As summer nears to an end, the tomato crops are being picked and given away to lucky people like us. But, what to do with gobs of tomatoes?
One idea was a simple paleo Tomato and Cucumber Salad. Â Truly it does not get any easier than this. Well, you could complicate it if you really wanted to but … why?
So, here’s the recipe ~
Ingredients
4 large ripe tomatoes, cut into bite sized pieces
1 large cucumber, sliced into small chunks
Black Olives, halved
Fresh Basil, chopped coarsely
Grapeola, a teaspoon or so
Salt, a pinch
Pepper, a pinch
Directions
In a small bowl, combine all the ingredients (except the Grapeola) then season with salt and pepper.
Once everything is combined, add the Grapeola a teaspoon at a time then stir until you get the right consistency.
That’s it! Â I like to use Grapeola Grape Seed Oil with fresh salads like this. Â Are you familiar with it?
Grapeola is a polyunsaturated oil that is rich in linoleic acid which is the main source for Omega-6. Â One can use about half as much as other cooking oils and get the same results.
Grapeola is kosher, rich in Vitamin E and is free of cholesterol. Â It also has a high smoke point and has a very light and mild flavor ~ that’s my favorite part.
My husband, bless his heart, wanted to give me a couple of kayaks for my birthday this year and when he asked me if that would be okay, I already knew the answer.
No thank you. It’s not that I don’t want to kayak although I’ve only tried it once in my life and enjoyed it, but …
I just didn’t feel that we would use them very often since we haven’t been on a kayak in the almost five years since we moved to Minnesota. We do have access to a lake but, thinking logically, I surmised that once we went out on the lake a couple of times we probably wouldn’t head out to discover what we had already discovered. hehe
So, I asked for something I knew I would thoroughly enjoy: getting rid of 26 trees. I know that seems like quite a few but in actuality, it wasn’t very many.
This summer, I’ve felt like I’ve been living under a dome of trees. Darkness encompassed me (literally) and made my normally cheery self feel blah.
The small maple and oak trees that were babies when we moved here 4 years ago grew to over 12 feet or more. I felled a few of the smaller ones using loppers but injured my elbow and shoulder by pressing too hard to get the trees down. Then my brother came over and tried to fell some with his gas saw but it broke and my husband’s electric saw wasn’t strong enough.
To the rescue came our nephew, an Eagle Scout, who felled about 15 of the smaller trees and cleared a lot of brush for us. My husband then took down about five more “smaller” ones.
Still, it was too dark. So my husband agreed to my suggestion of felling 26 trees from large to medium to small (in addition to the ones he and the nephew already took down).
Here’s a picture of the contractor using his equipment to cut large branches off before cutting the trunk.
Contractor Felling A Tree
Here’s a view from afar. Â He was pretty high up.
Contractor Felling A Tree
These trunks represent a small portion of what they felled.
Felled Tree Trunks
We only felled one large dead tree in this area. Â Unfortunately the one that is leaning towards our house is not on our property so we didn’t have it felled. Â (It’s quite expensive to fell trees …)
View of Trees
Now we can see partial sky in the back of our house. Â Unfortunately it faces north so we don’t get sun but plenty of light streams into the family room.
View from Back Deck
Here’s another view from the back deck looking north. Â I can see sky!!!!
View from Back Deck
It’s amazing how much difference a little light can make in a person’s disposition. Â I was so happy I could call myself giddy.
There are about 5 more trees that need to come down. Â Next year. Â Next year.
Kung Pao chicken is one of my favorite dishes. Have you ever tried it?
Normally found on Chinese restaurant menus, I was surprised when I found it on the menu of a local Thai restaurant.
But, I digress.
This recipe is so easy to make it will take you no time at all. I found the original recipe in the book Cooking Light but I adapted it to paleo-ize it.
Here it is for you to try ~
Ingredients
2 tablespoons dark sesame oil
1 cup chopped onion
2 garlic cloves, minced
1 pound skinless, boneless chicken thighs, cut into 1-inch pieces
3/4 cup water
3 tablespoons amino acids
2 teaspoons tapioca powder
1 teaspoon pure maple syrup
1/2 teaspoon minced ginger
1 teaspoon crushed red pepper
1 cup thinly sliced red bell pepper
Fresh basil leaves
2 tablespoons chopped, unsalted, cashews
Directions
In a large skillet over low to medium heat, add the sesame oil and allow it to heat through.
Add the onion and stir until softened.
Add the garlic and blend with the onion, stirring, for approximately 1 minute.
Add the chicken and mix with the garlic and onion until it’s browned.
In a bowl, combine the water, amino acids, tapioca powder, pure maple syrup, minced ginger and the crushed red pepper and stir it together with a whisk.
Add the water mixture to the skillet and bring this to a boil.
Add the bell pepper and cook for approximately 2 minutes.
Allow the sauce to thicken then add 1 tablespoon of the cashews to the mixture.
Remove from the stove top then add the fresh basil on top along with the rest of the cashews.
I served this Paleo Kung Pao Chicken with a baked sweet potato and a slice or orange which helps cleanse the palette.
After living in Minnesota almost 5 years and on an almost all forested property, we were able to plant and grow tomatoes. Â Three cheers for us!
You need to understand that the majority of our property is shaded ~ we have a little bit of sun in our front yard and a little bit of sun in the back yard. Between fighting for sun and deer eating everything in sight, having two tomato plants that actually have tomatoes on them is, well, almost miraculous.
There is just something about biting into a home-grown tomato that has flavor that brings my person a little closer to heaven. Â No?
Next year, I’m hoping to grow tomatoes and cucumbers if I’m able to make a raised bed with some wire mesh around it.
It reminds me of a poem I once read called “It Couldn’t Be Done” by Edgar Albert Guest.
It Couldn’t Be Done
Somebody said that it couldn’t be done But he with a chuckle replied That “maybe it couldn’t,” but he would be one Who wouldn’t say so til he’d tried. So he buckled right in with the trace of a grin On his face. If he worried he hid it. He started to sing as he tackled the thing That couldn’t be done, and he did it!
Somebody scoffed: “Oh, you’ll never do that At least no one ever has done it” But he took off his coat and he took off his hat And the first thing we knew he’d begun it. Without any doubting or quiddit, He started to sing as he tackled the thing That couldn’t be done, and he did it.
There are thousands to tell you it cannot be done, There are thousands to prophesy failure, There are thousands to point out to you one by one The dangers that wait to assail you. But just buckle in with a bit of a grin, Just take off your coat and go to it Just start to sing as you tackle the thing That “cannot be done,” and you’ll do it.
So ~ I encourage you to keep trying until you get it just right. Â Indeed, home grown tomatoes will grow in a shaded property if you find “just the right spot.”
We had a few chilly days (like my play on words?) in Minnesota recently and I thought chili would be good to prepare as a precursor to autumn being right around the corner.
Never too soon to get ready as autumn is my favorite time of year.
This Paleo Beef Chili with Fresh Tomatoes has enough flavor to make you come to your senses yet not too many that you’ll lose your mind. (For those who don’t know yet, I don’t like my food too spicy so add more spice if you feel you need to.)
Here’s the simple recipe for you to try …
Ingredients
2 teaspoons olive oil
1 pound ground beef
1 teaspoon oregano
2 teaspoons chili powder
1 1/2 teaspoon ground cumin
1 teaspoon chipotle powder
2 garlic cloves, minced
Dash of cayenne pepper
10 cherry tomatoes or 4 medium tomatoes, cut into small pieces
1 onion, chopped
1 red pepper, chopped
1 yellow pepper, chopped
Dash of Worcestershire sauce
Salt, to taste
Pepper, to taste
Directions
In a large skillet, melt the olive oil then add the onion and cook until it’s clear.
Add the peppers to the onion and cook until they are soft.
Next add the garlic and stir until everything is well combined.
Add the beef and cook until it’s thoroughly brown.
Add the spices, salt, pepper and make sure everything is well combined.
Allow this mixture to cook through for about 10 minutes then add the tomatoes and cook another 5 minutes.
Next, enjoy!
Paleo Beef Chili with Fresh Tomatoes
You can serve this atop a bed of lettuce, wrap it in lettuce leaves or enjoy it by itself.
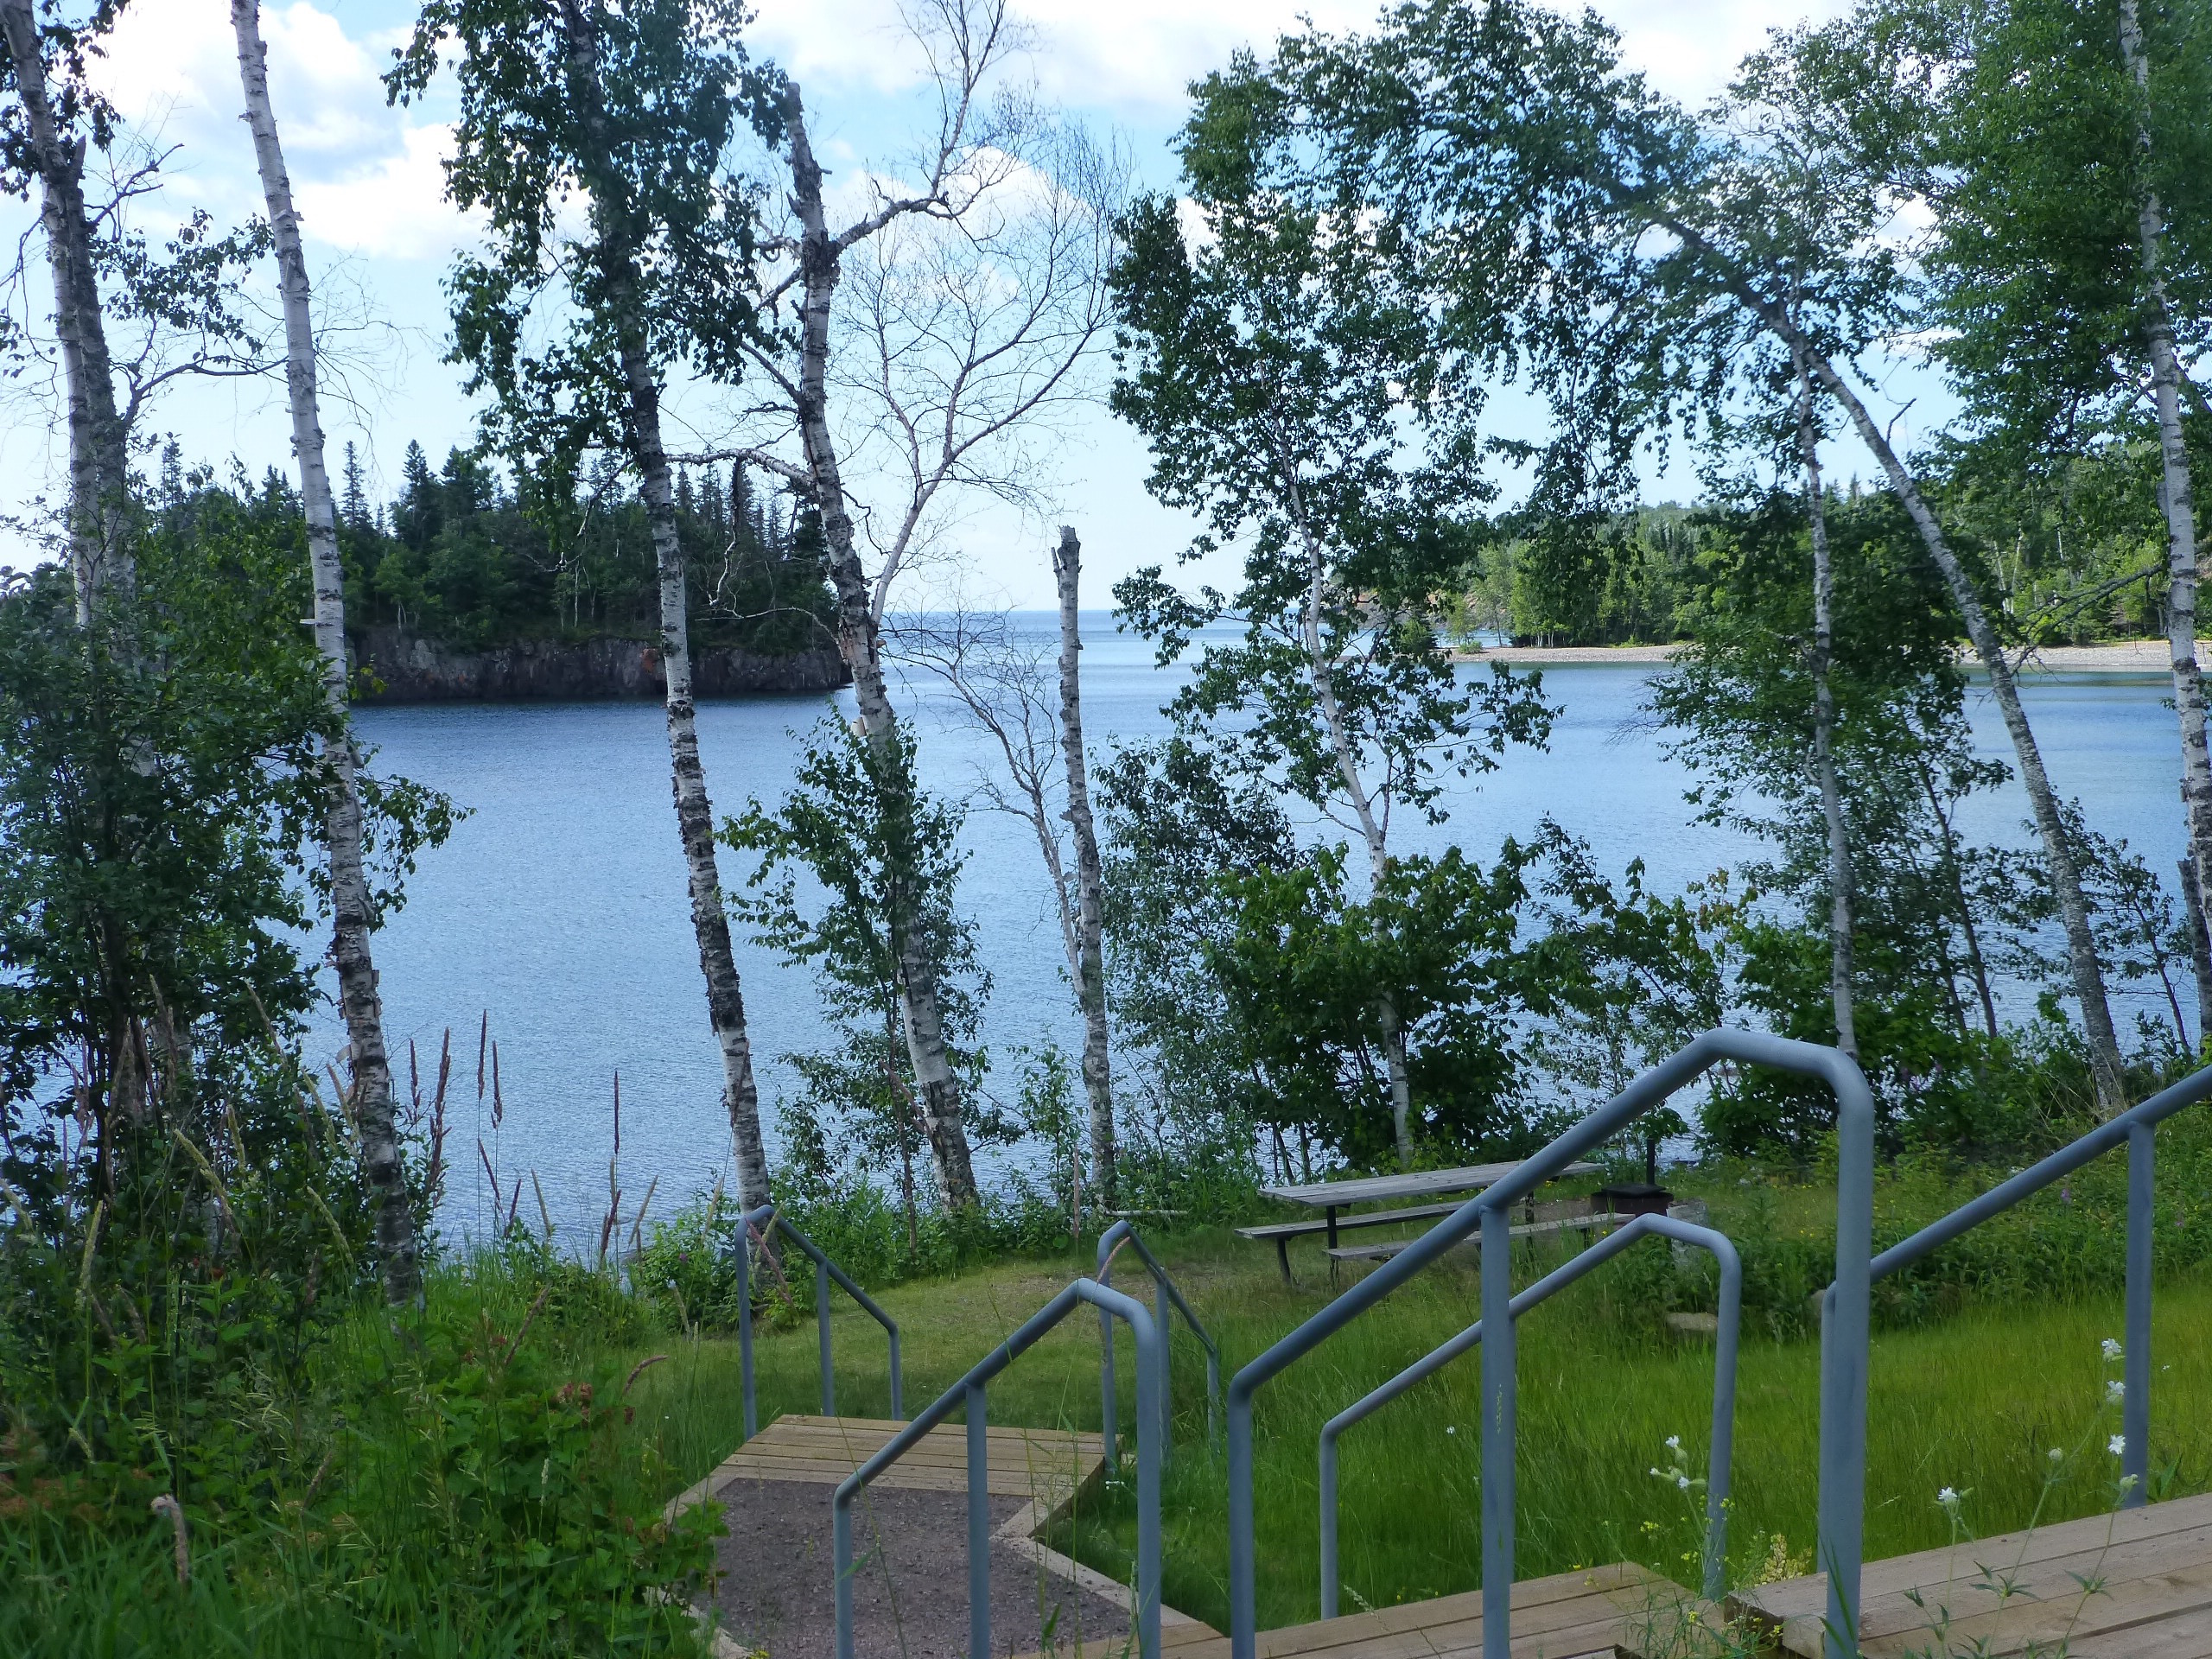
This summer we ventured back to the North Shore of Minnesota. Â This is a beautiful area to relax and let the mind meander. Although, I have to say, too much meandering makes me overly sensitive. (More on that in another post.)
So, take your shoes off, relax, pretend you’re on vacation for a few minutes and enjoy the photos below.
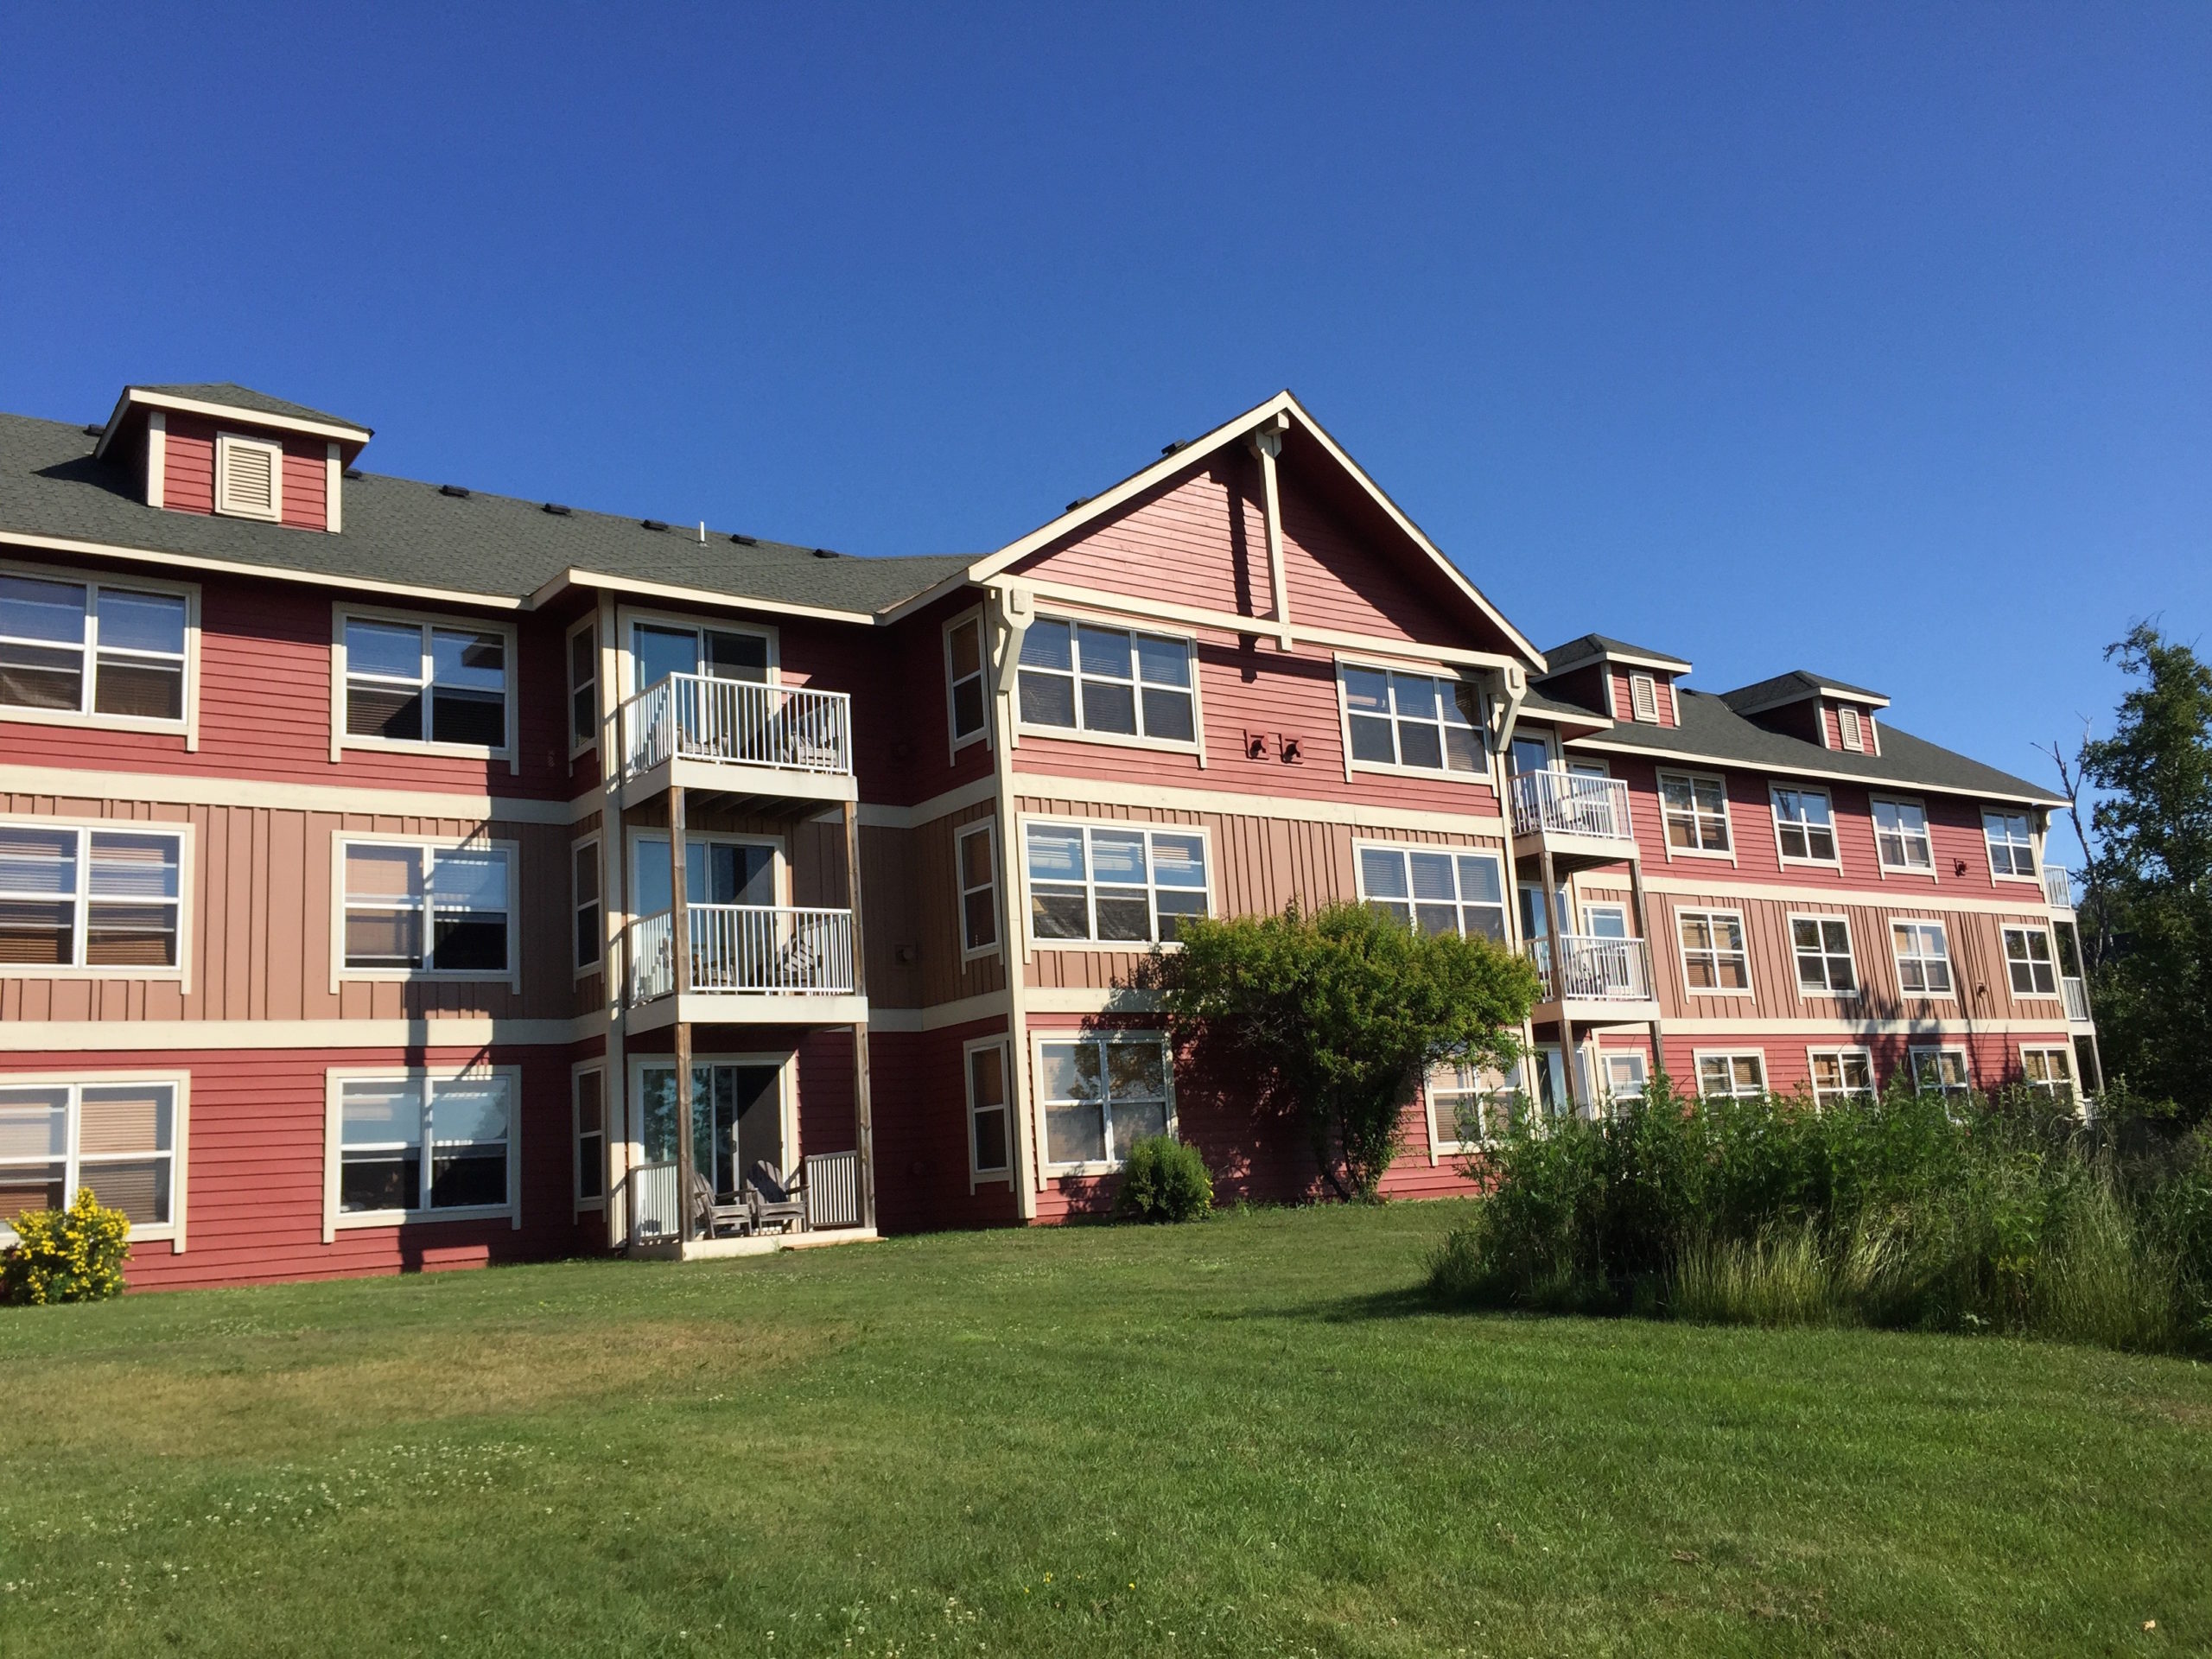
This is Cove Point Lodge which is on the shore of Lake Superior. Â Our room was on the first floor and had a deck. Â (If I wouldn’t have been taking the picture I would have waved for you.)
Cove Point Lodge, Beaver Bay, Minnesota
The view from our room was stupendous! Breathe in, breathe out. Fresh air and sunshine. Enough to give the capillaries something to talk about. Â (hehe)
Imagine waking up to this every morning.
Lake Superior, Sunrise
There was more than a gentle wind today. It reminded me of how life’s circumstances push us this way and that and we’re always forced to bend but always seem to straighten ourselves back up. Â Although sometimes we don’t straighten all the way back up.
Lake Superior Beaver Bay, MN
Right here ~ I’d like to have a cabin right here with this view. No?
Lake Superior Beaver Bay, MN
These rocks seem to have been positioned for this picture. Â Now, how did that happen? Â The ebb and flow of the water has put them there without asking for their opinion. They didn’t fight they just “went along.” Â If rocks could be “at peace” then these rocks would be the epitome of that.
Lake Superior Beaver Bay, MN
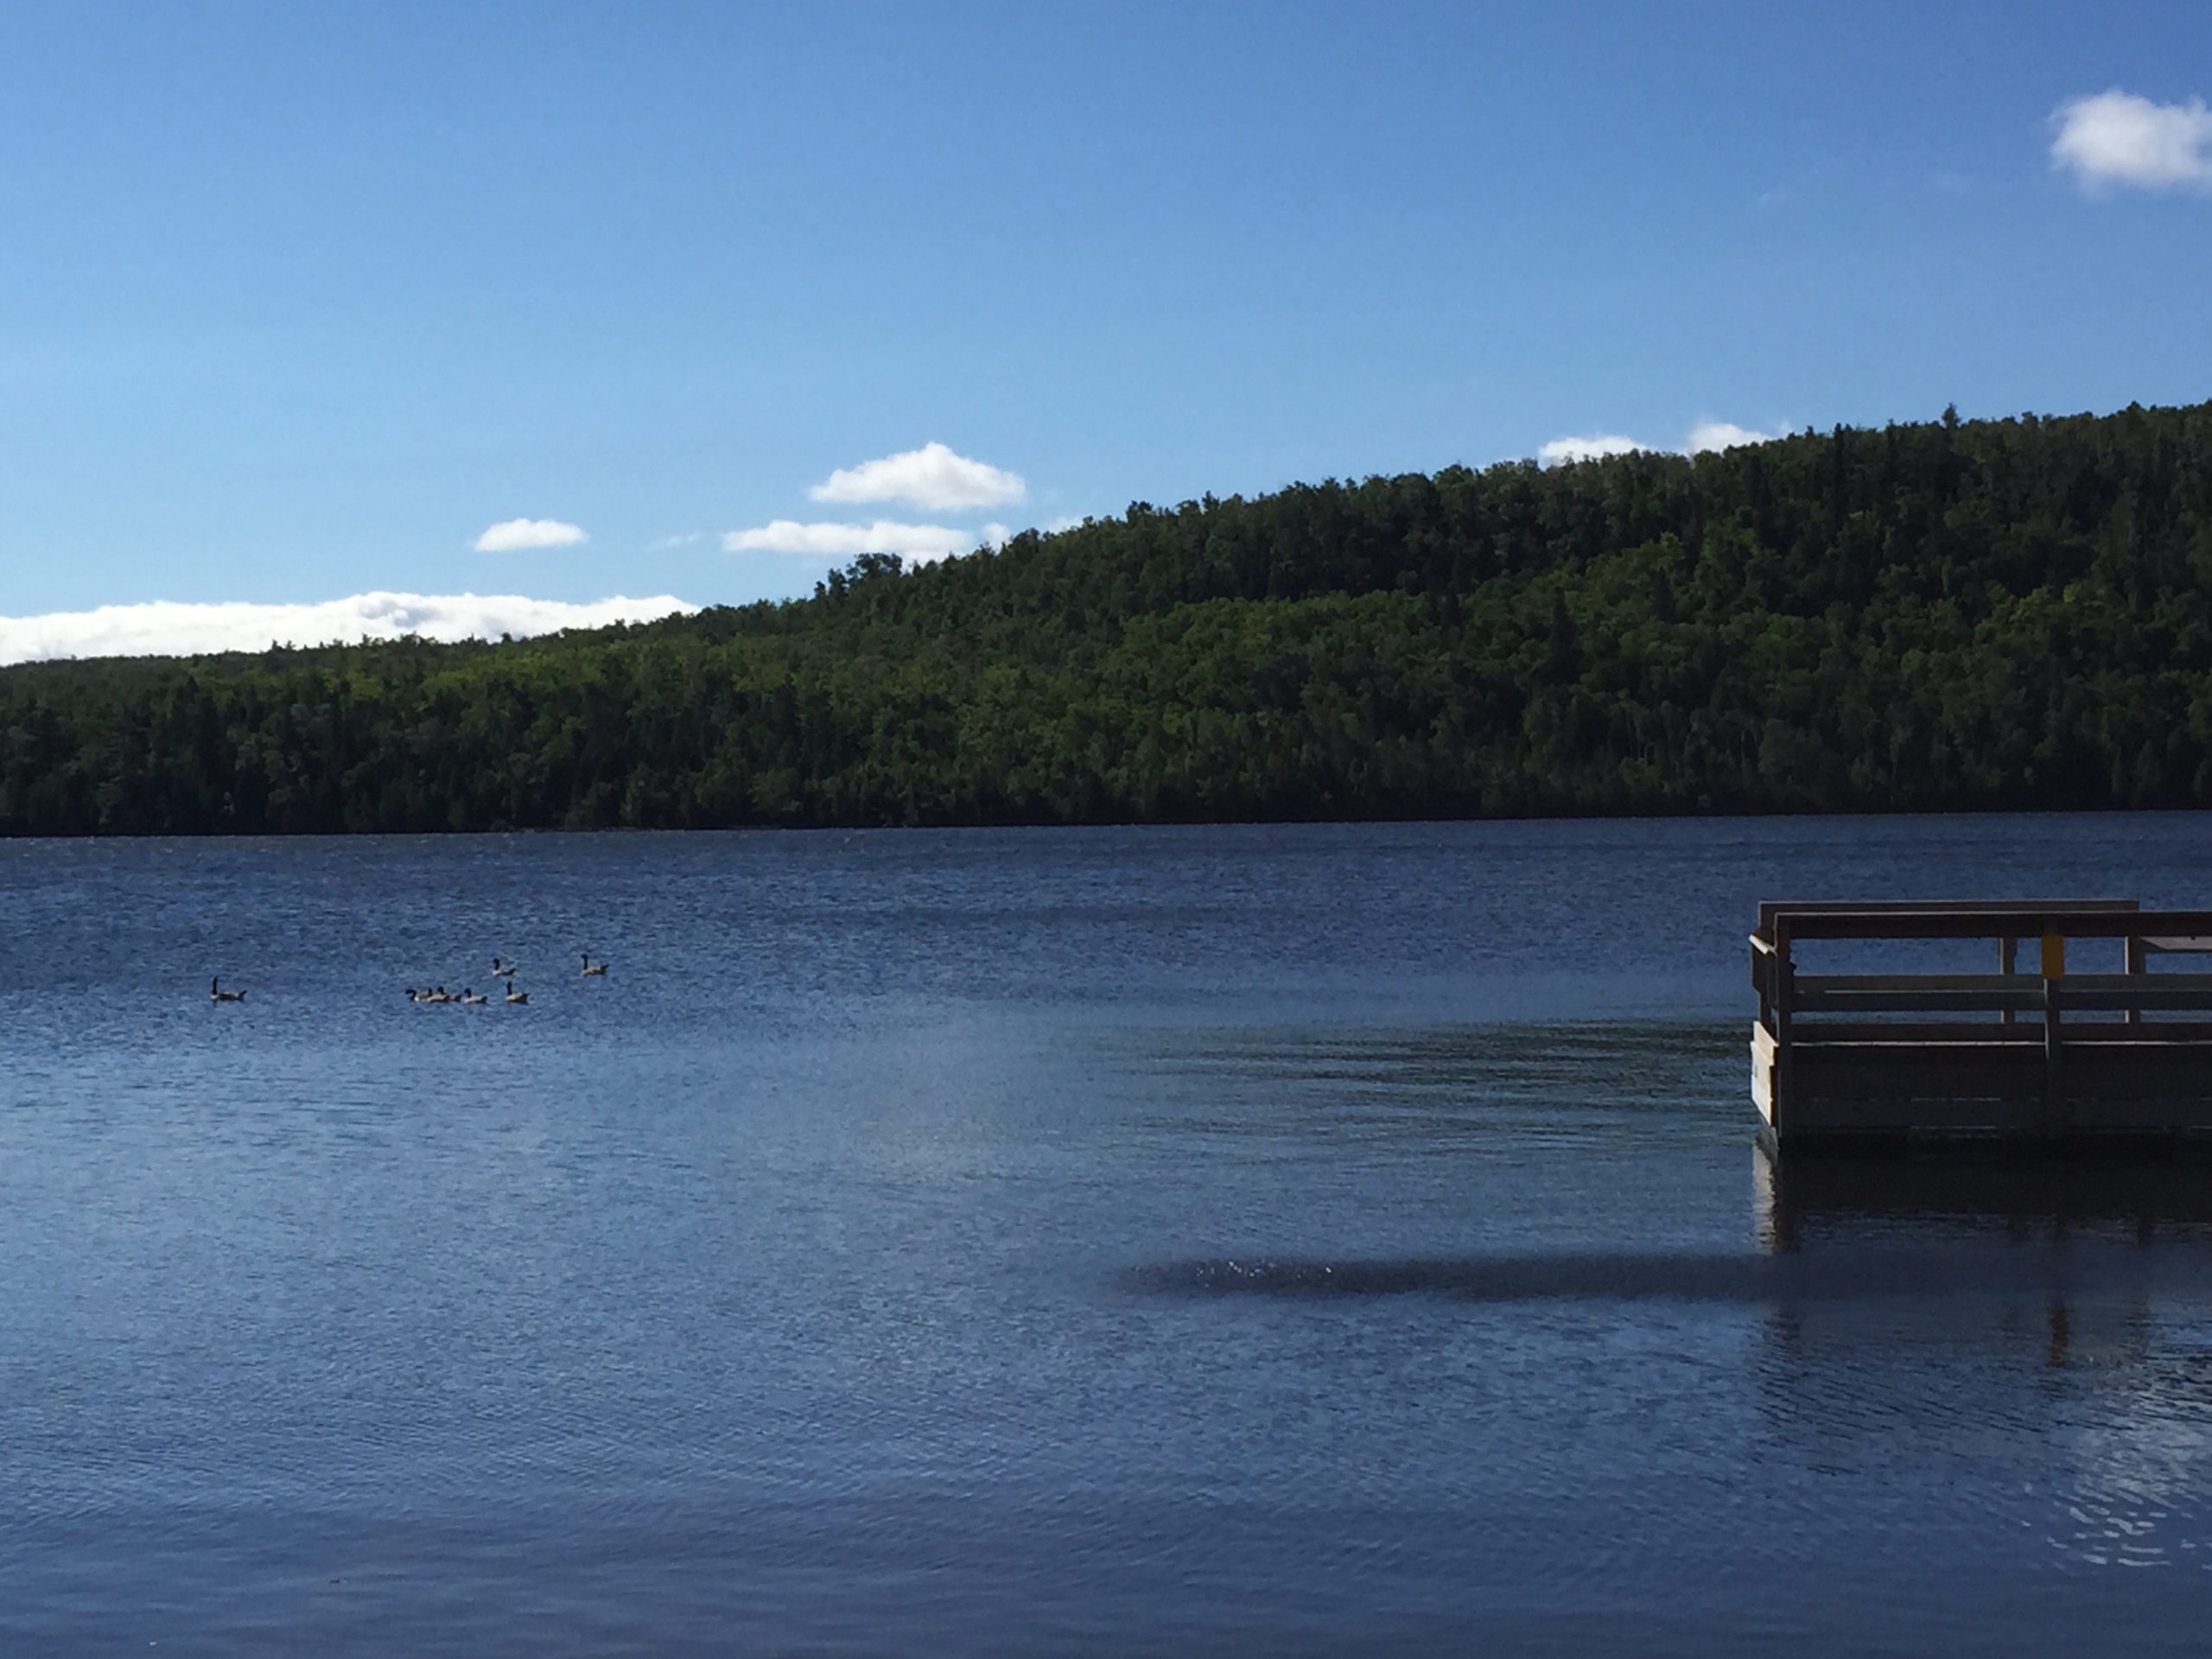
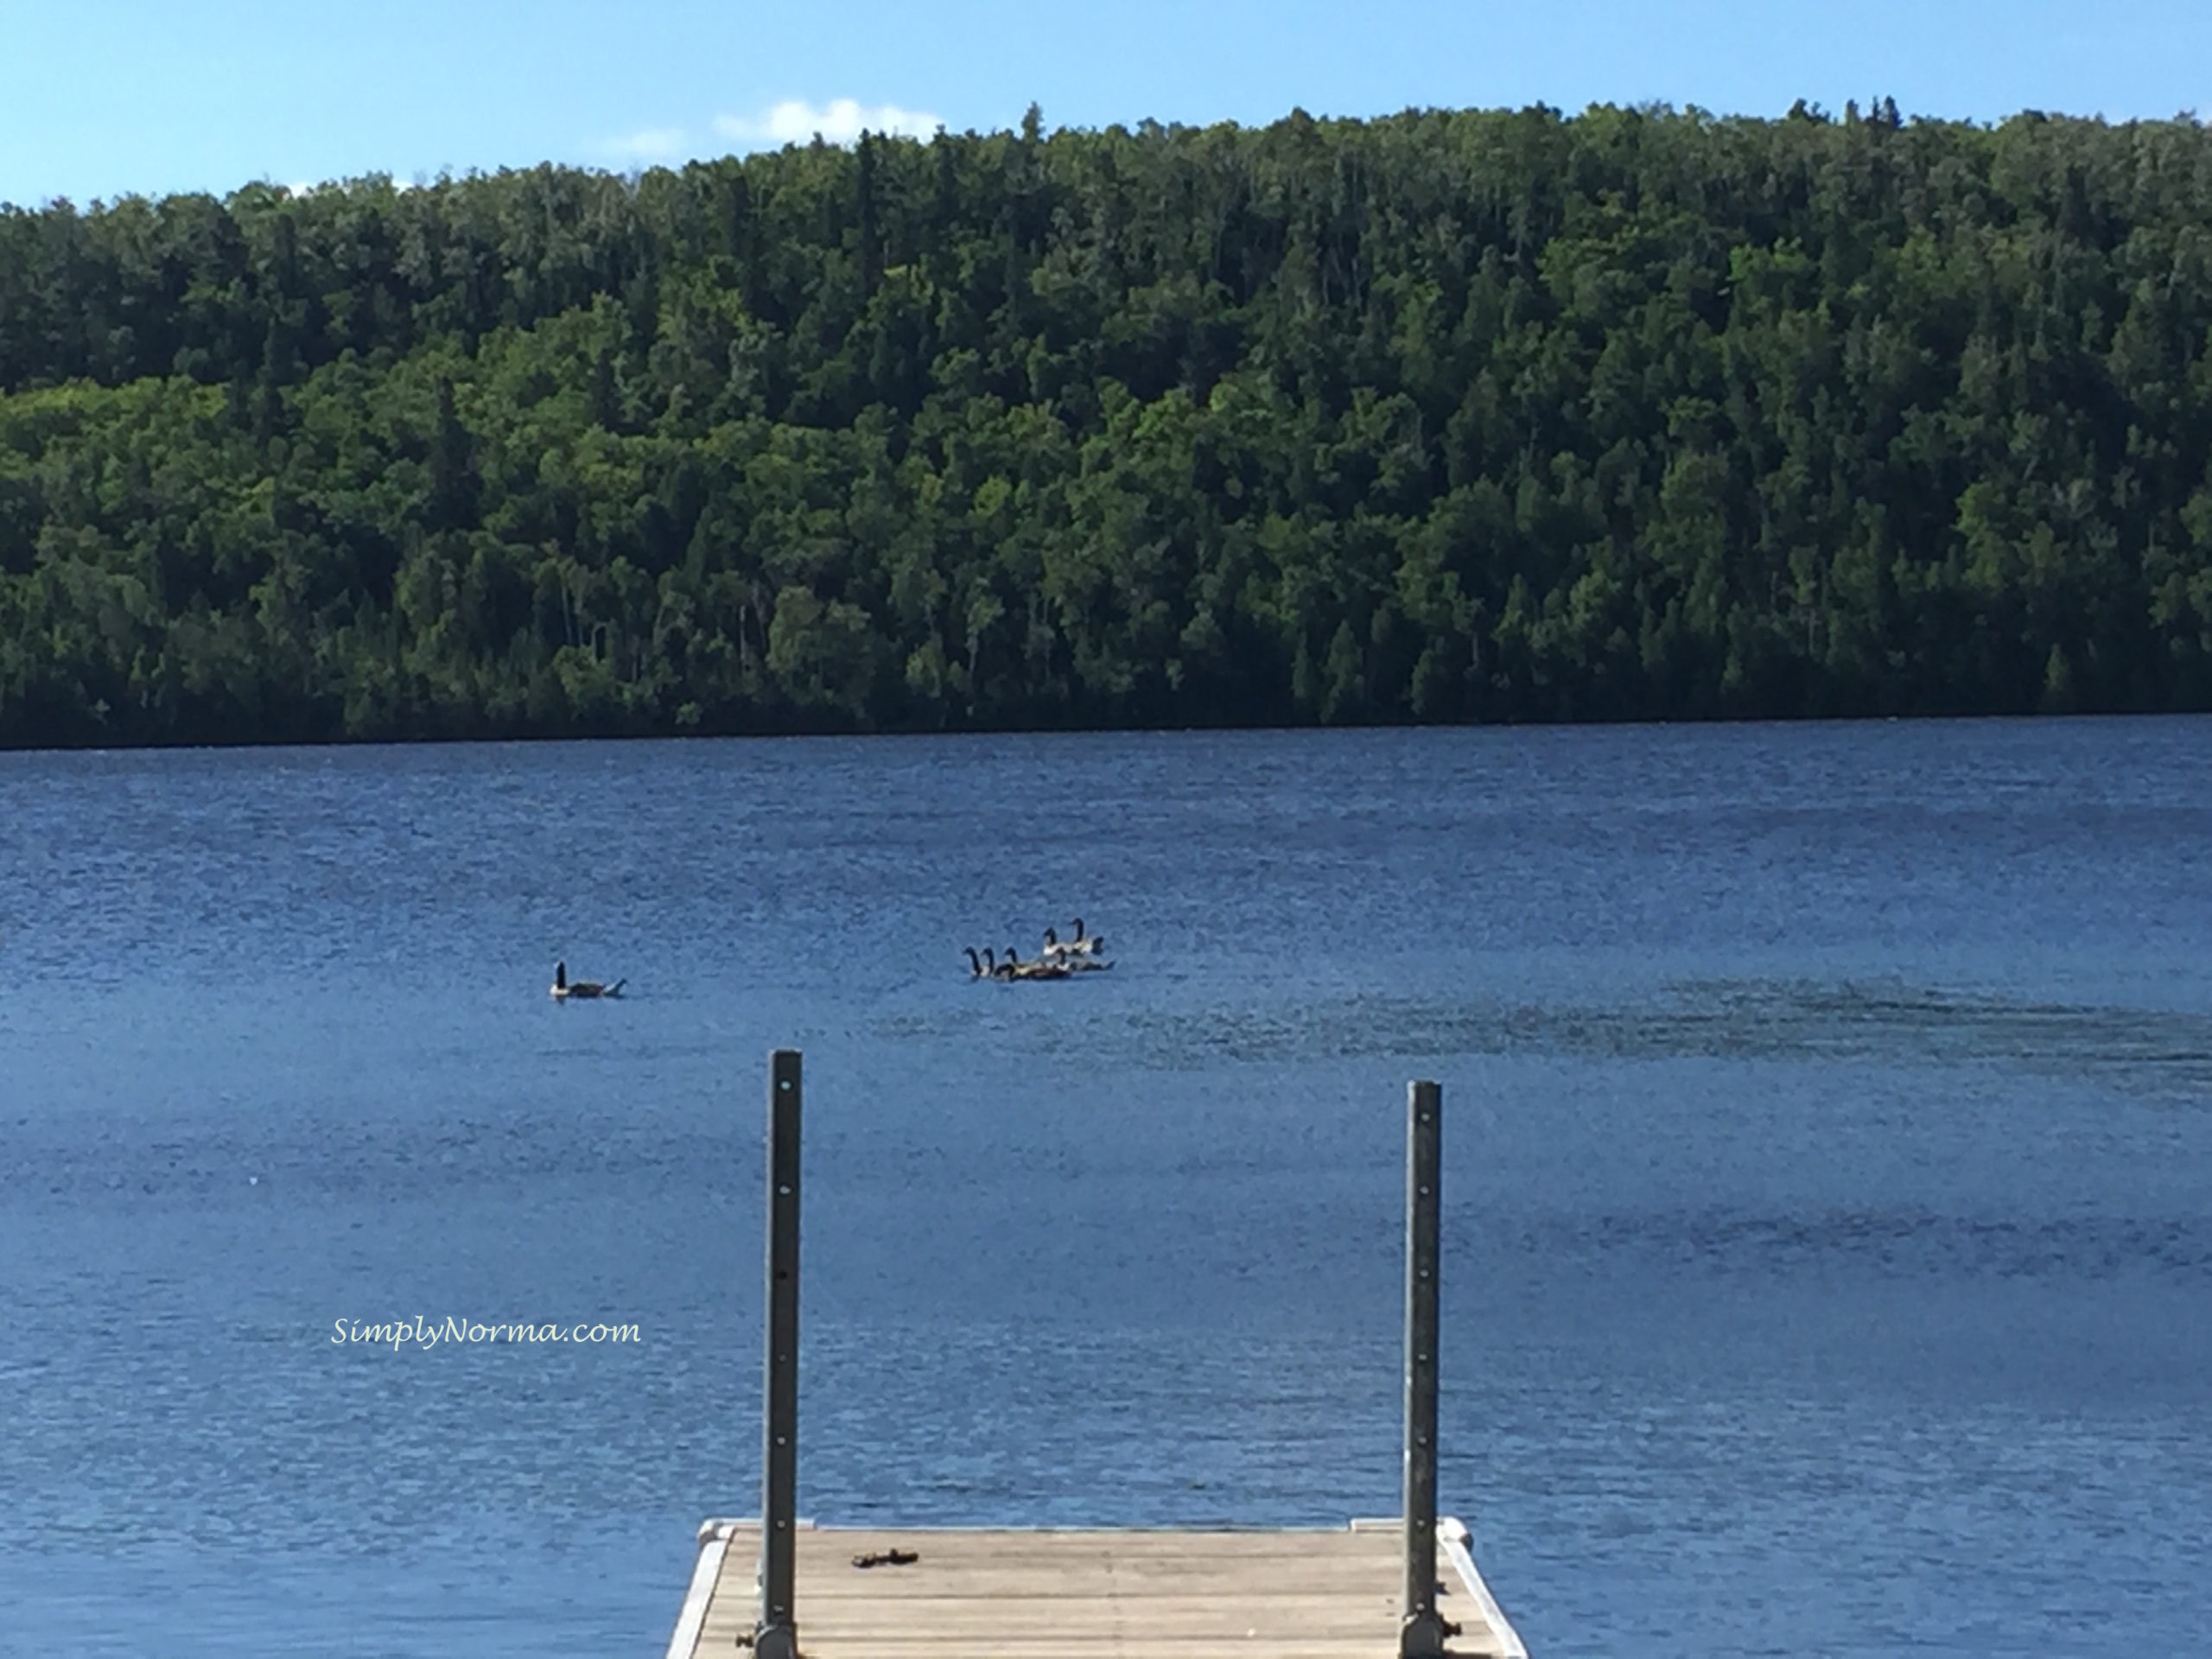
A drive around the area brought us to Lax Lake. Â Where oh where are all the people and why aren’t they out on a boat, canoe or kayak on such a beautiful day?
Lax Lake, MinnesotaLax Lake, MinnesotaLax Lake, MN
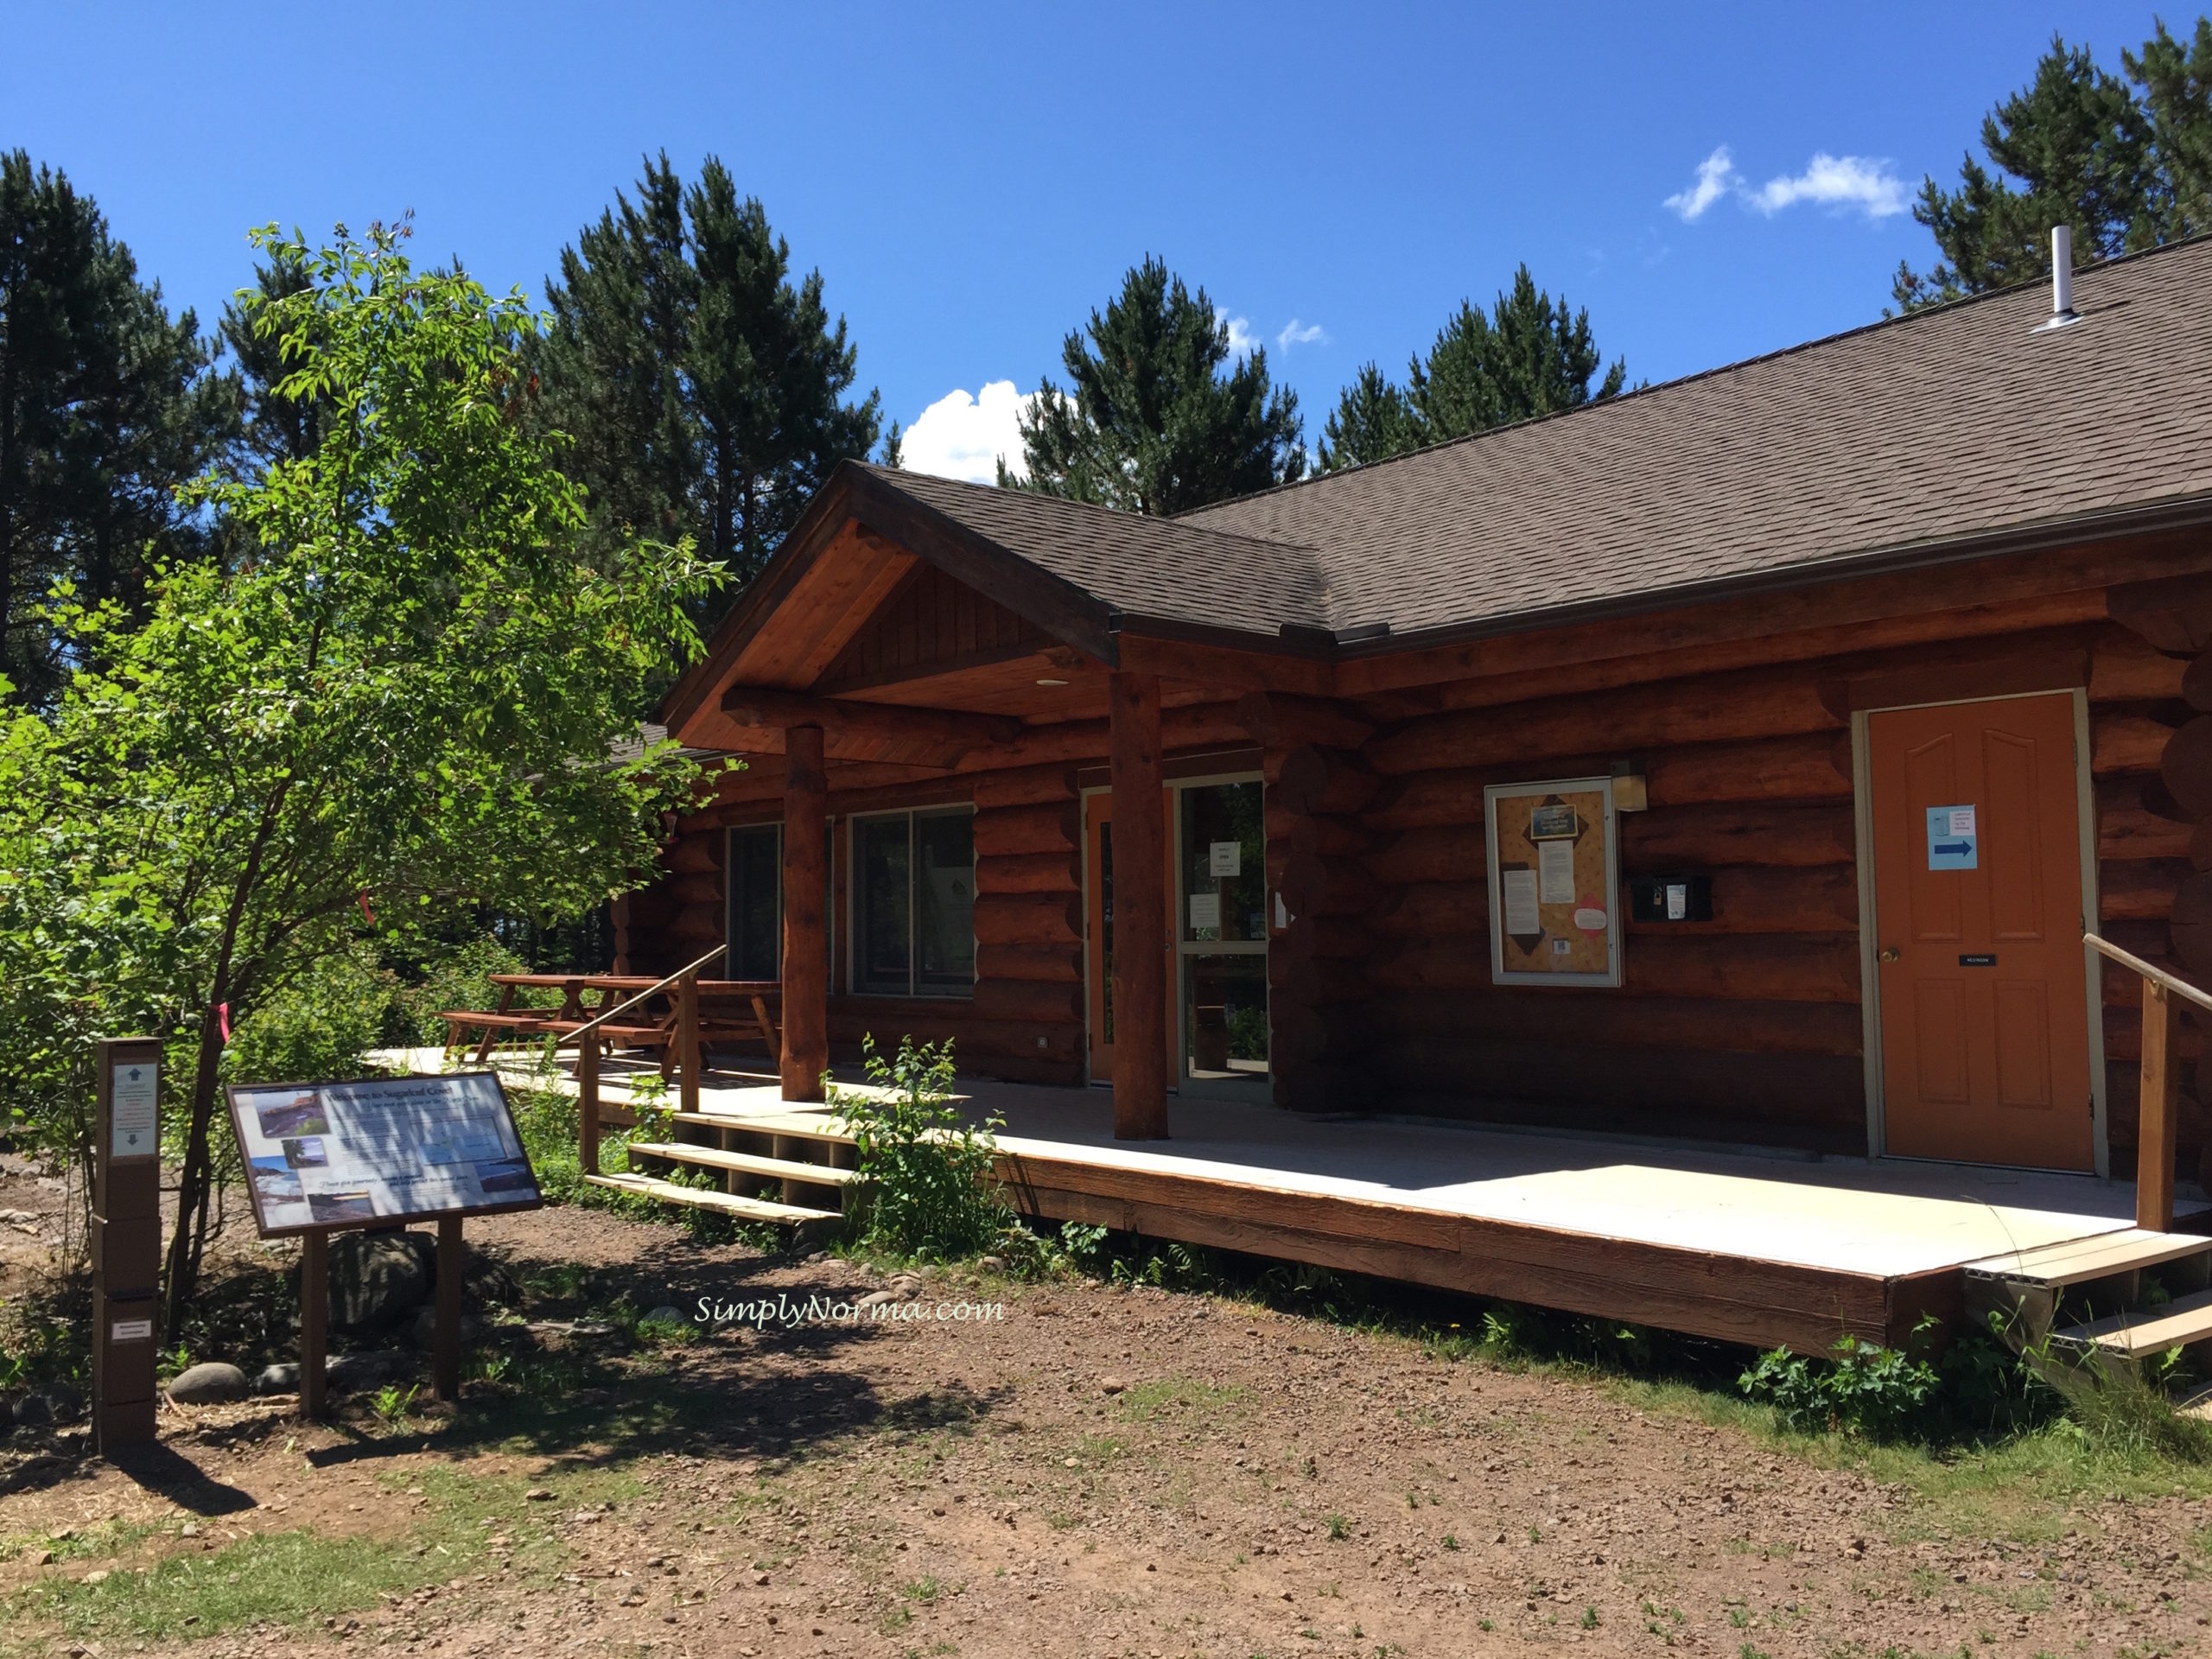
Further into our drive we stopped at a place called Sugarloaf Cove. Â Sugarloaf is working to restore and preserve the North Shore of Lake Superior. A very cool place to visit. Â The staff is very well informed of the area and of what it will take to preserve it.
Sugarloaf Cove, MN
Hmmm … Beach or Trail? How about both?!!
Sugarloaf Cove, MN
The puffy clouds mingle with the blue sky and hang over the deep blue water causing the mind to find rest.
Lake Superior from Sugarloaf Cove, MN
We took a different trail back to the visitor center which led us through majestic trees.
Sugarloaf Cove, MNSugarloaf Cove, MN
On our way home we stopped at the Split Rock Lighthouse which is in Two Harbors, MN. Â We were a little disappointed that the fee they charge to get into the park doesn’t include the tour to the lighthouse. Our choices were to pay for the tour or find a trail that leads to the lighthouse that is a tad bit longer. Â We chose the latter.
Lake Superior near Split Rock Lighthouse, MN
The walk to get a picture of the lighthouse wasn’t too bad …
Split Rock Lighthouse, MN
Just a little closer …
Split Rock Lighthouse, MN
Unfortunately we didn’t get much closer than that as this was the way “up” and we didn’t want to spend more time here …
Split Rock Lighthouse, MN
Well, would YOU have gone?
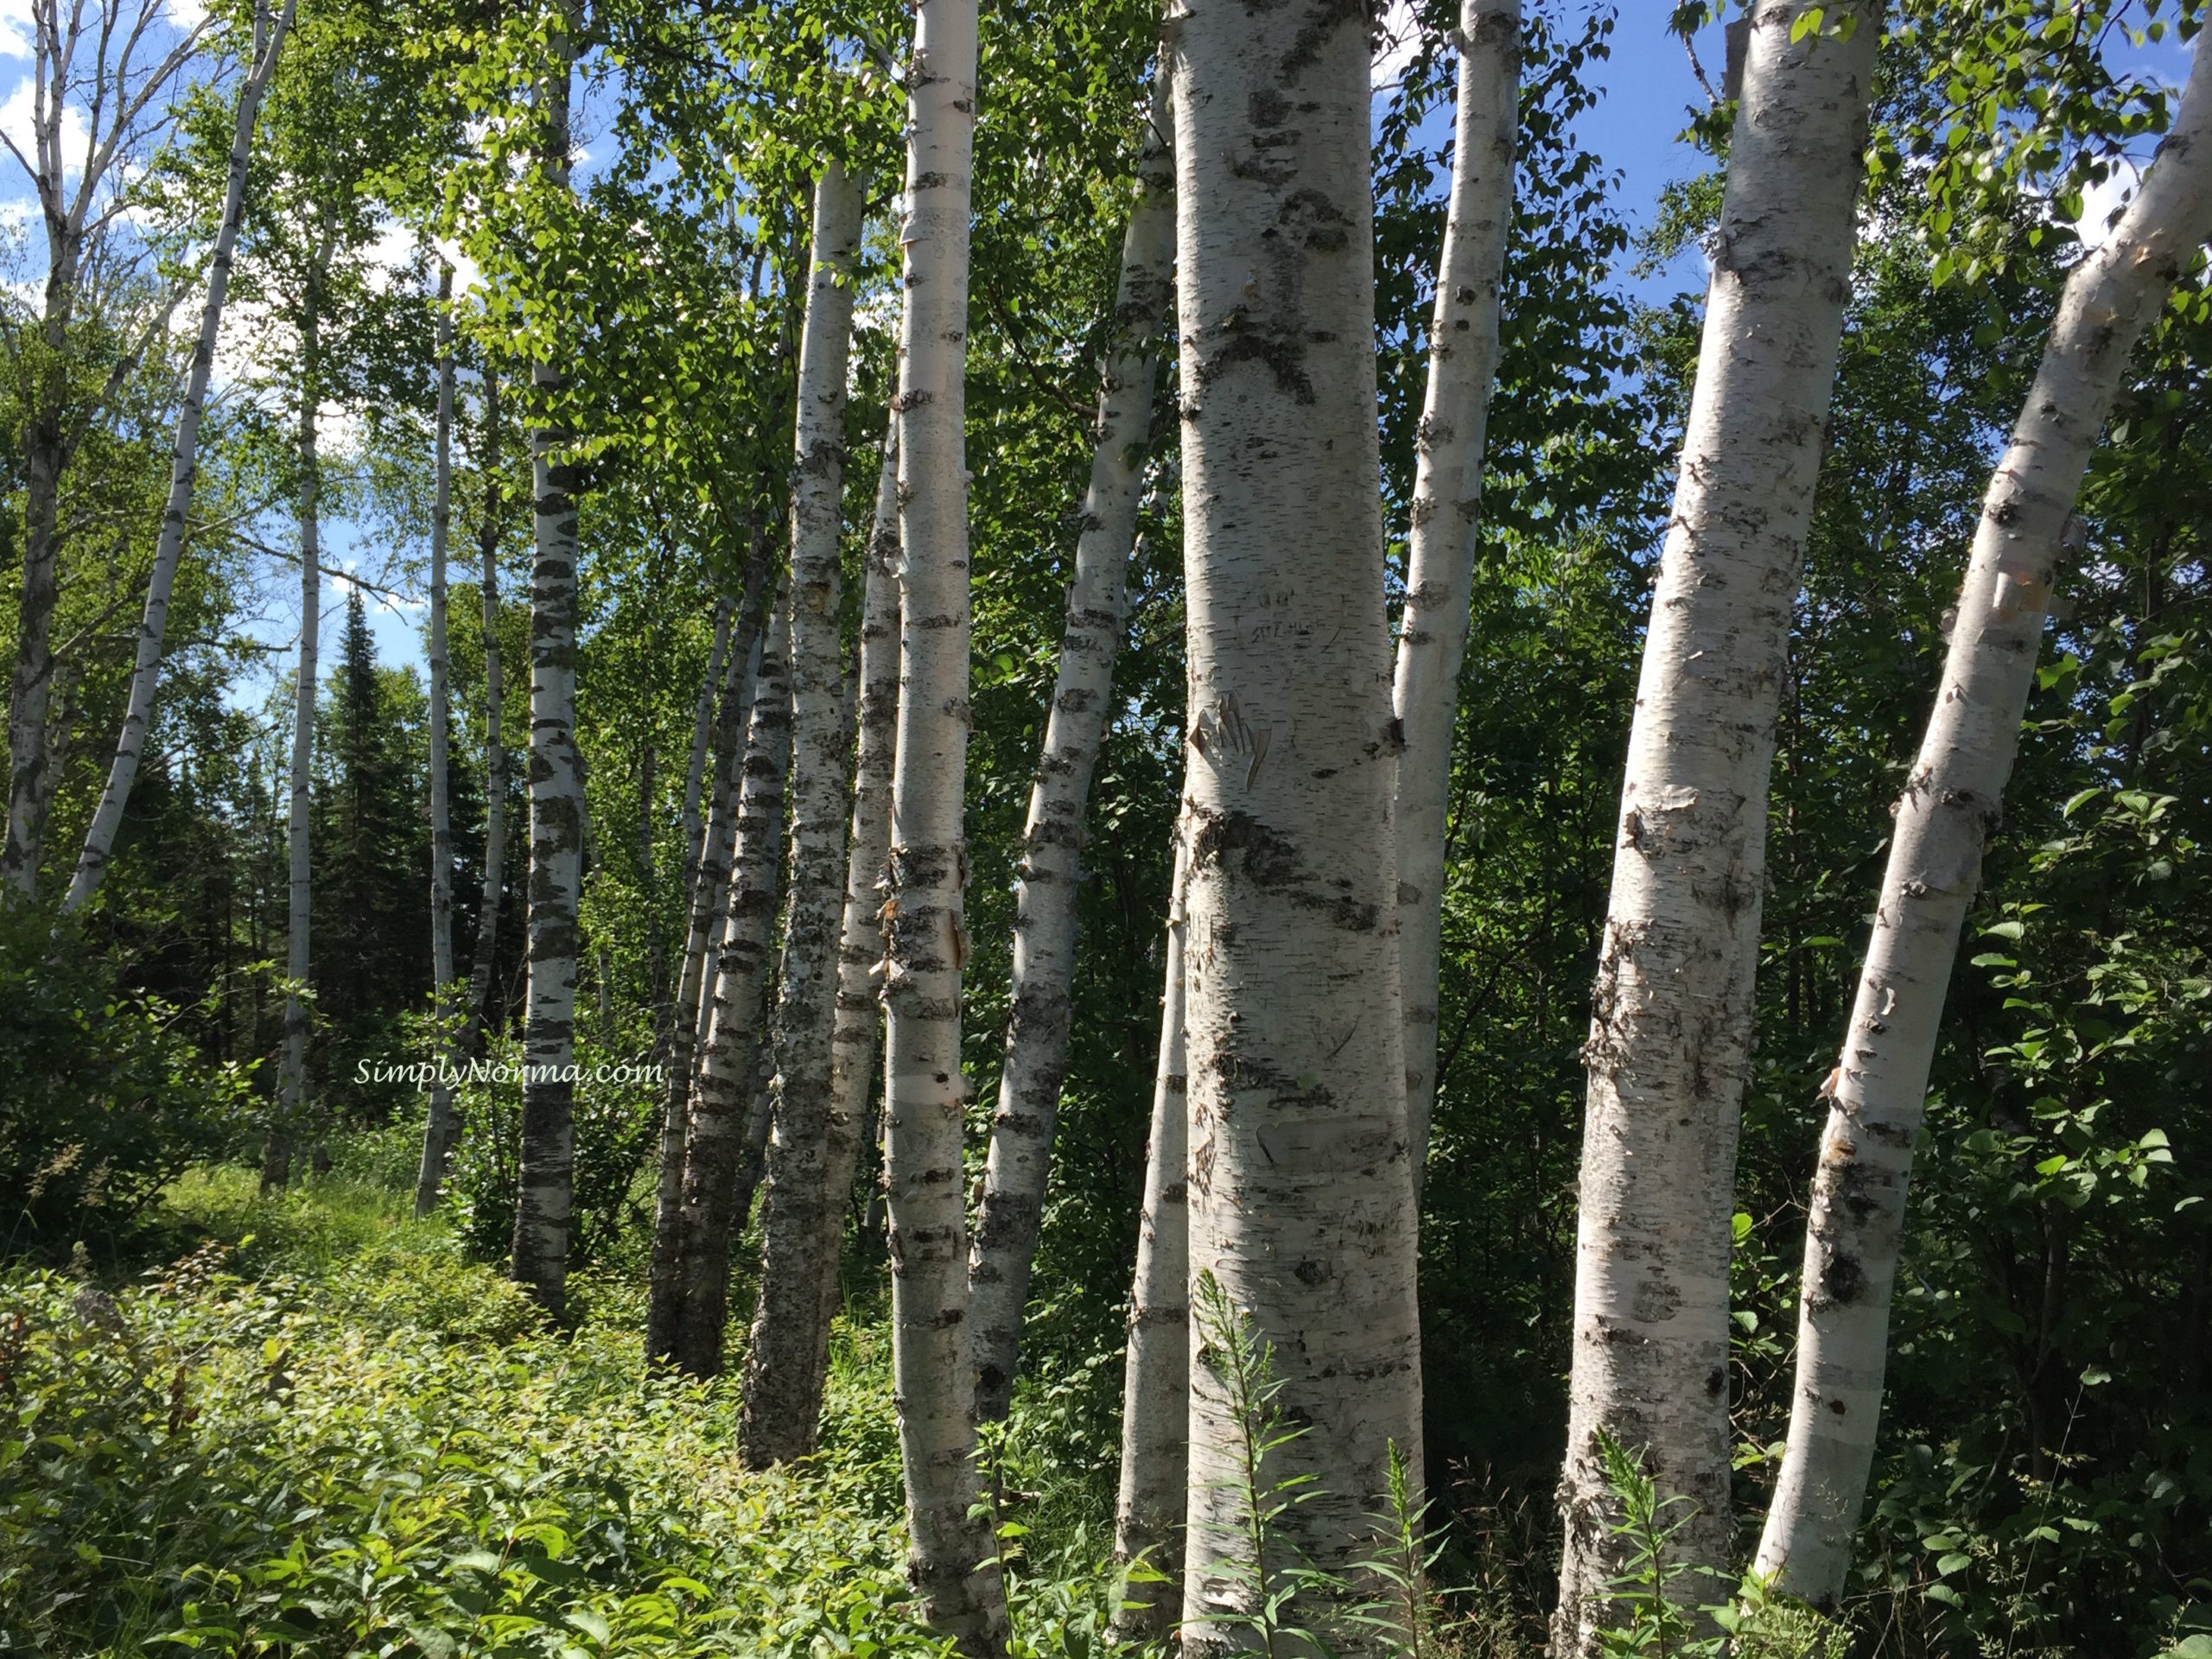
My enjoyment of trees, especially birch, was not denied on this trip. Something about these trees clumped in a group gives me a sense of awe.
Birch Trees, MN
Here the birch trees reach high into the blue sky as if reaching for heaven.
Birch Trees, MN
The three days we were gone seemed like a week to me. Taking in so much beauty in a short amount of time really does revive and elevate the senses.
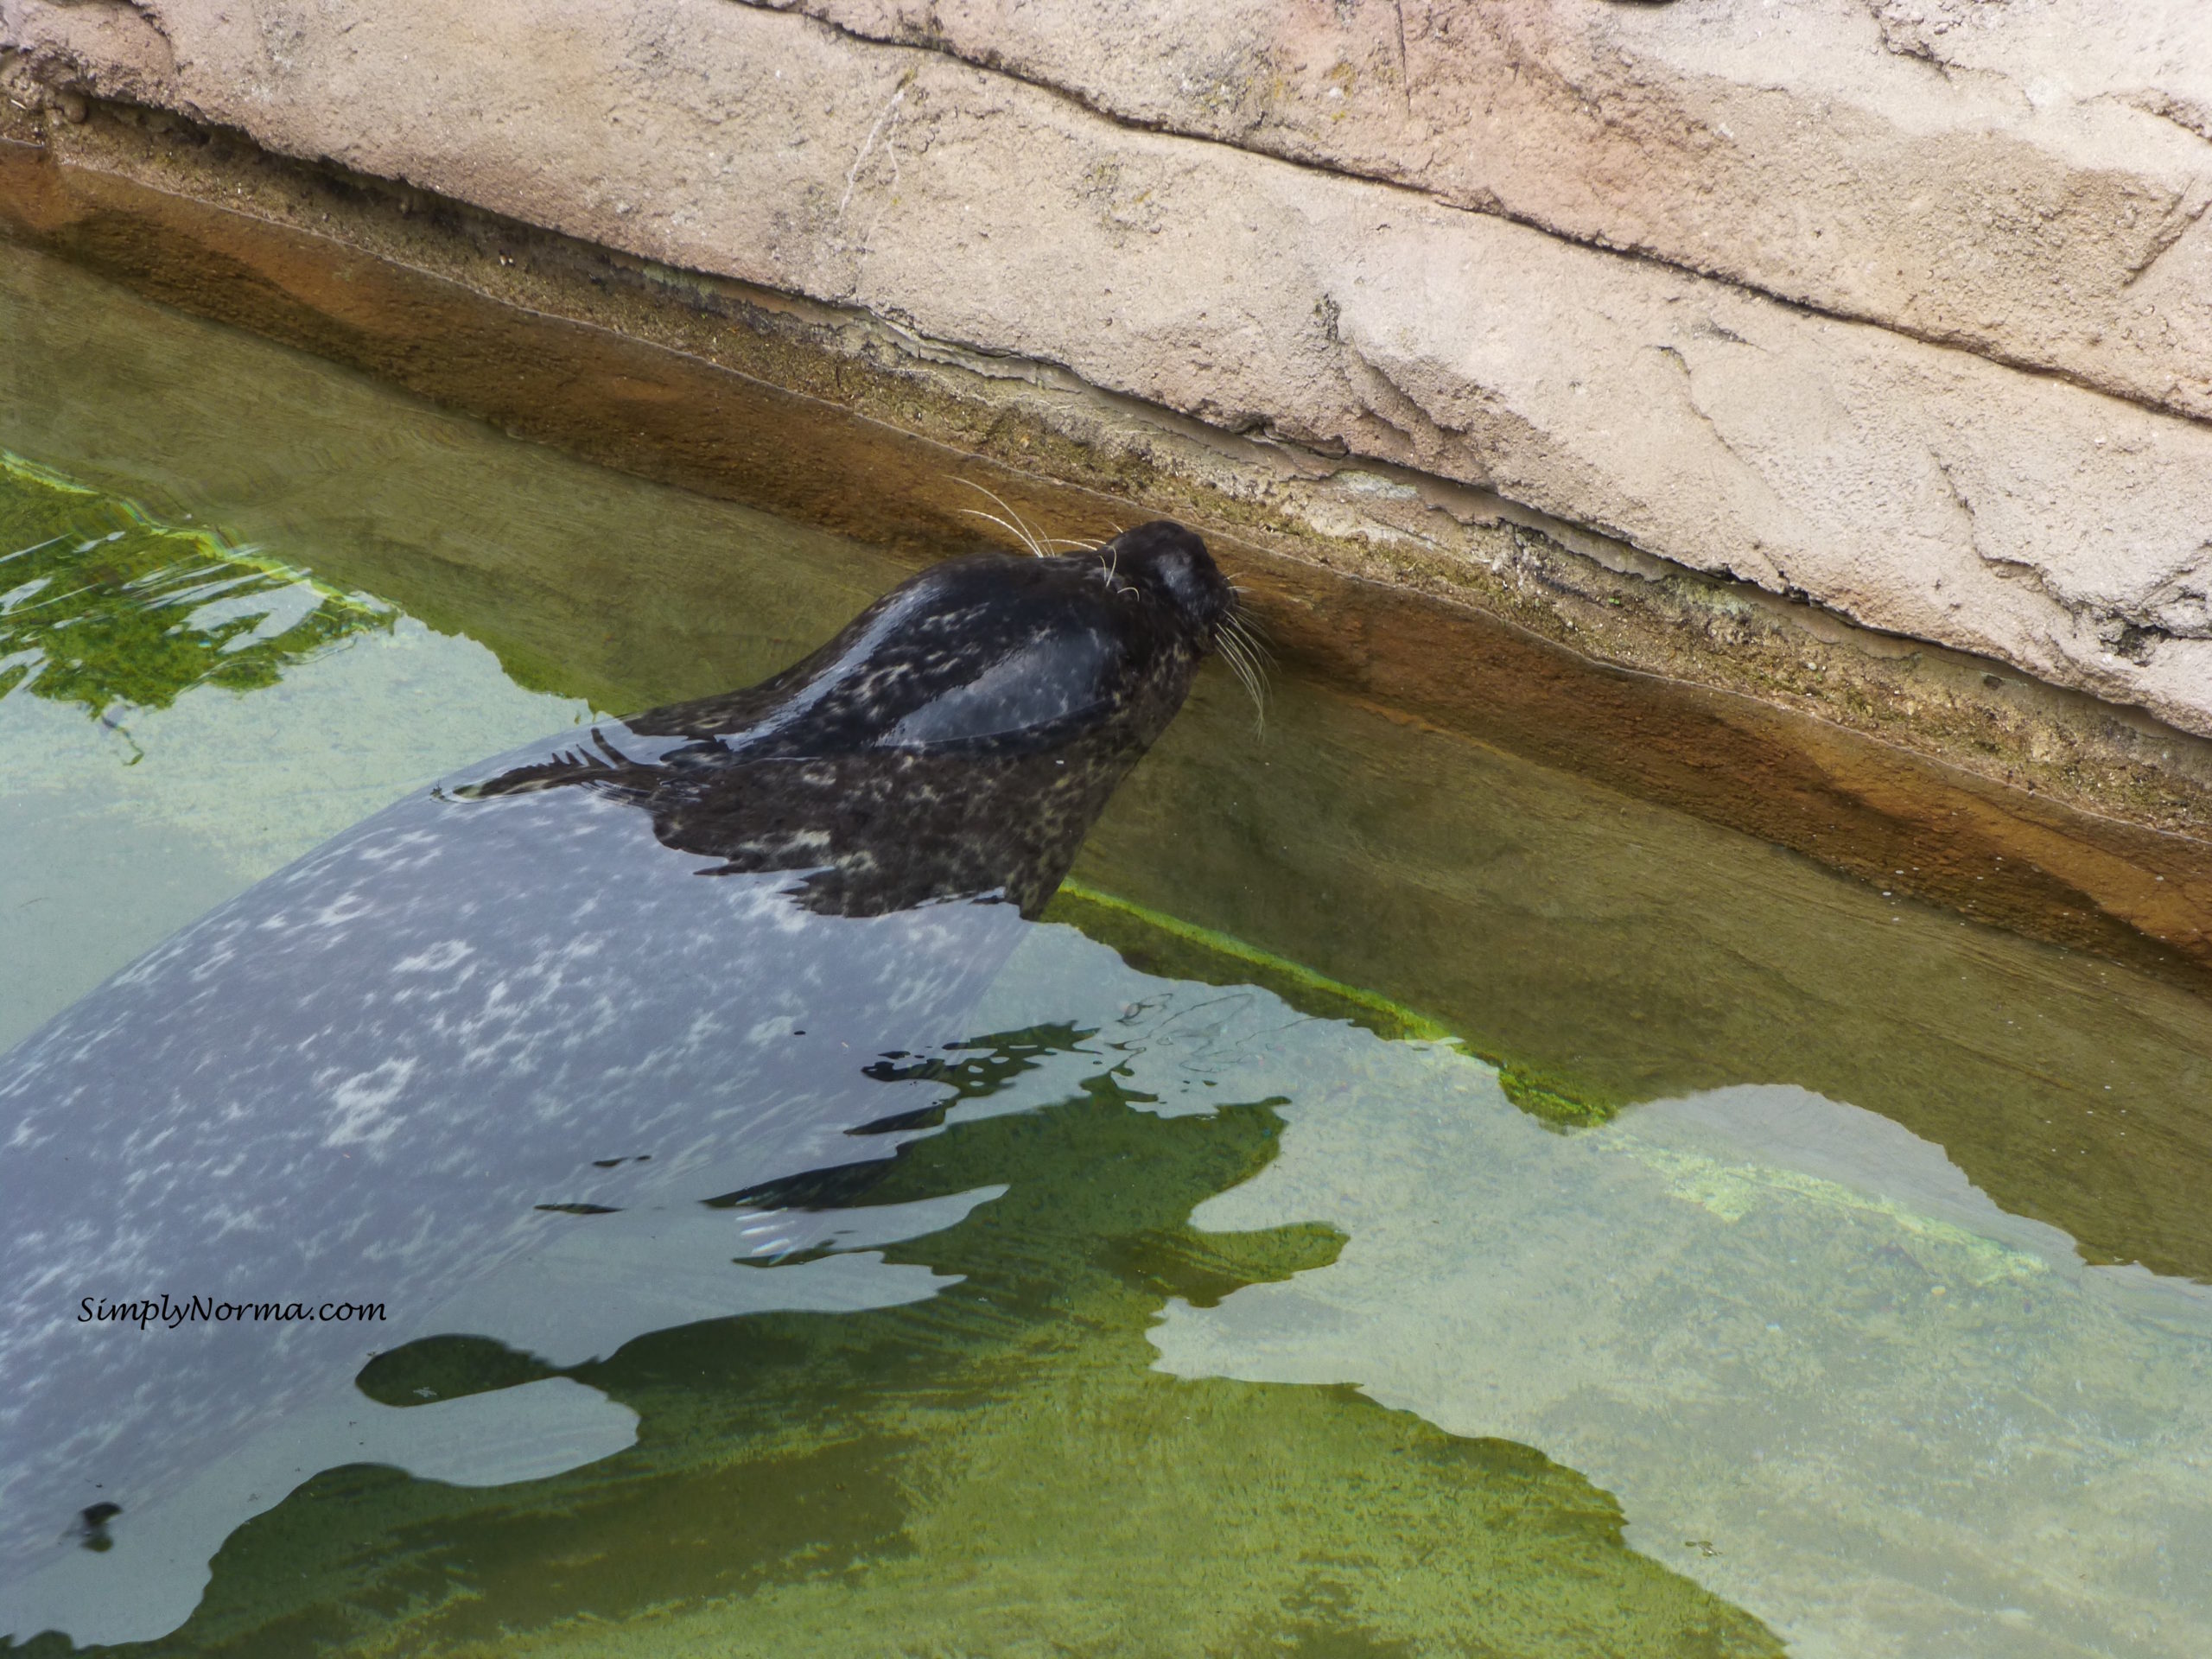
On a very warm day in St. Paul, we headed to the Como Park Zoo. I was glad that it is a small zoo so we were able to stroll through and take our time.
The animals seemed lethargic ~ perhaps the weather affects them more than I thought. Â Or maybe they simply weren’t happy.
They didn’t seem to move very much ~ even the sea lion just lay there.
Sea Lion, Como Park Zoo
The gorilla seemed pensive ~ what do gorillas think about, I wonder?
Gorilla, Como Park Zoo
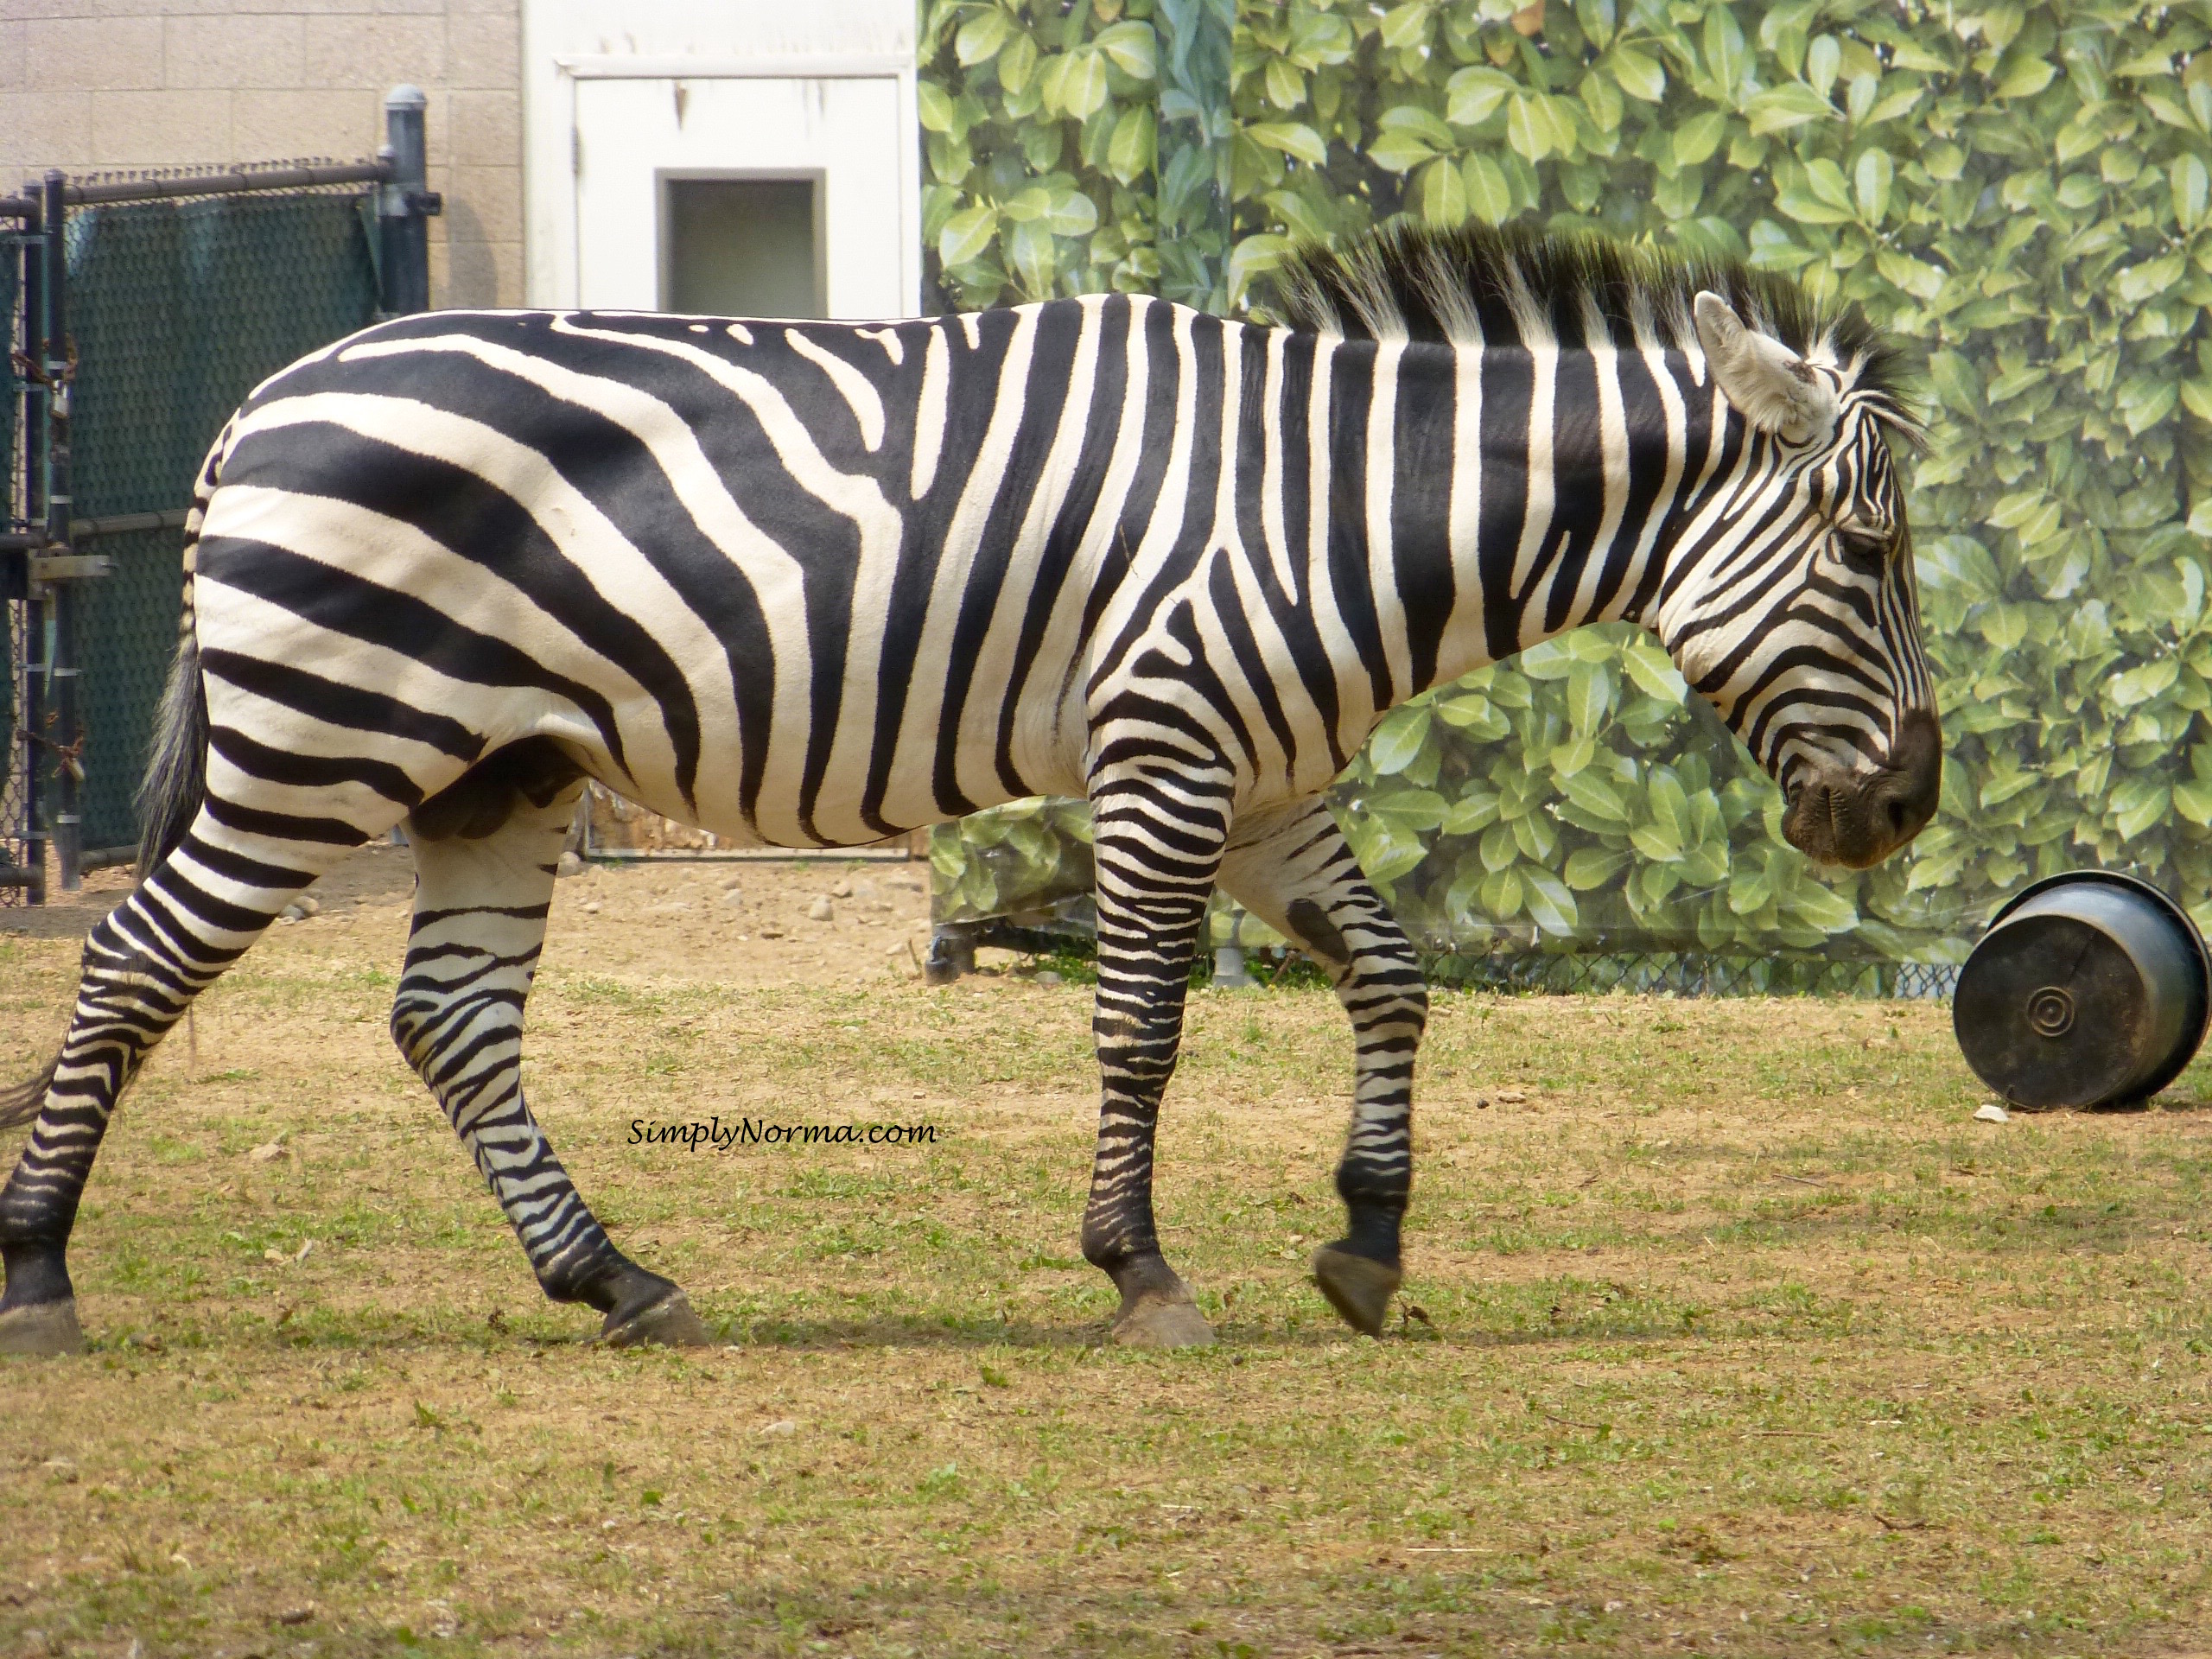
I was able to get pretty close to the zebra. It is quite a fascinating animal with all the stripes and it’s large muscles. Â Did you know that the strip pattern on every zebra is unique? Check it out sometime.
Zebra, Como Park ZooZebra, Como Park ZooZebra, Como Park Zoo
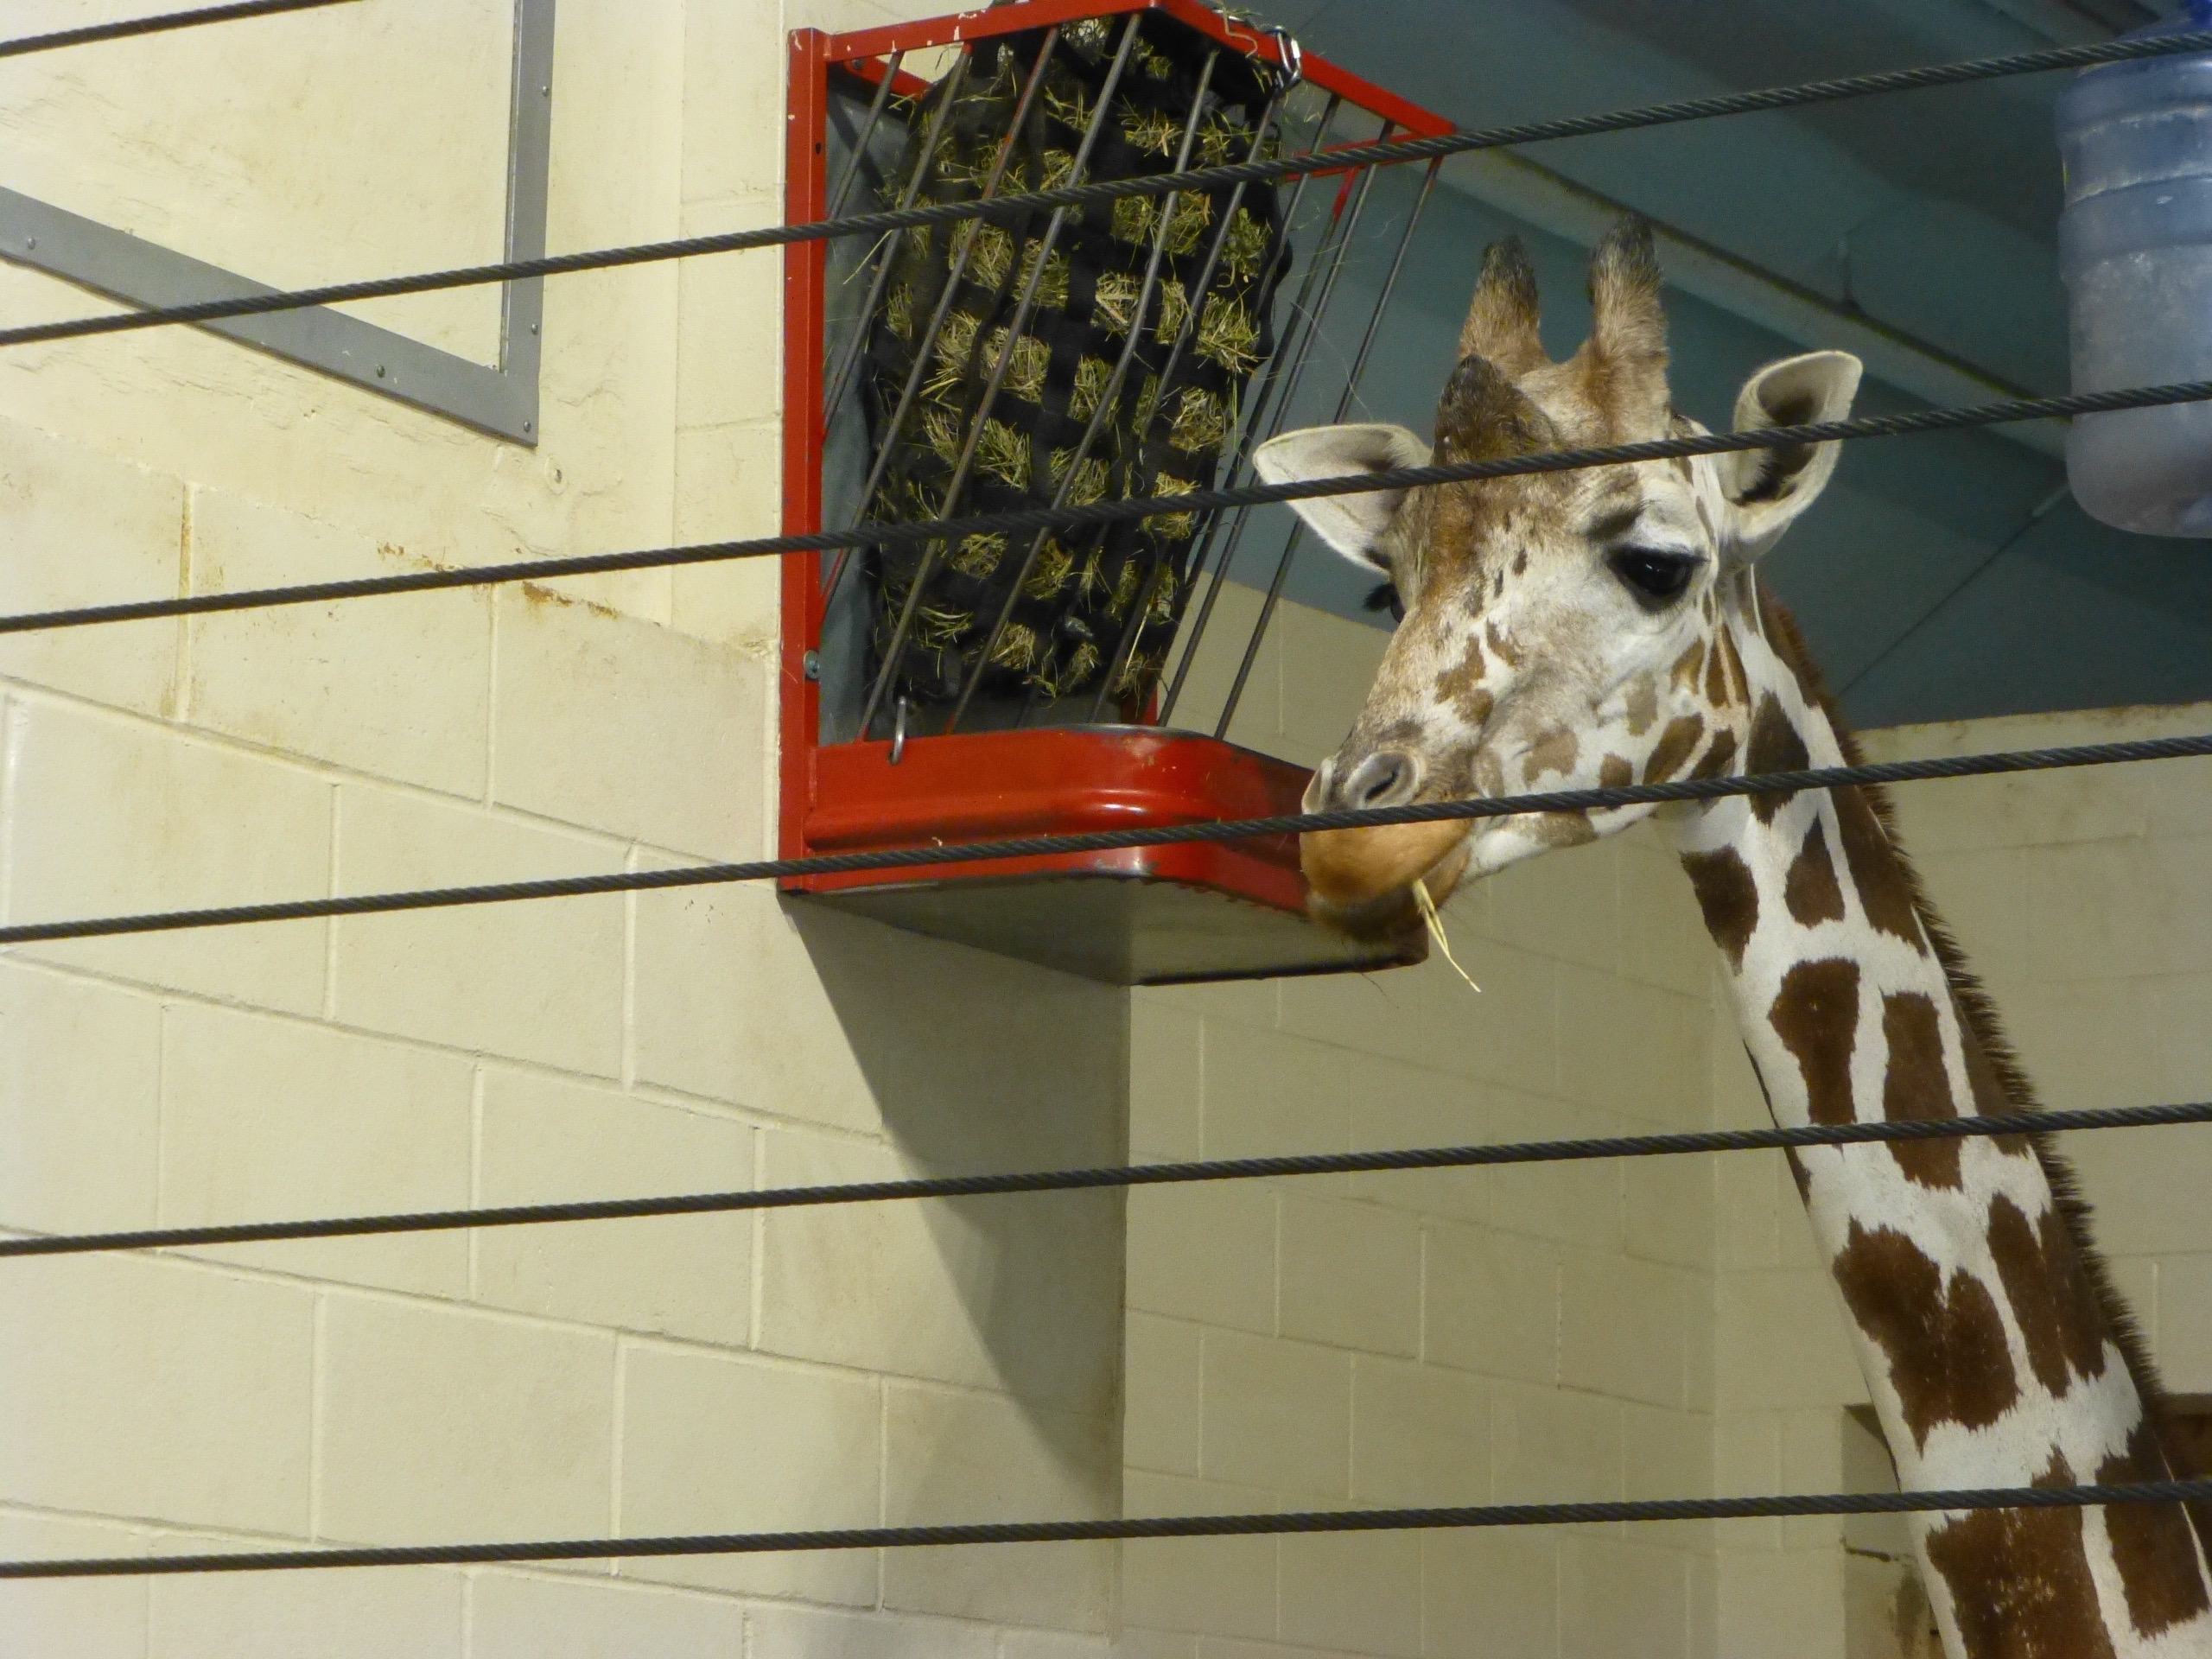
The giraffe was the most active out of all the animals.
Giraffe, Como Park Zoo
Did you know that a male lion’s roar can be heard up to 5 miles away?
Lion, Como Park Zoo
This tiger just lay on its back ~ too hot to move?
Tiger, Como Park Zoo
Most of the other animals were “hiding.”
The zoo has a few places to pick up some goodies and drinks.
Hopefully the next time we go the animals will be a little more active (chipper).
I am still a beginner when it comes to quilting. Perhaps it’s because I don’t quilt every day. I usually do one project every 3-6 months and then spring/summer roll around and I’m back to the stress of yard work.
The lap top quilt I recently made is called Candy Squares and is quite pretty. Â I bought the kit on Craftsy which came with all of the fabric material except for the batting and the backing.
Unfortunately, the first kit I received from them which had both off white Kona yardage and 100 5″ colored fabric squares had the wrong size colored squares so I emailed them and they sent me another kit and allowed me to keep the first one. Â That actually made sense since I hadn’t measured the fabric material when I received it and had already cut the off white material by following the instructions.
Lesson learned. Â I’ll make sure to measure the fabric before I start a project.
The instructions said I should press the fabric first so that’s what I did. Â It does not recommend washing as the fabric pieces are quite small.
I started the project by cutting 70 of the 5″ squares into 2.5 x 2.5 inch squares.  This is time consuming because I needed to make sure the cuts were precise.  The remaining 5″ squares (all 30 of them) are cut into two pieces each ~ 2½” x 5†rectangles for the binding.
I’m considering getting a Cricut which, although a little expensive, is supposed to cut a lot more accurately than I can. Â I thought perhaps I was the only one having problems cutting precisely but many experienced quilters say they have had the same problem.
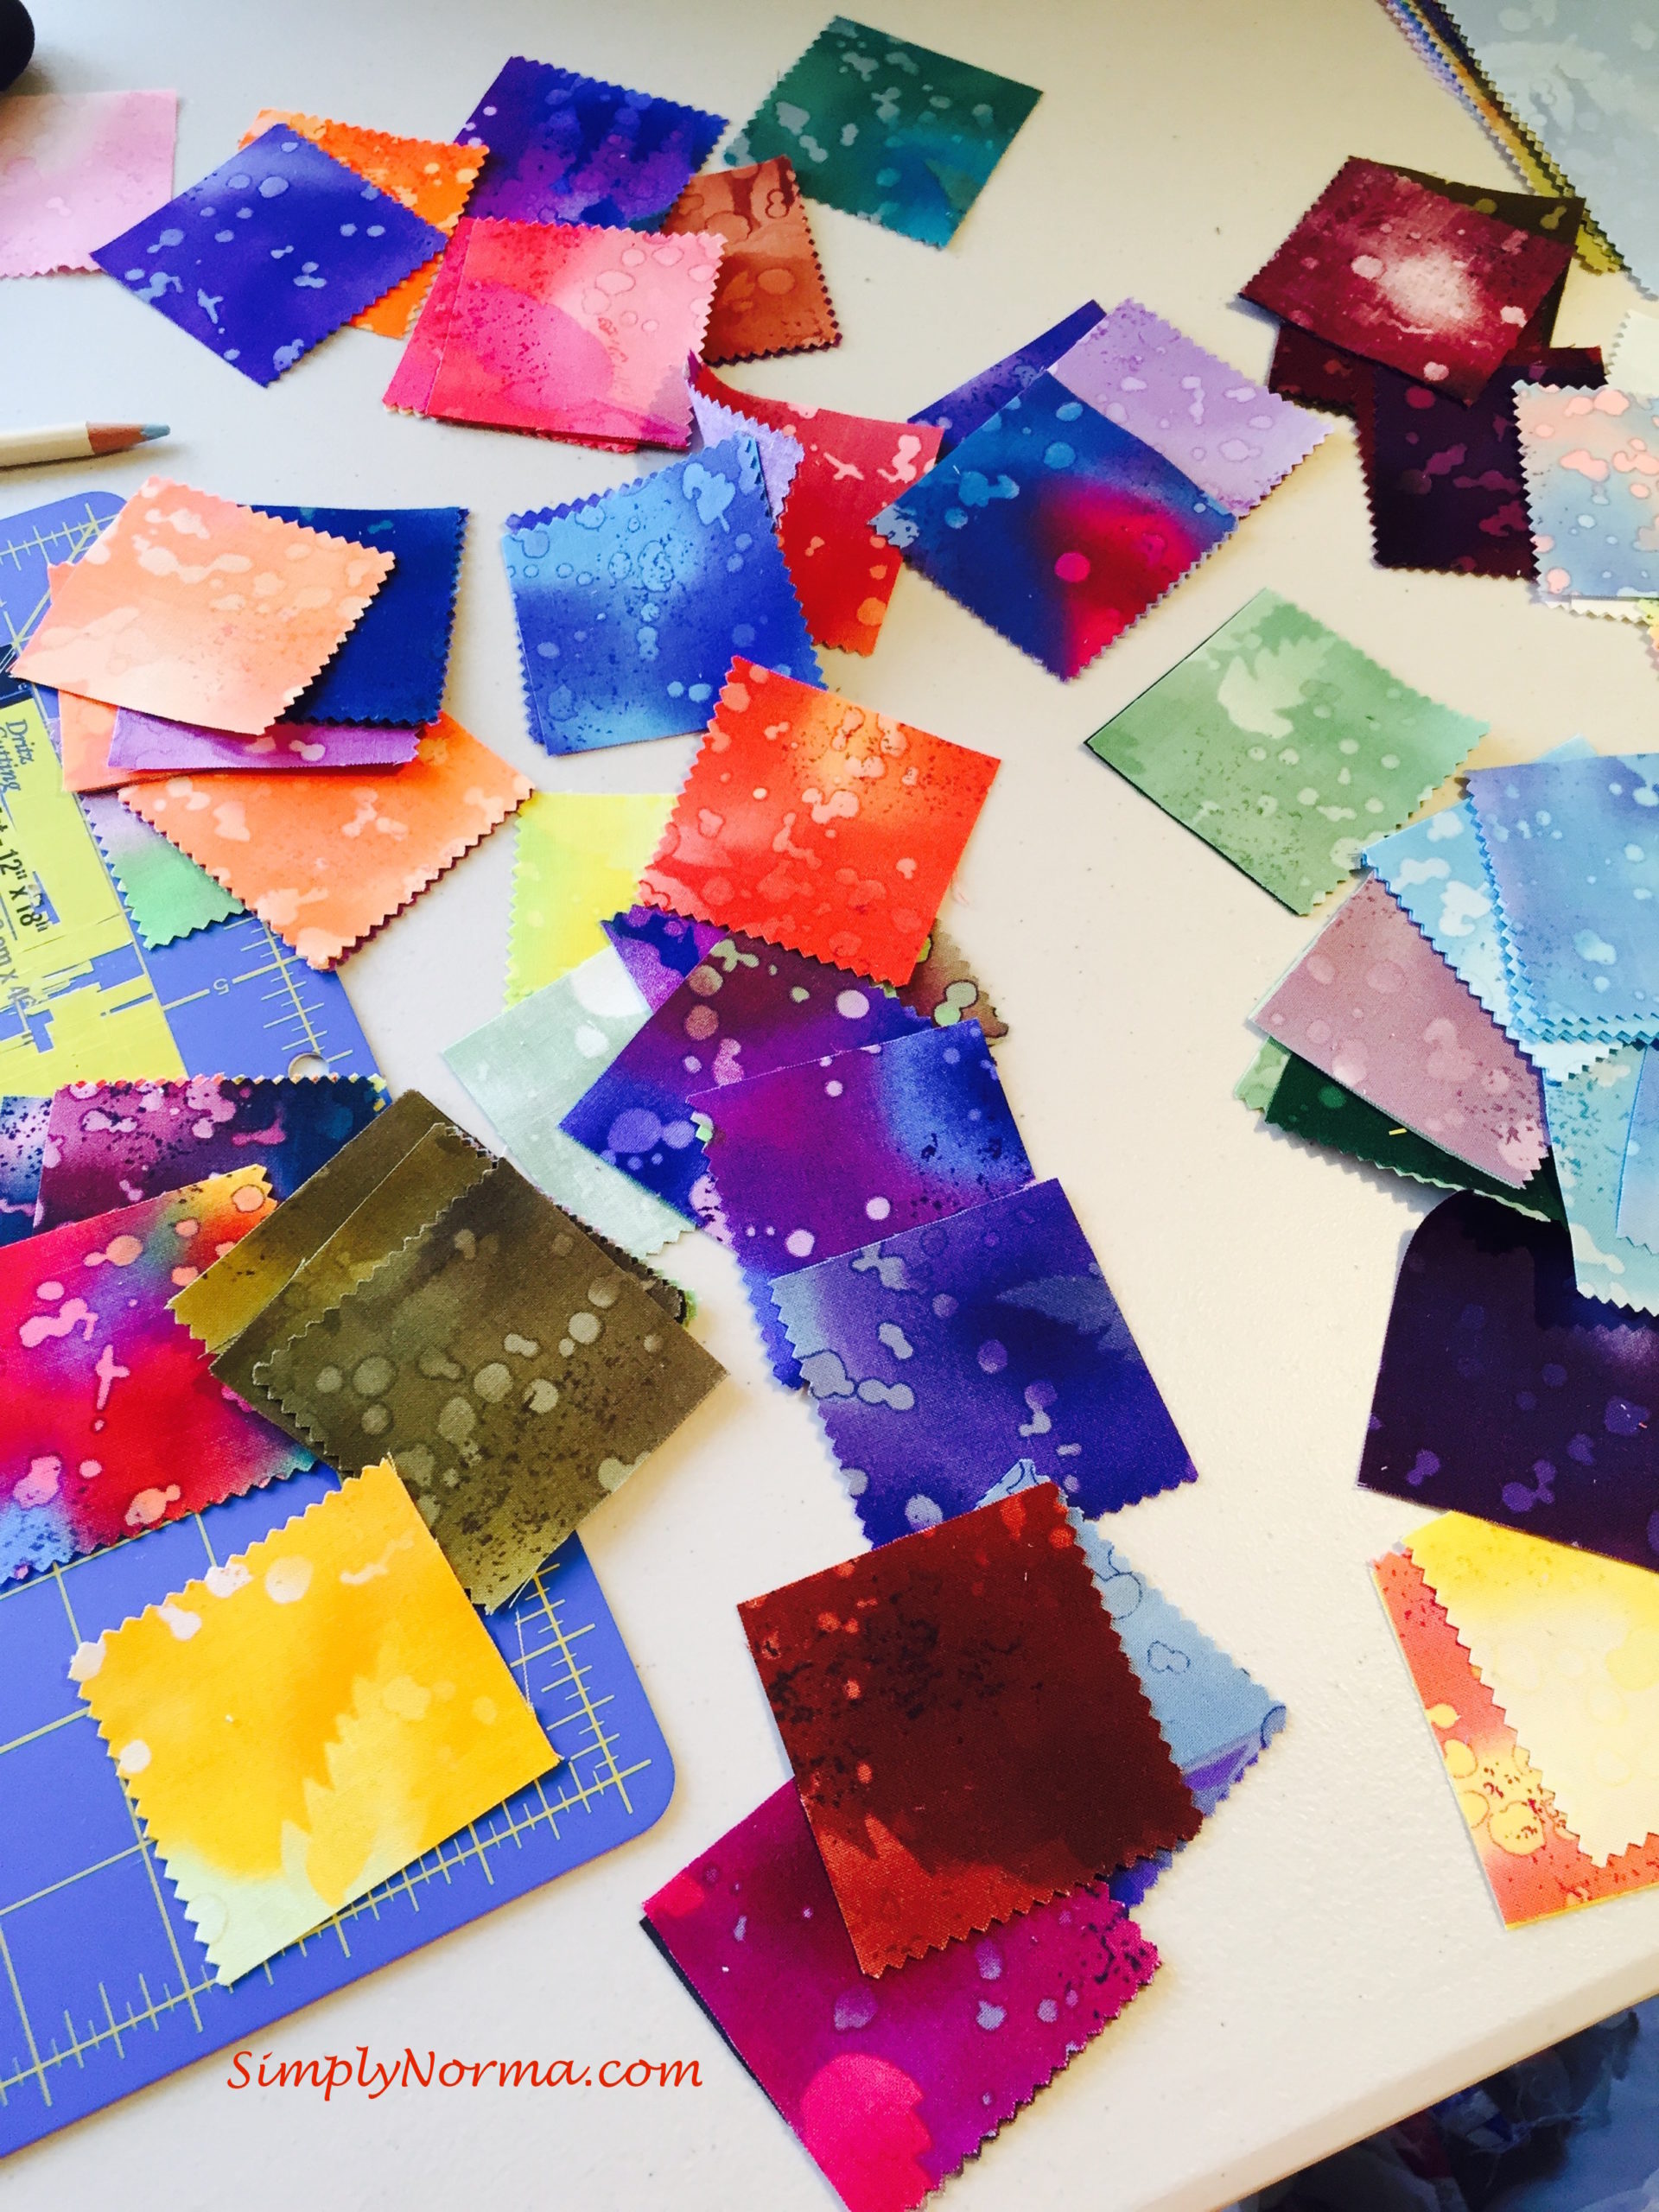
I love the vivid
Fossil Fern Charms
Next I cut the 3 yards of Kona White fabric into 13 2½†strips and then sub cut it into 200 2½” squares.  Then I cut 9 6½” strips and sub cut those into 49 6½” squares.
That’s a lot of cutting for sure!
The quilt has a pattern as such:
Row 1 = color – white – color
Row 2 = white – color – white
Row 3 = color – white – color
Fossil Fern Charms
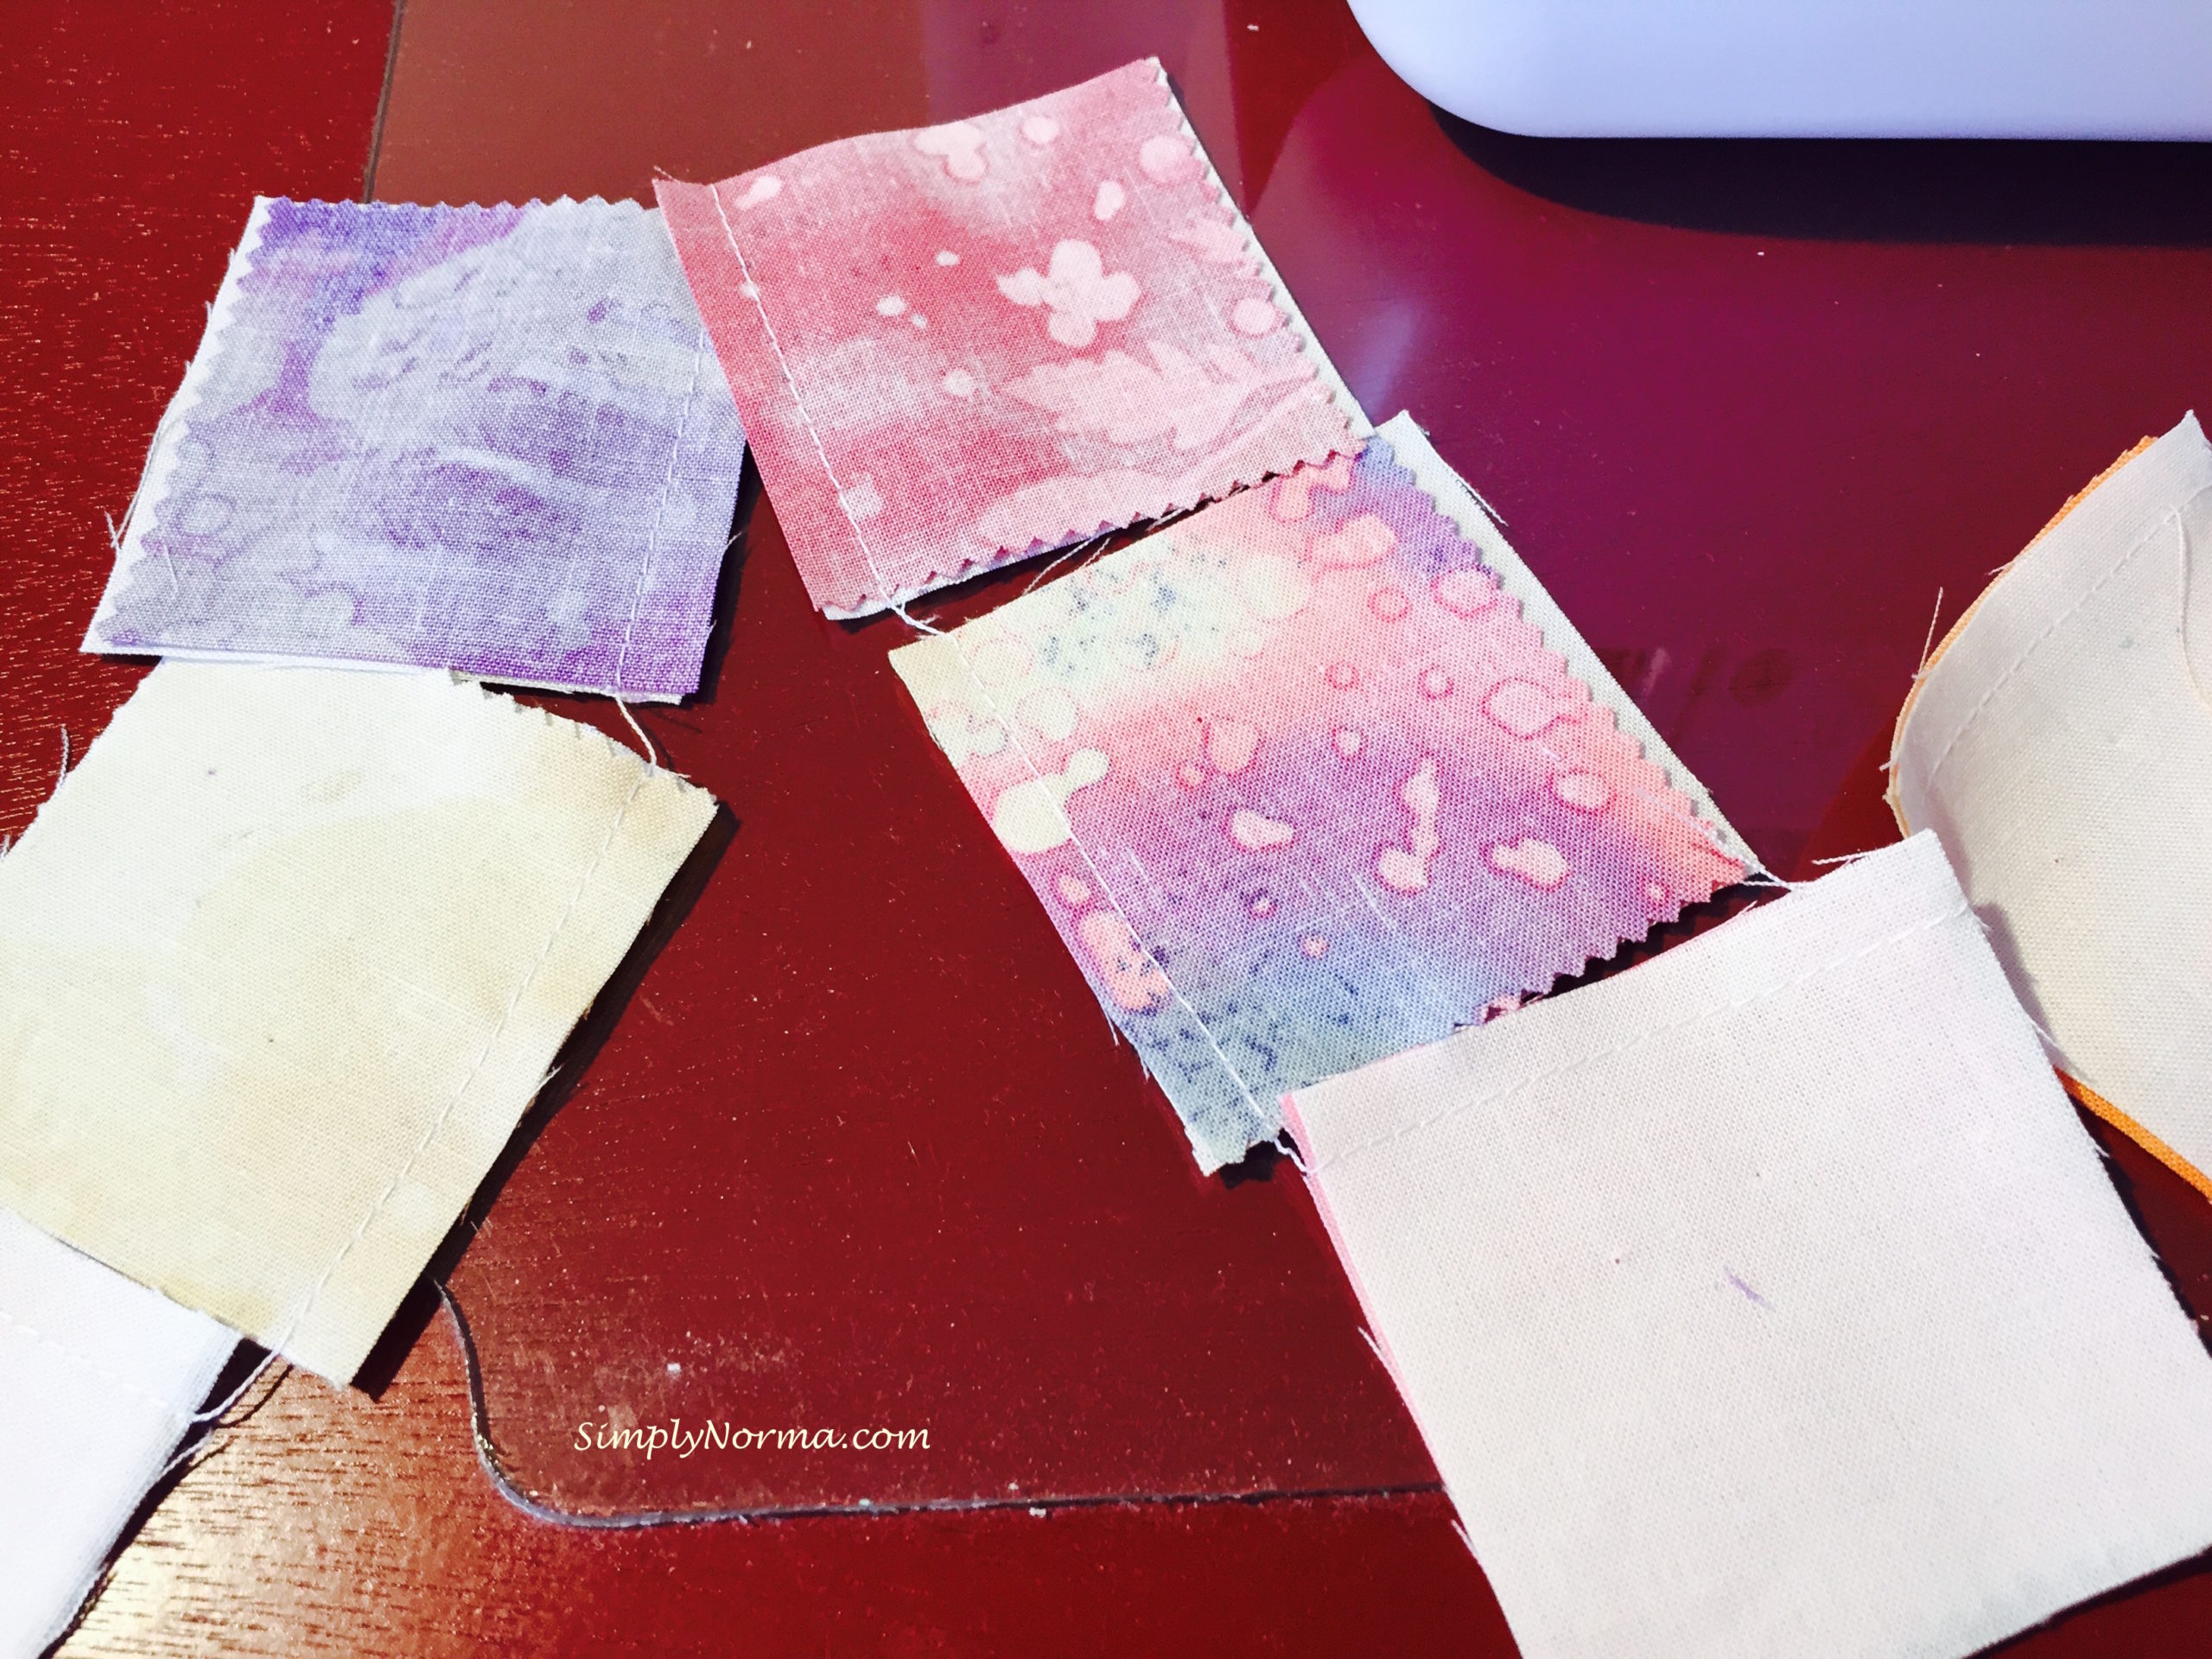
The colored fabric is chosen randomly and is sewn to the white color as stated above.
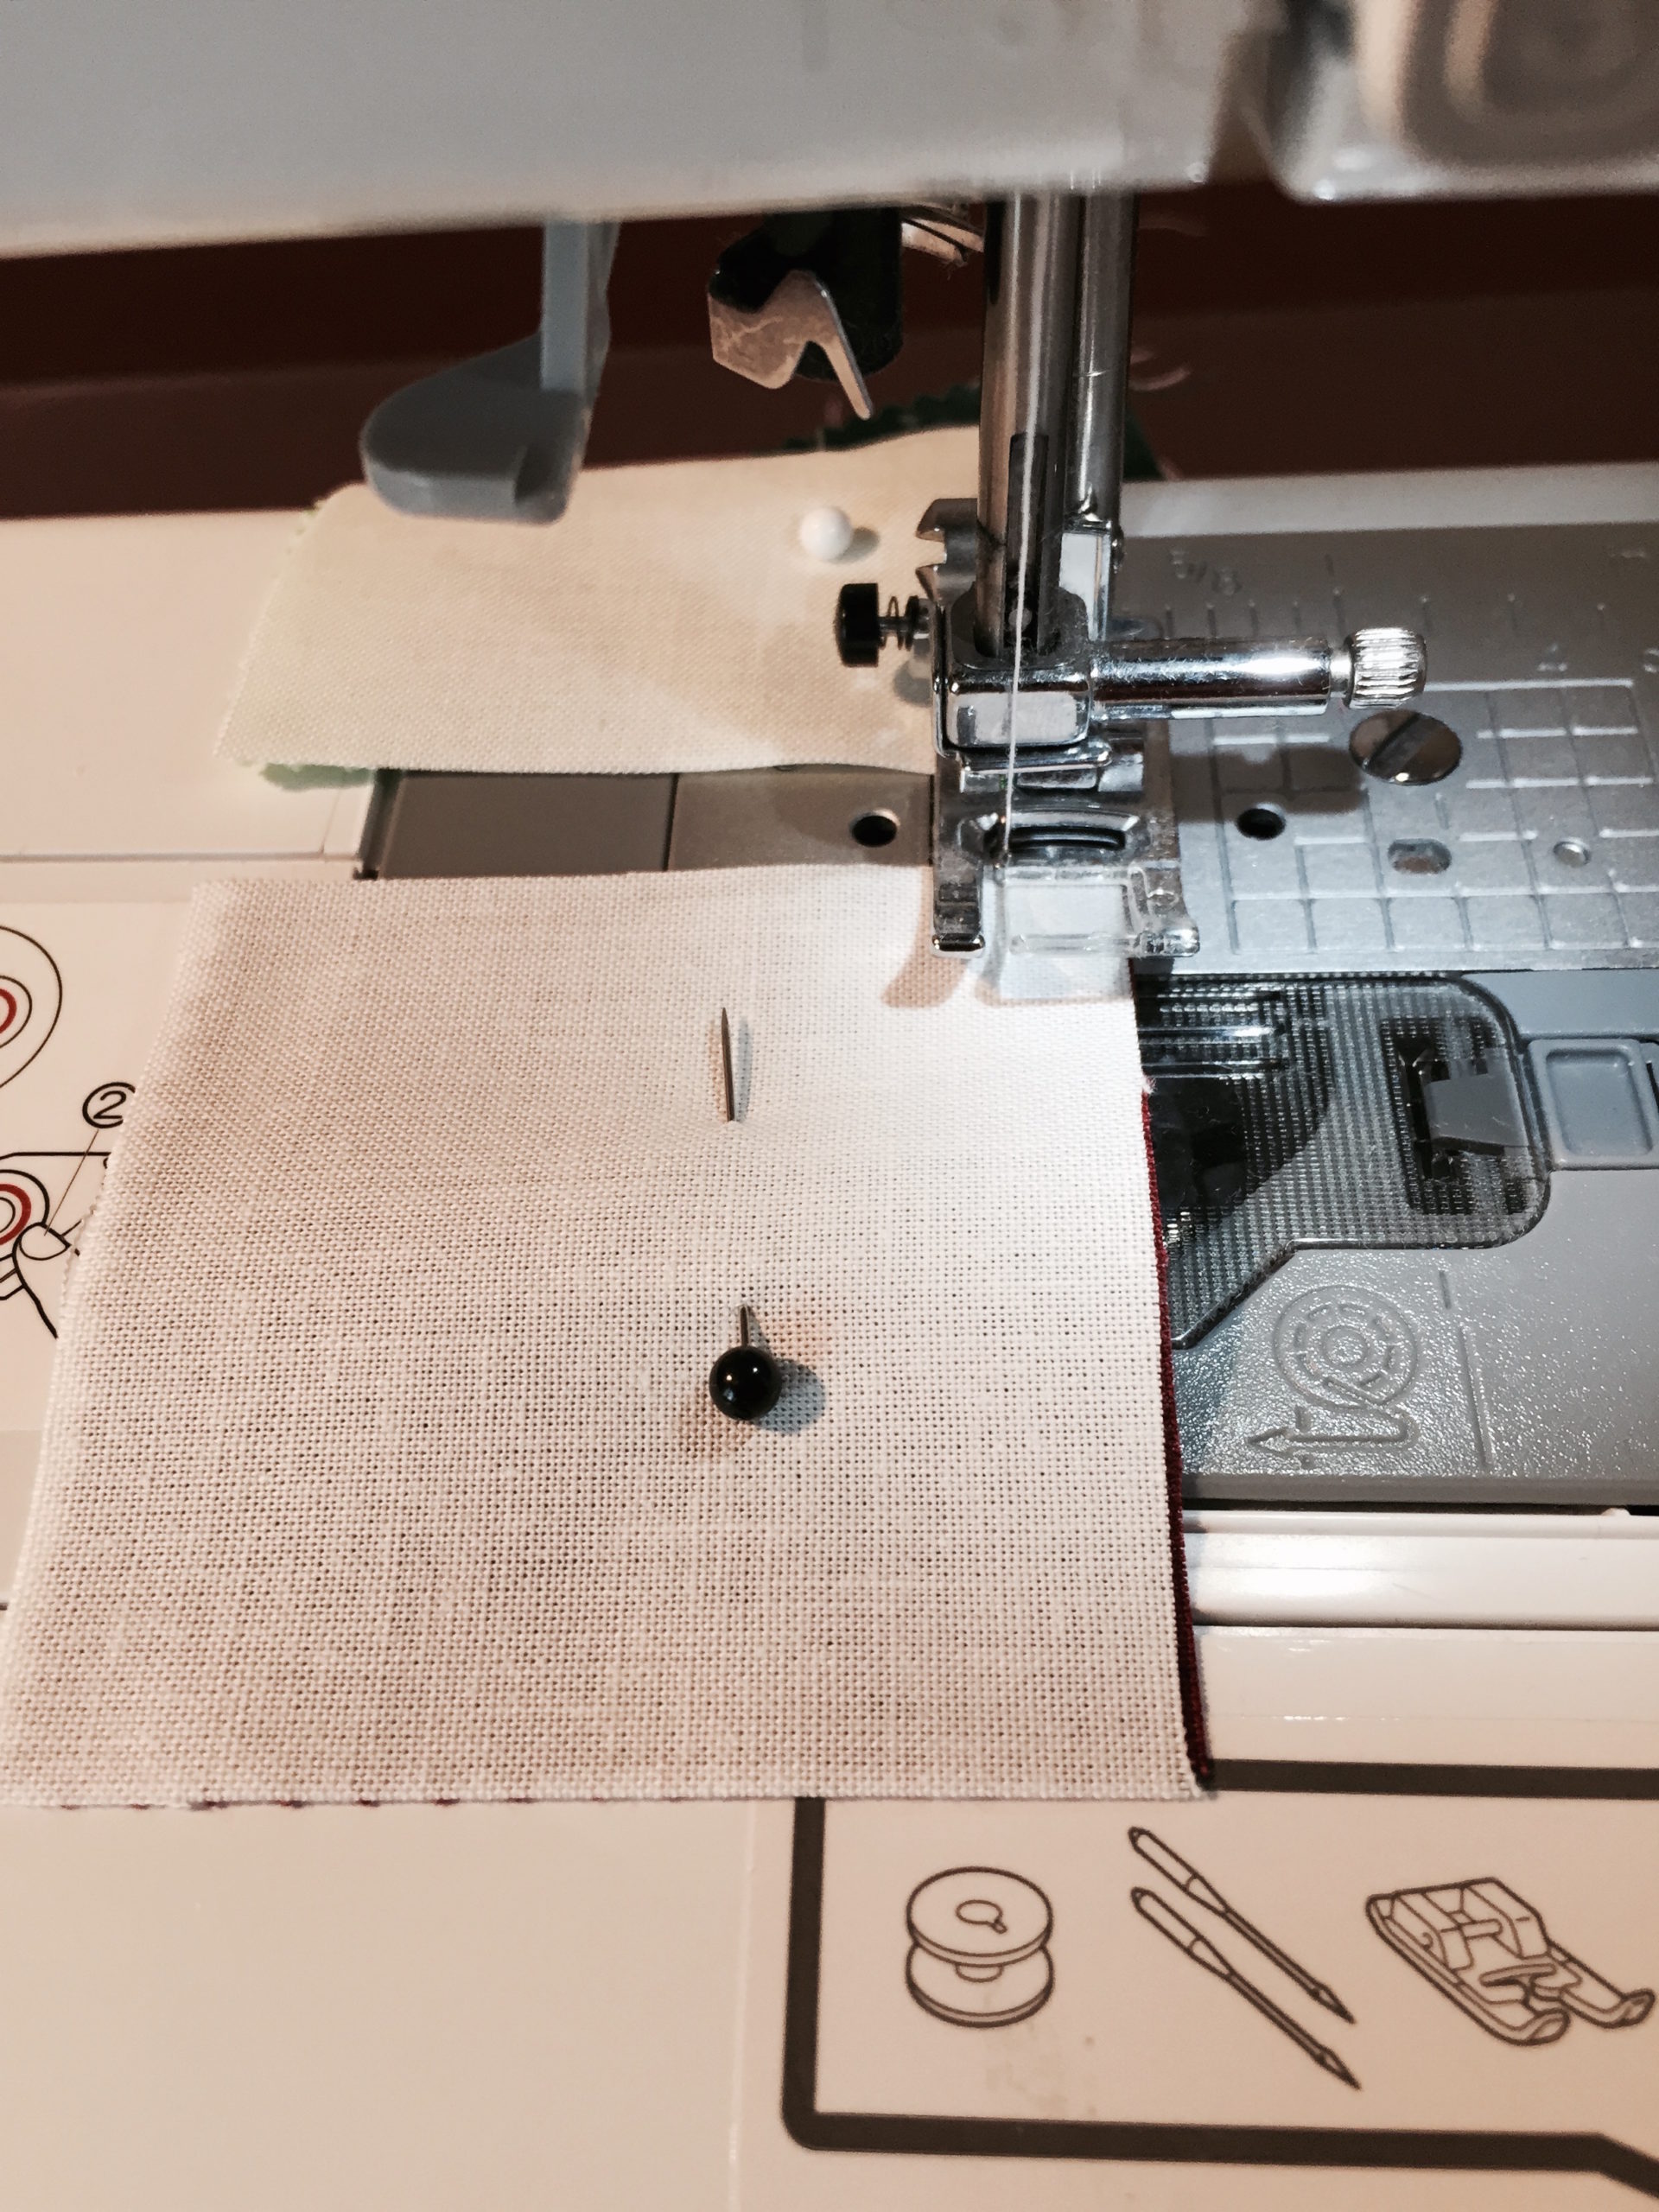
You need to make sure you have lots of pins for this project and a pincushion comes in handy.
Pin Cushion
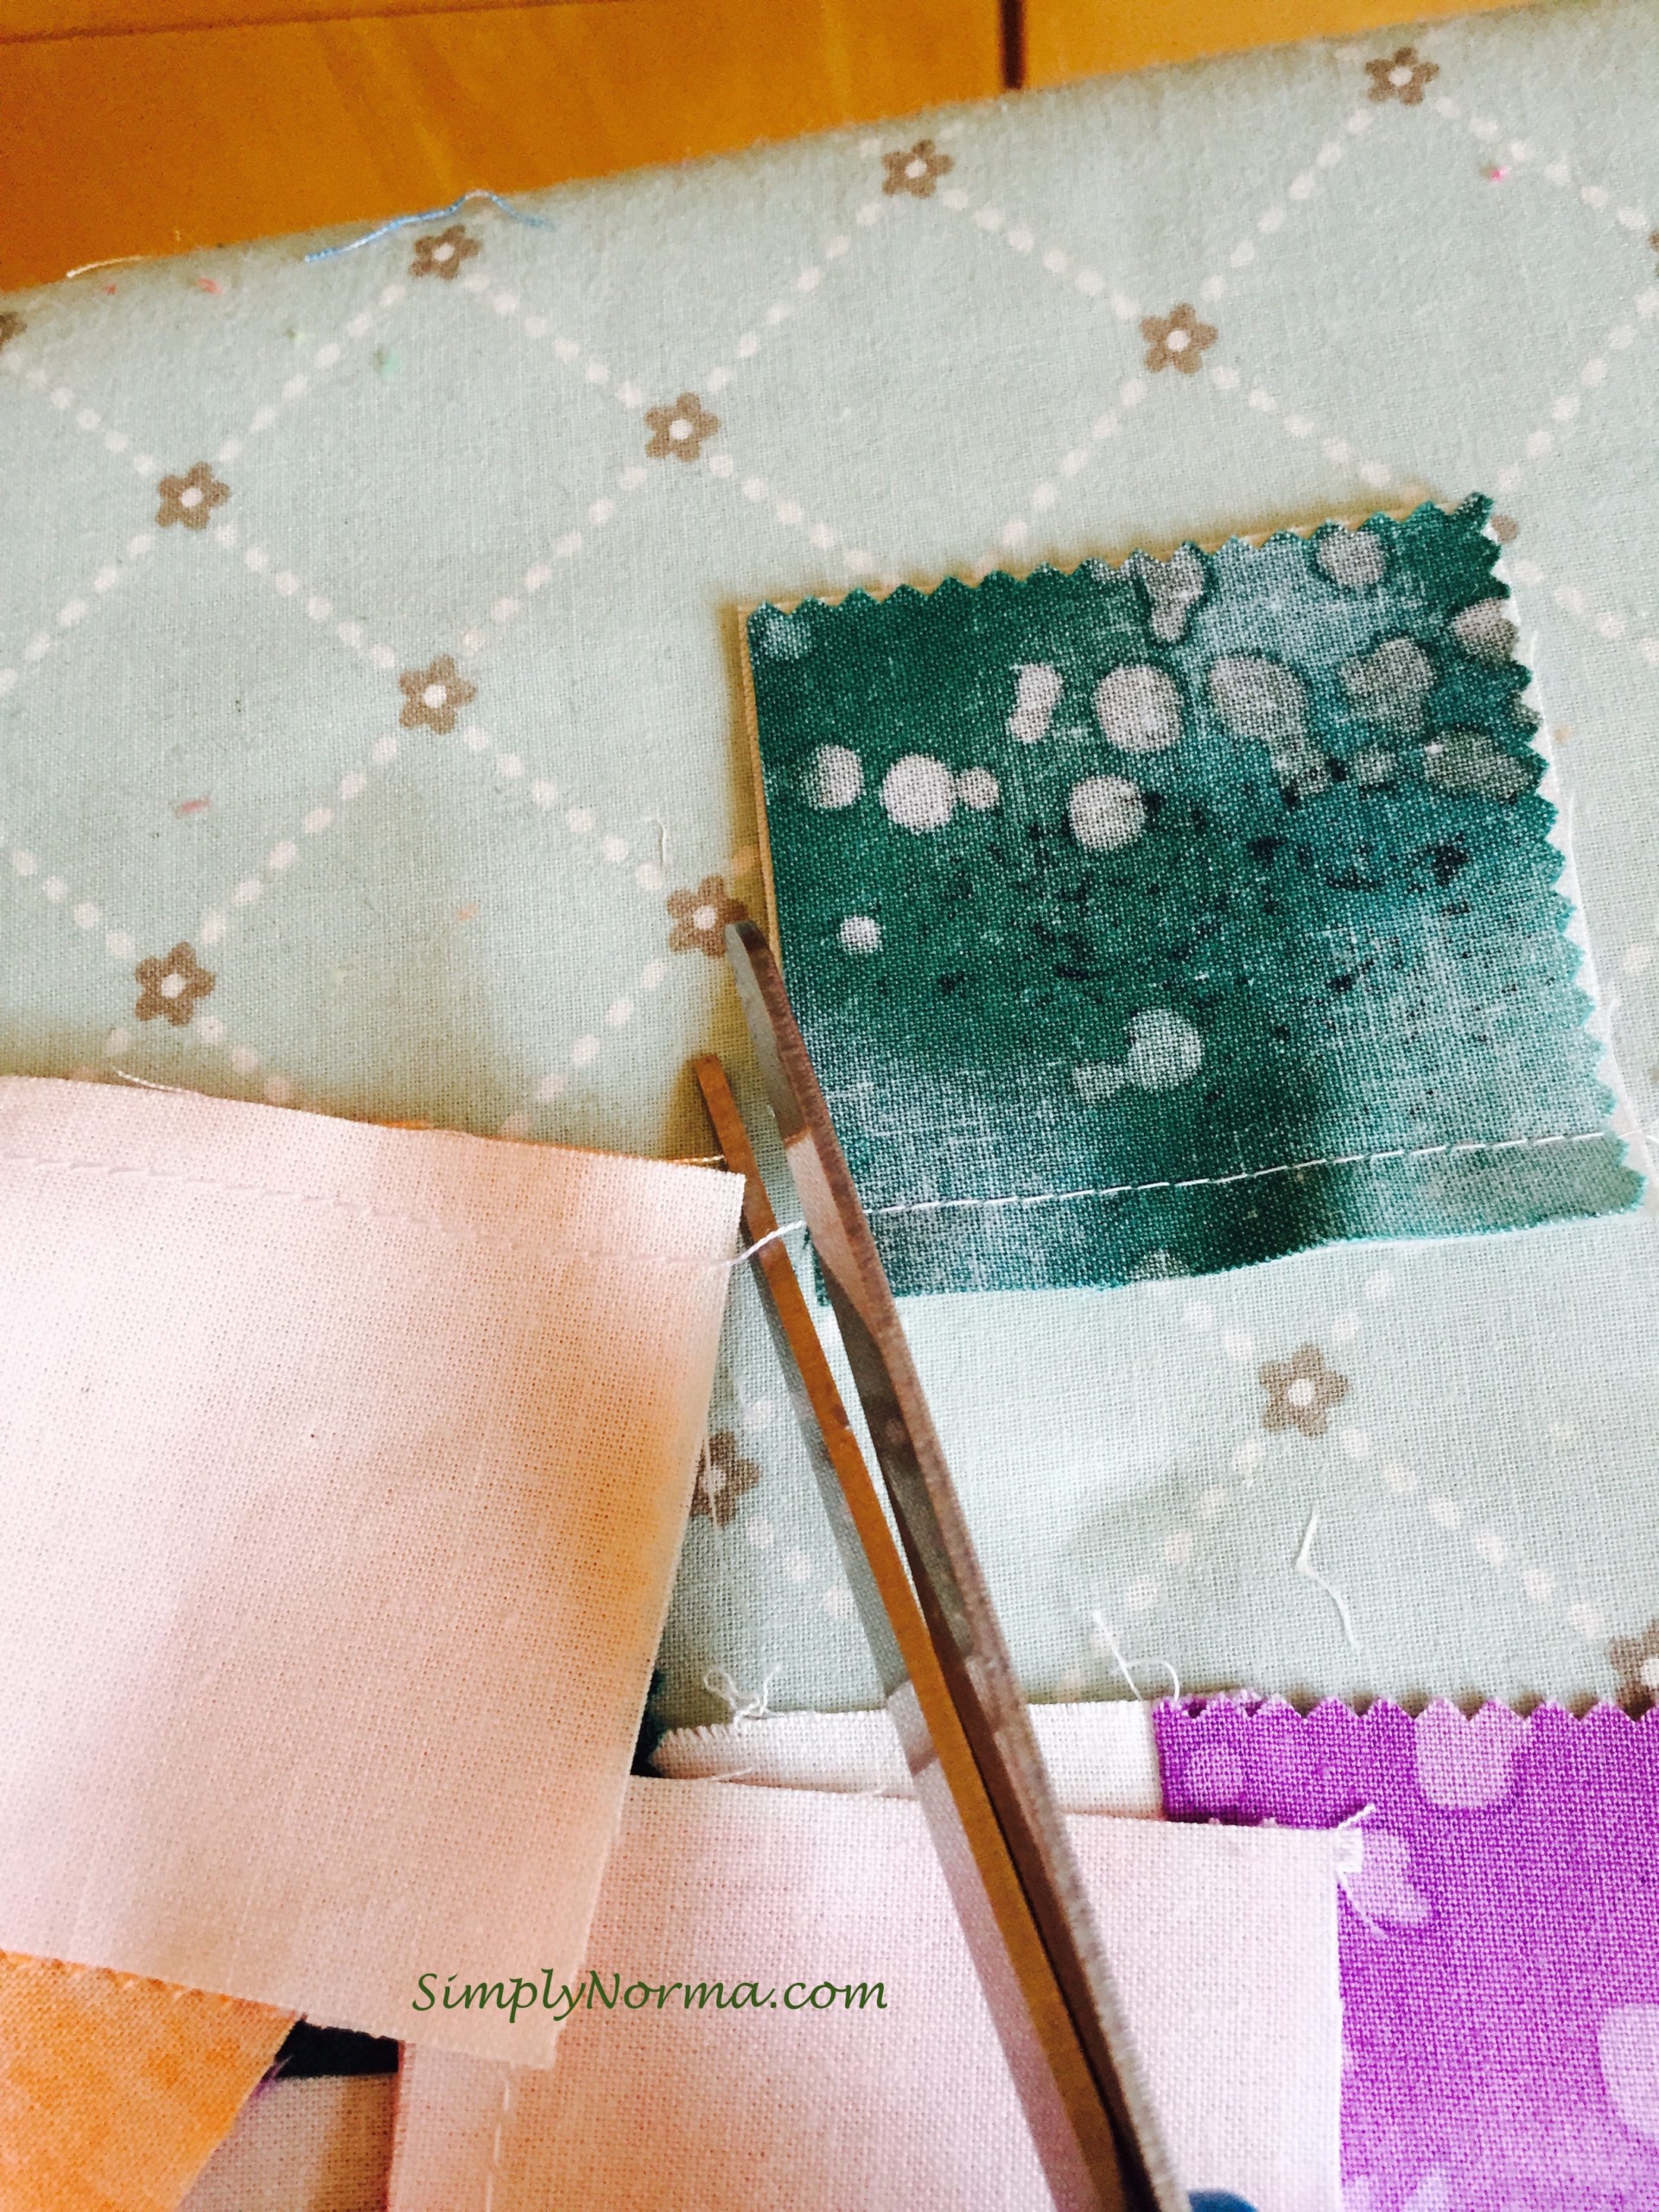
I pinned each set of two squares and sewed them together.
Sew Squares Together
I continued feeding the sewing machine the sets of squares with a little space between them and later snipped that thread off. Â Then I added the third square.
Sew Pieces ContinouslySeparate the sewn rows
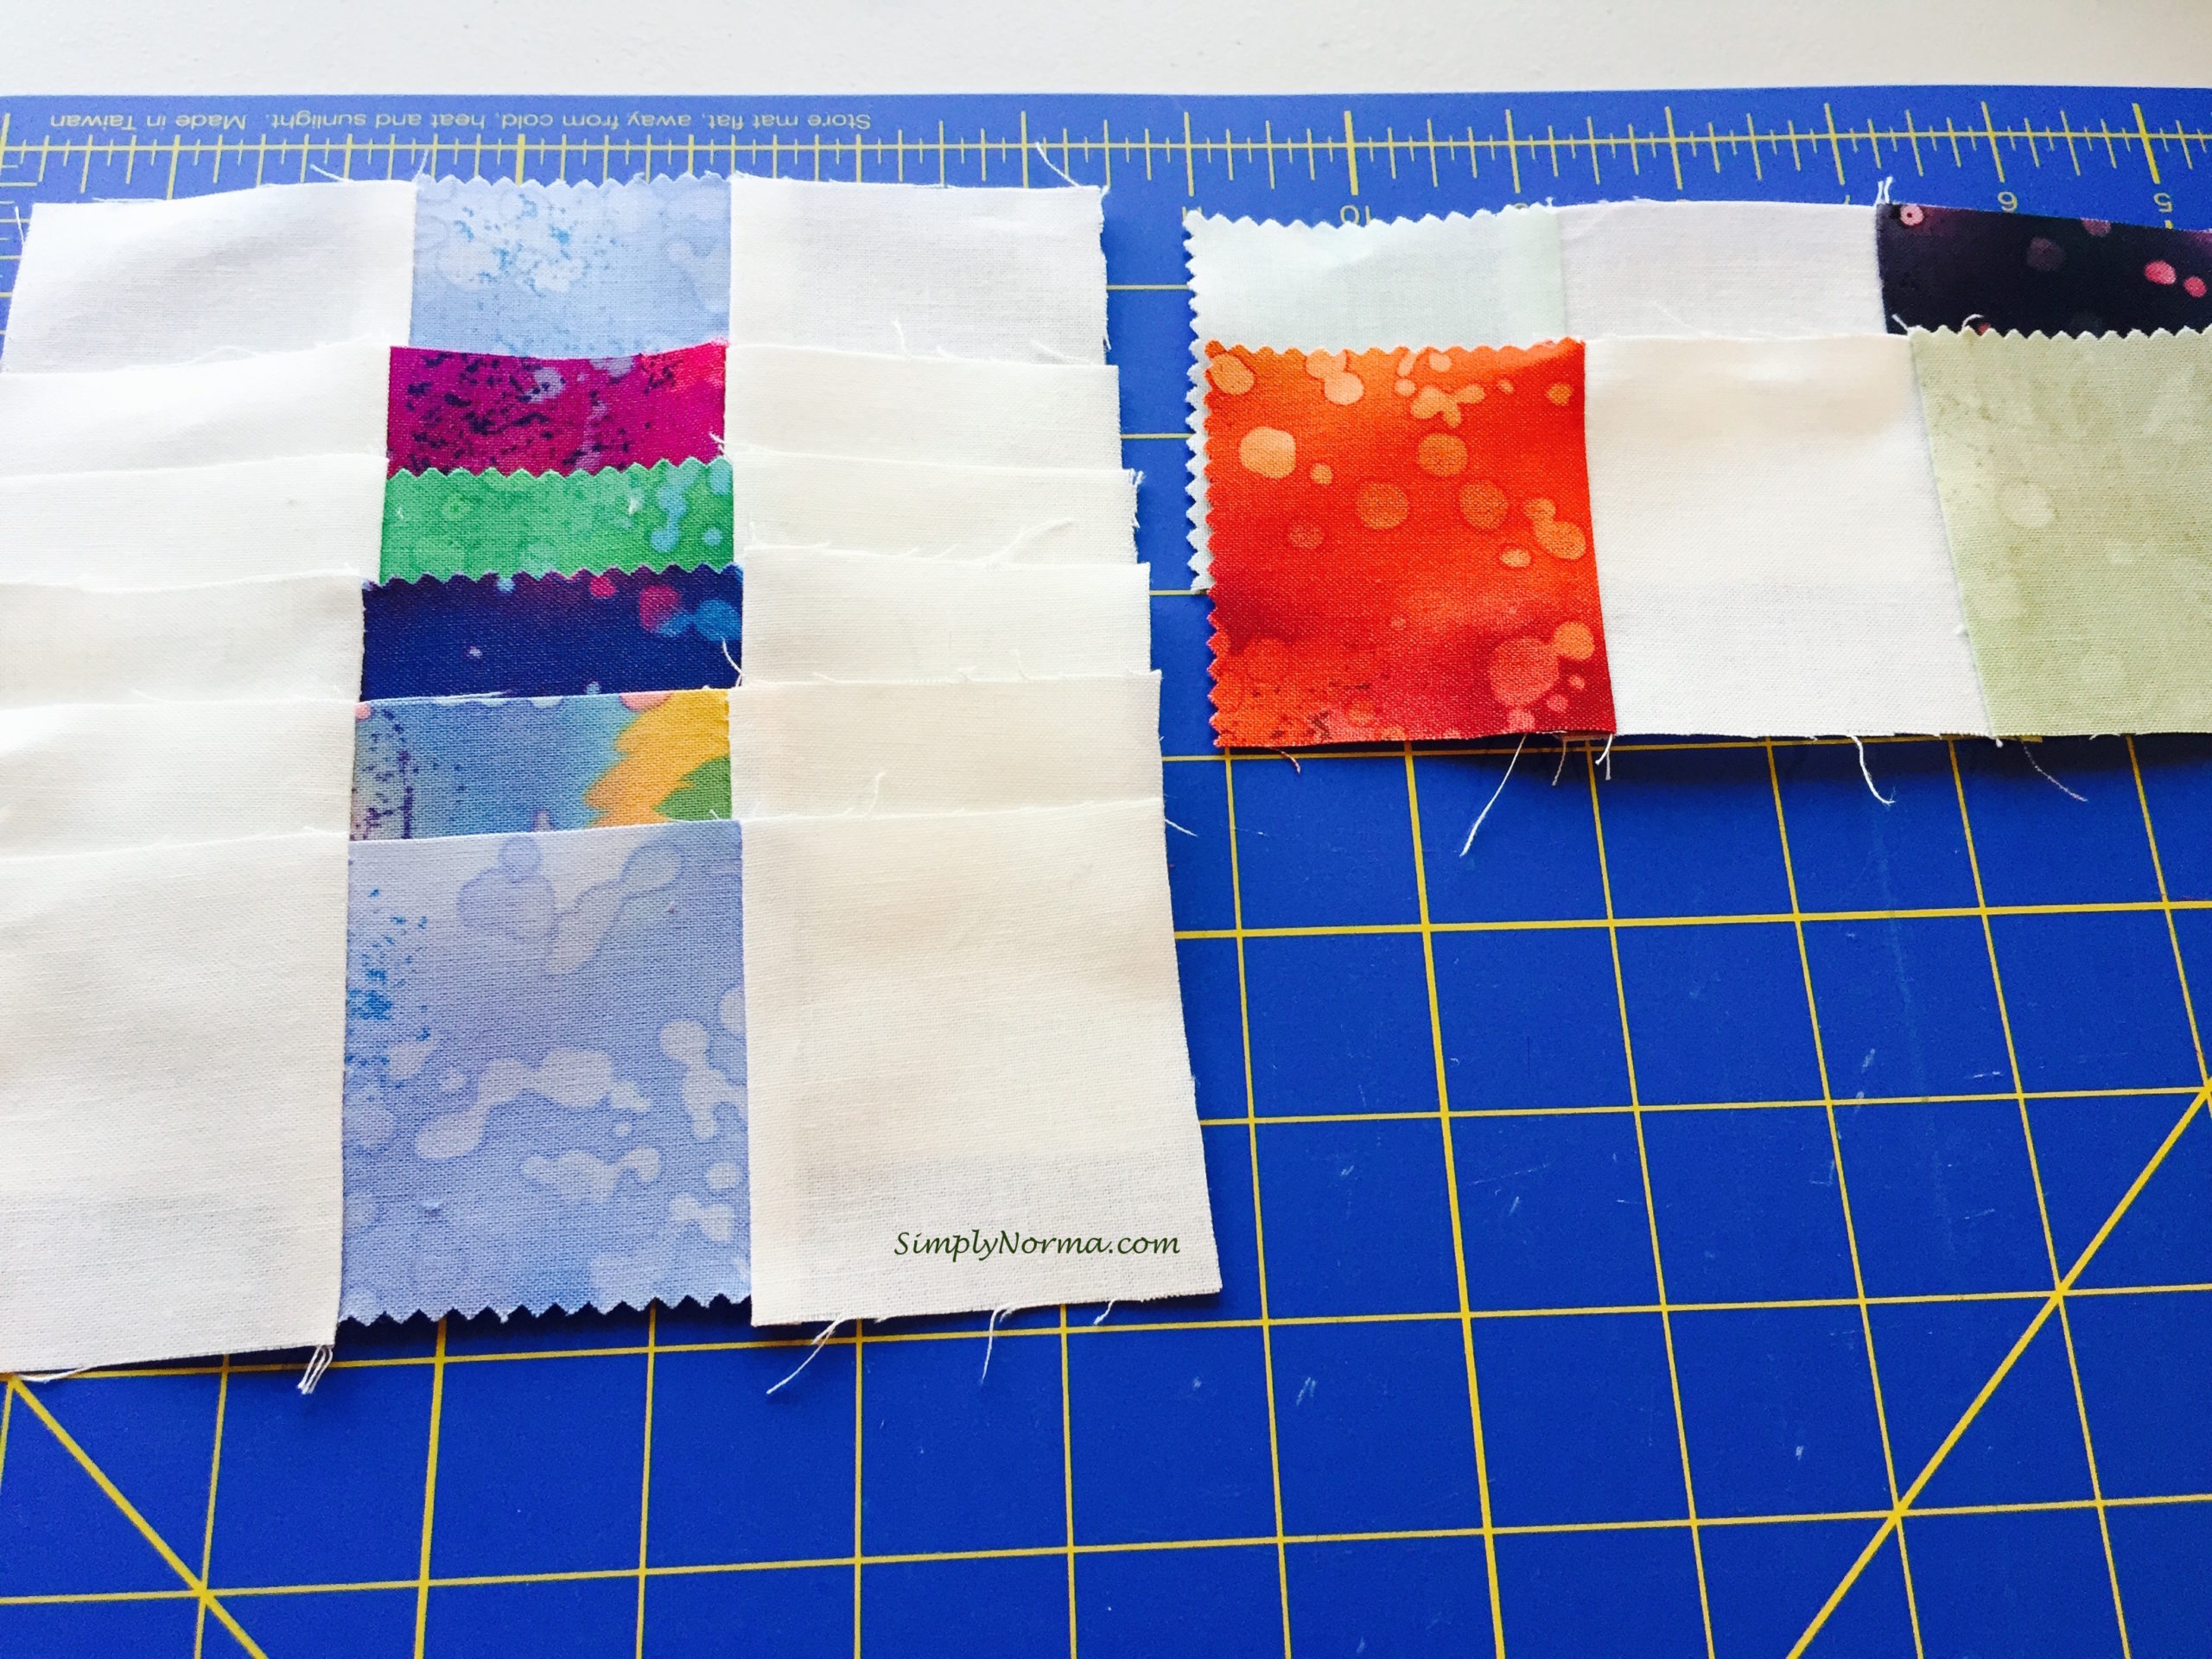
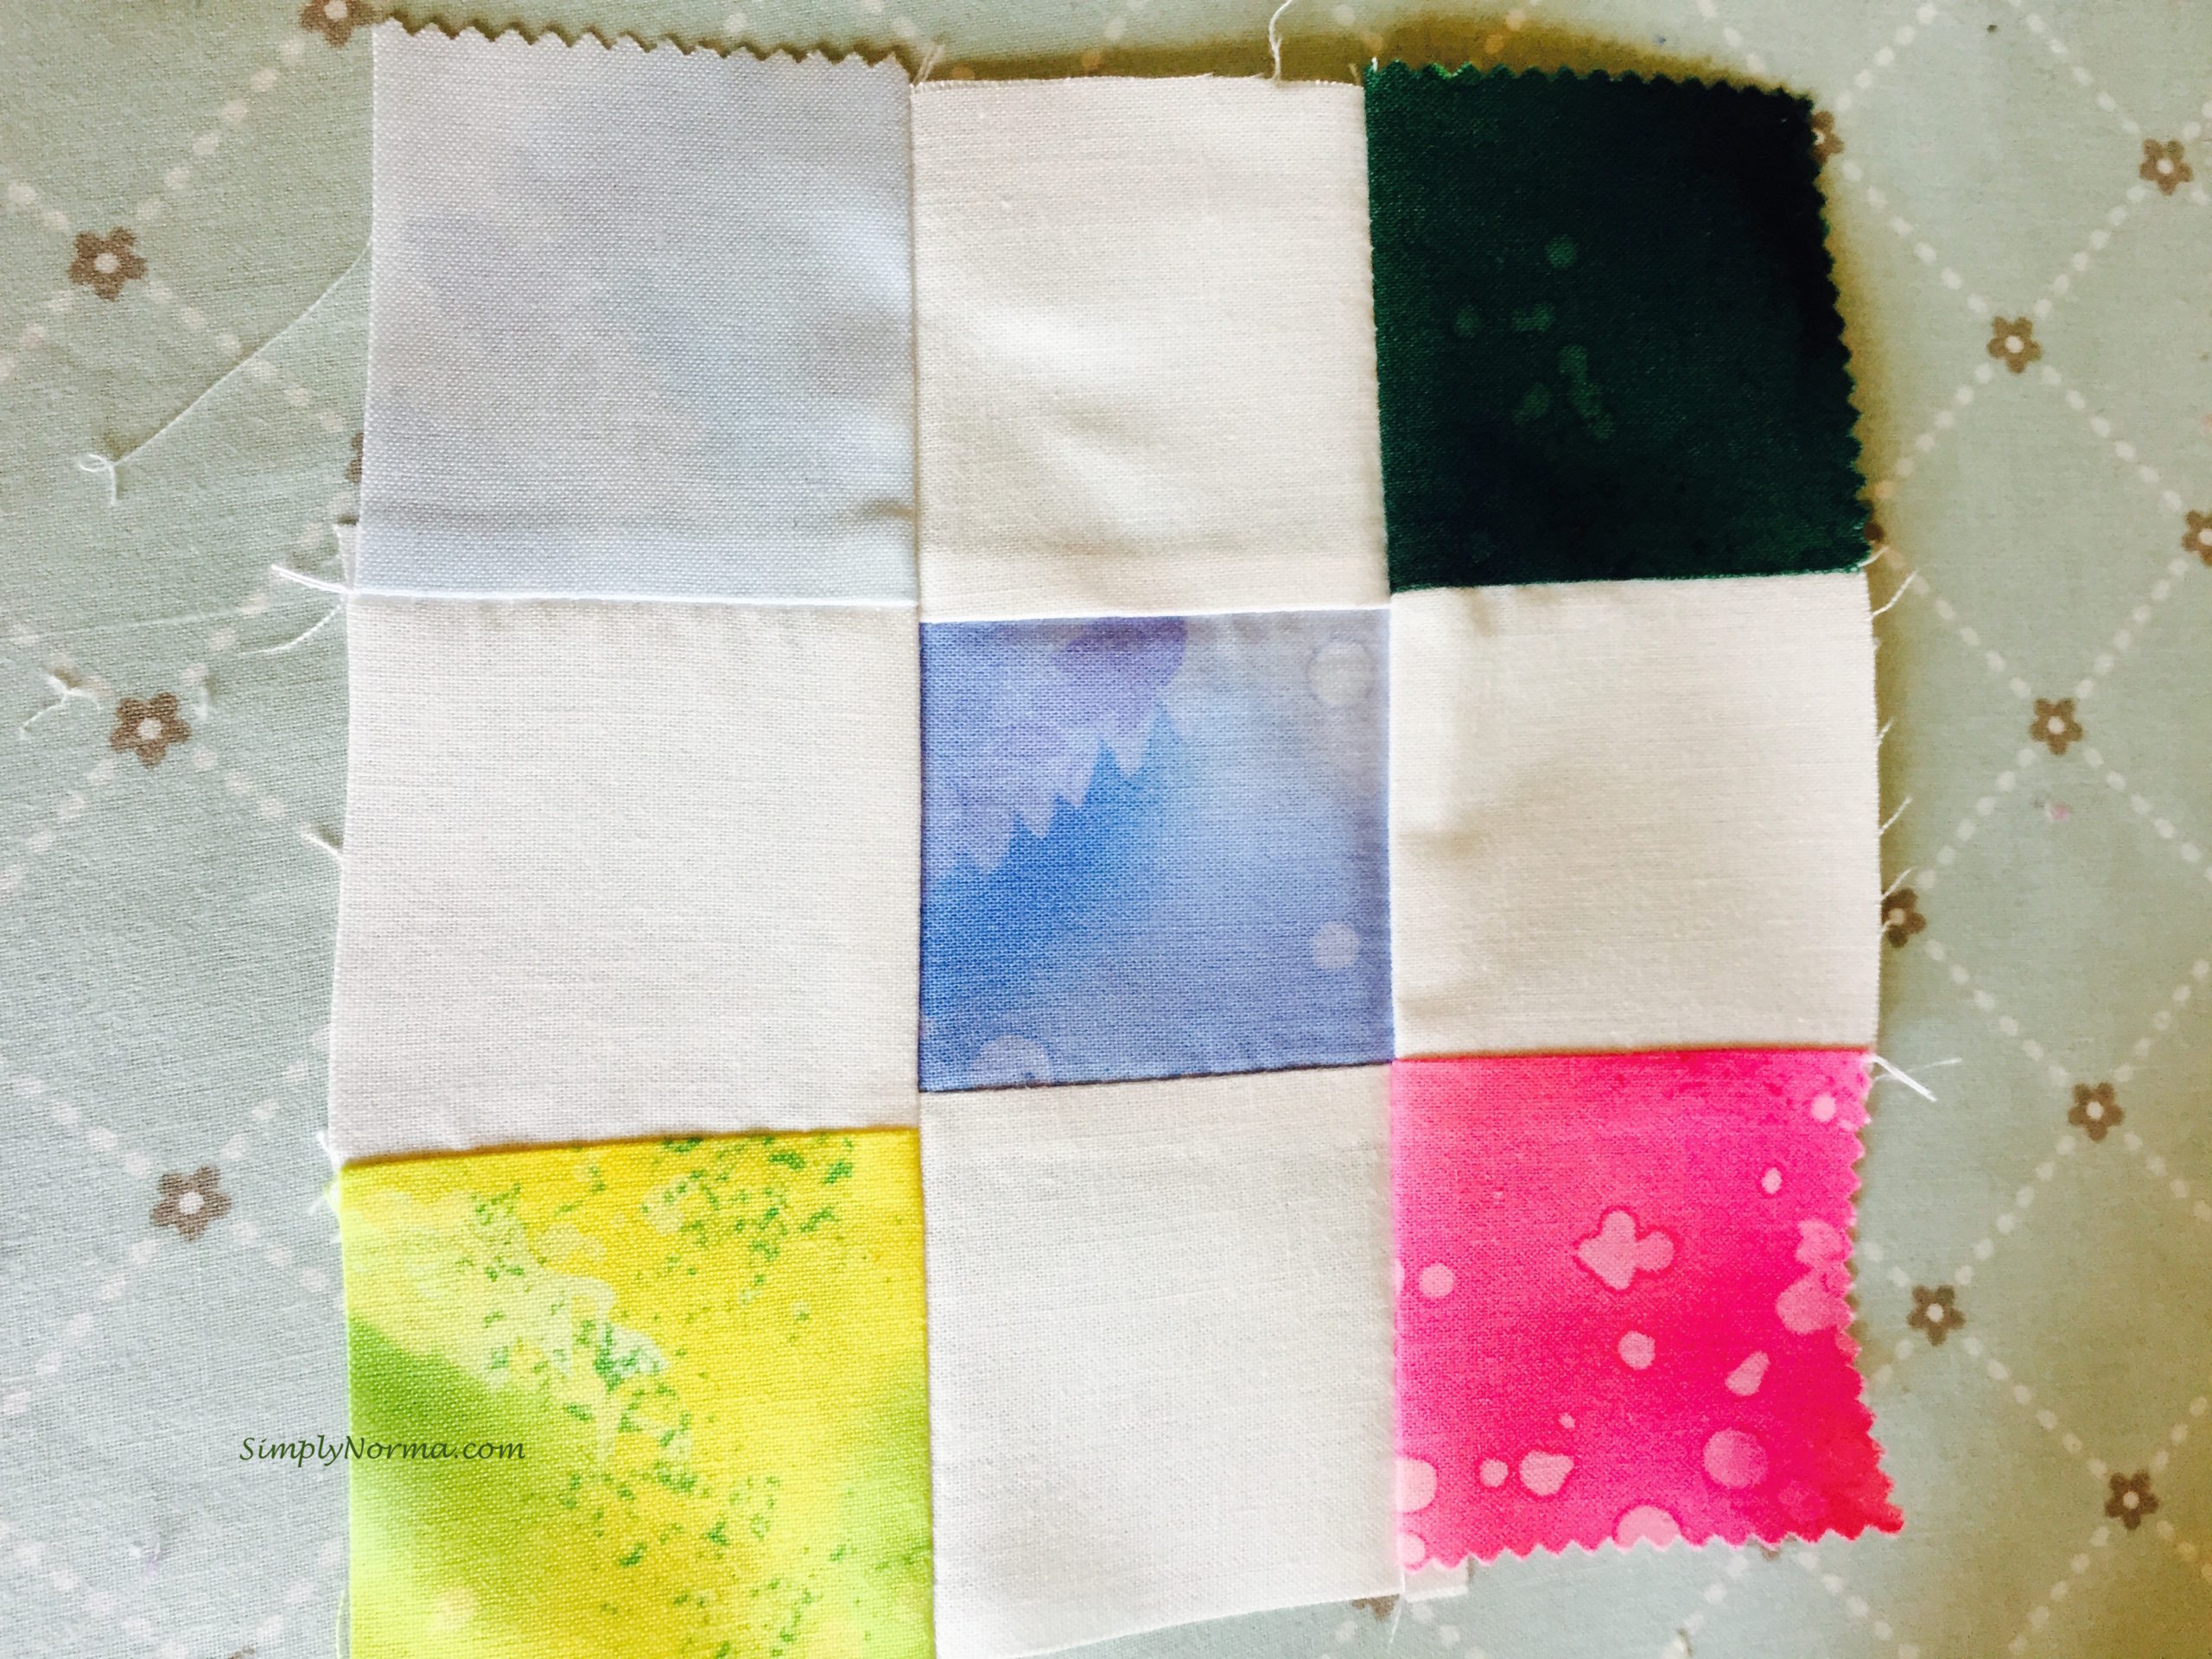
Next I put 3 rows of squares together to make a 9 piece square.
If you’ll notice, I made two different sets ~ the first had white on each end with a colored fabric in the middle and the second had colored pieces on the ends and a white piece in the middle. Â I then put those in separate piles.
I simply love the vibrant colors in this quilt.
Eventually you’ll be using 3 of these to make a larger square.
It is VERY important that the fabric is cut precisely or you’ll have problems later on trying to match pieces. But, don’t worry too much over it. I’m still trying to be a perfectionist at quilting but more and more I read of how it’s okay to let some of these things go.
Below is a picture of one large square that is not lined up very well. Â Blah.
Here is one that is much much better.
Sewing The Squares Together
I made 50 of these blocks and I starched each one. Whew!
Since this is a lap quilt, I used a king size bed to put the sewn squares on. Â This allowed me to see how the colors were lining up. Â As you can see, one large white square is sewn in between the color combination ones.
After all the rows were completed, I was able to step back and look to make sure I didn’t have colors that were next to each other to give it a more random look.
For this quilt I used a very light batting since I wasn’t sure who it might be given to (any ideas?) and I know folks all over the U.S. Â I also decided not to pin the top, batting and backing together but used a basting spray instead which worked quite well.
To reiterate, this is what the kit came with and what is needed:
1 Charm Pack of Fossil Fern fabrics – 100 5″ Squares (included in the kit)
3 Yards Kona Cotton in snow/white
Backing: 3 5/8 yard (need to purchase)
Batting: 62″ x 74″ (need to purchase)
The finished size is 54″ x 66″.
For the backing, I asked a couple of friends what color they thought would work and I used a burgundy color but any color would have worked.
After I checked to make sure everything was pieced together correctly (it wasn’t ~ I had a few pieces I had to hand sew as they had separated for some reason), I washed the quilt on delicate and in cold water. Then I checked again to make sure all the pieces were still together. I noticed that a few had come undone. Â Blah again! Â So, I hand sewed those and it was finally finished.
On a beautiful sunny afternoon, I stepped outside all decked out in my mosquito gear (jeans, long sleeve shirt and hat) along with my mosquito cologne (deet) to work in the yard.
Making sure my small wagon had all the supplies I needed, I headed to the back of the house to weed. What a perfect day, I thought to myself, as I started my weeding.
After an hour or so I looked around and decided that perhaps I needed a larger shovel so I headed back to the garage.
Walking to the front door of the garage, I noticed a turkey “hanging out.” Uh, no, I don’t think so. I waved my arms and scared it away. That was easy ~ or so I thought.
After making sure the turkey ran well into the woods, I grabbed my shovel and headed back to do more weeding. Feeling quite accomplished at the work I had completed in a couple of hours, I put everything into my wagon and headed back to the garage to put my tools away.
Then I noticed “it” on the ground. Â A white blotchy substance made a path into my garage. Hmmm …
What could that be?
Putting the wagon away, I followed the “path” into the garage. Next to the car. Next to the bicycles. Back to the shop.
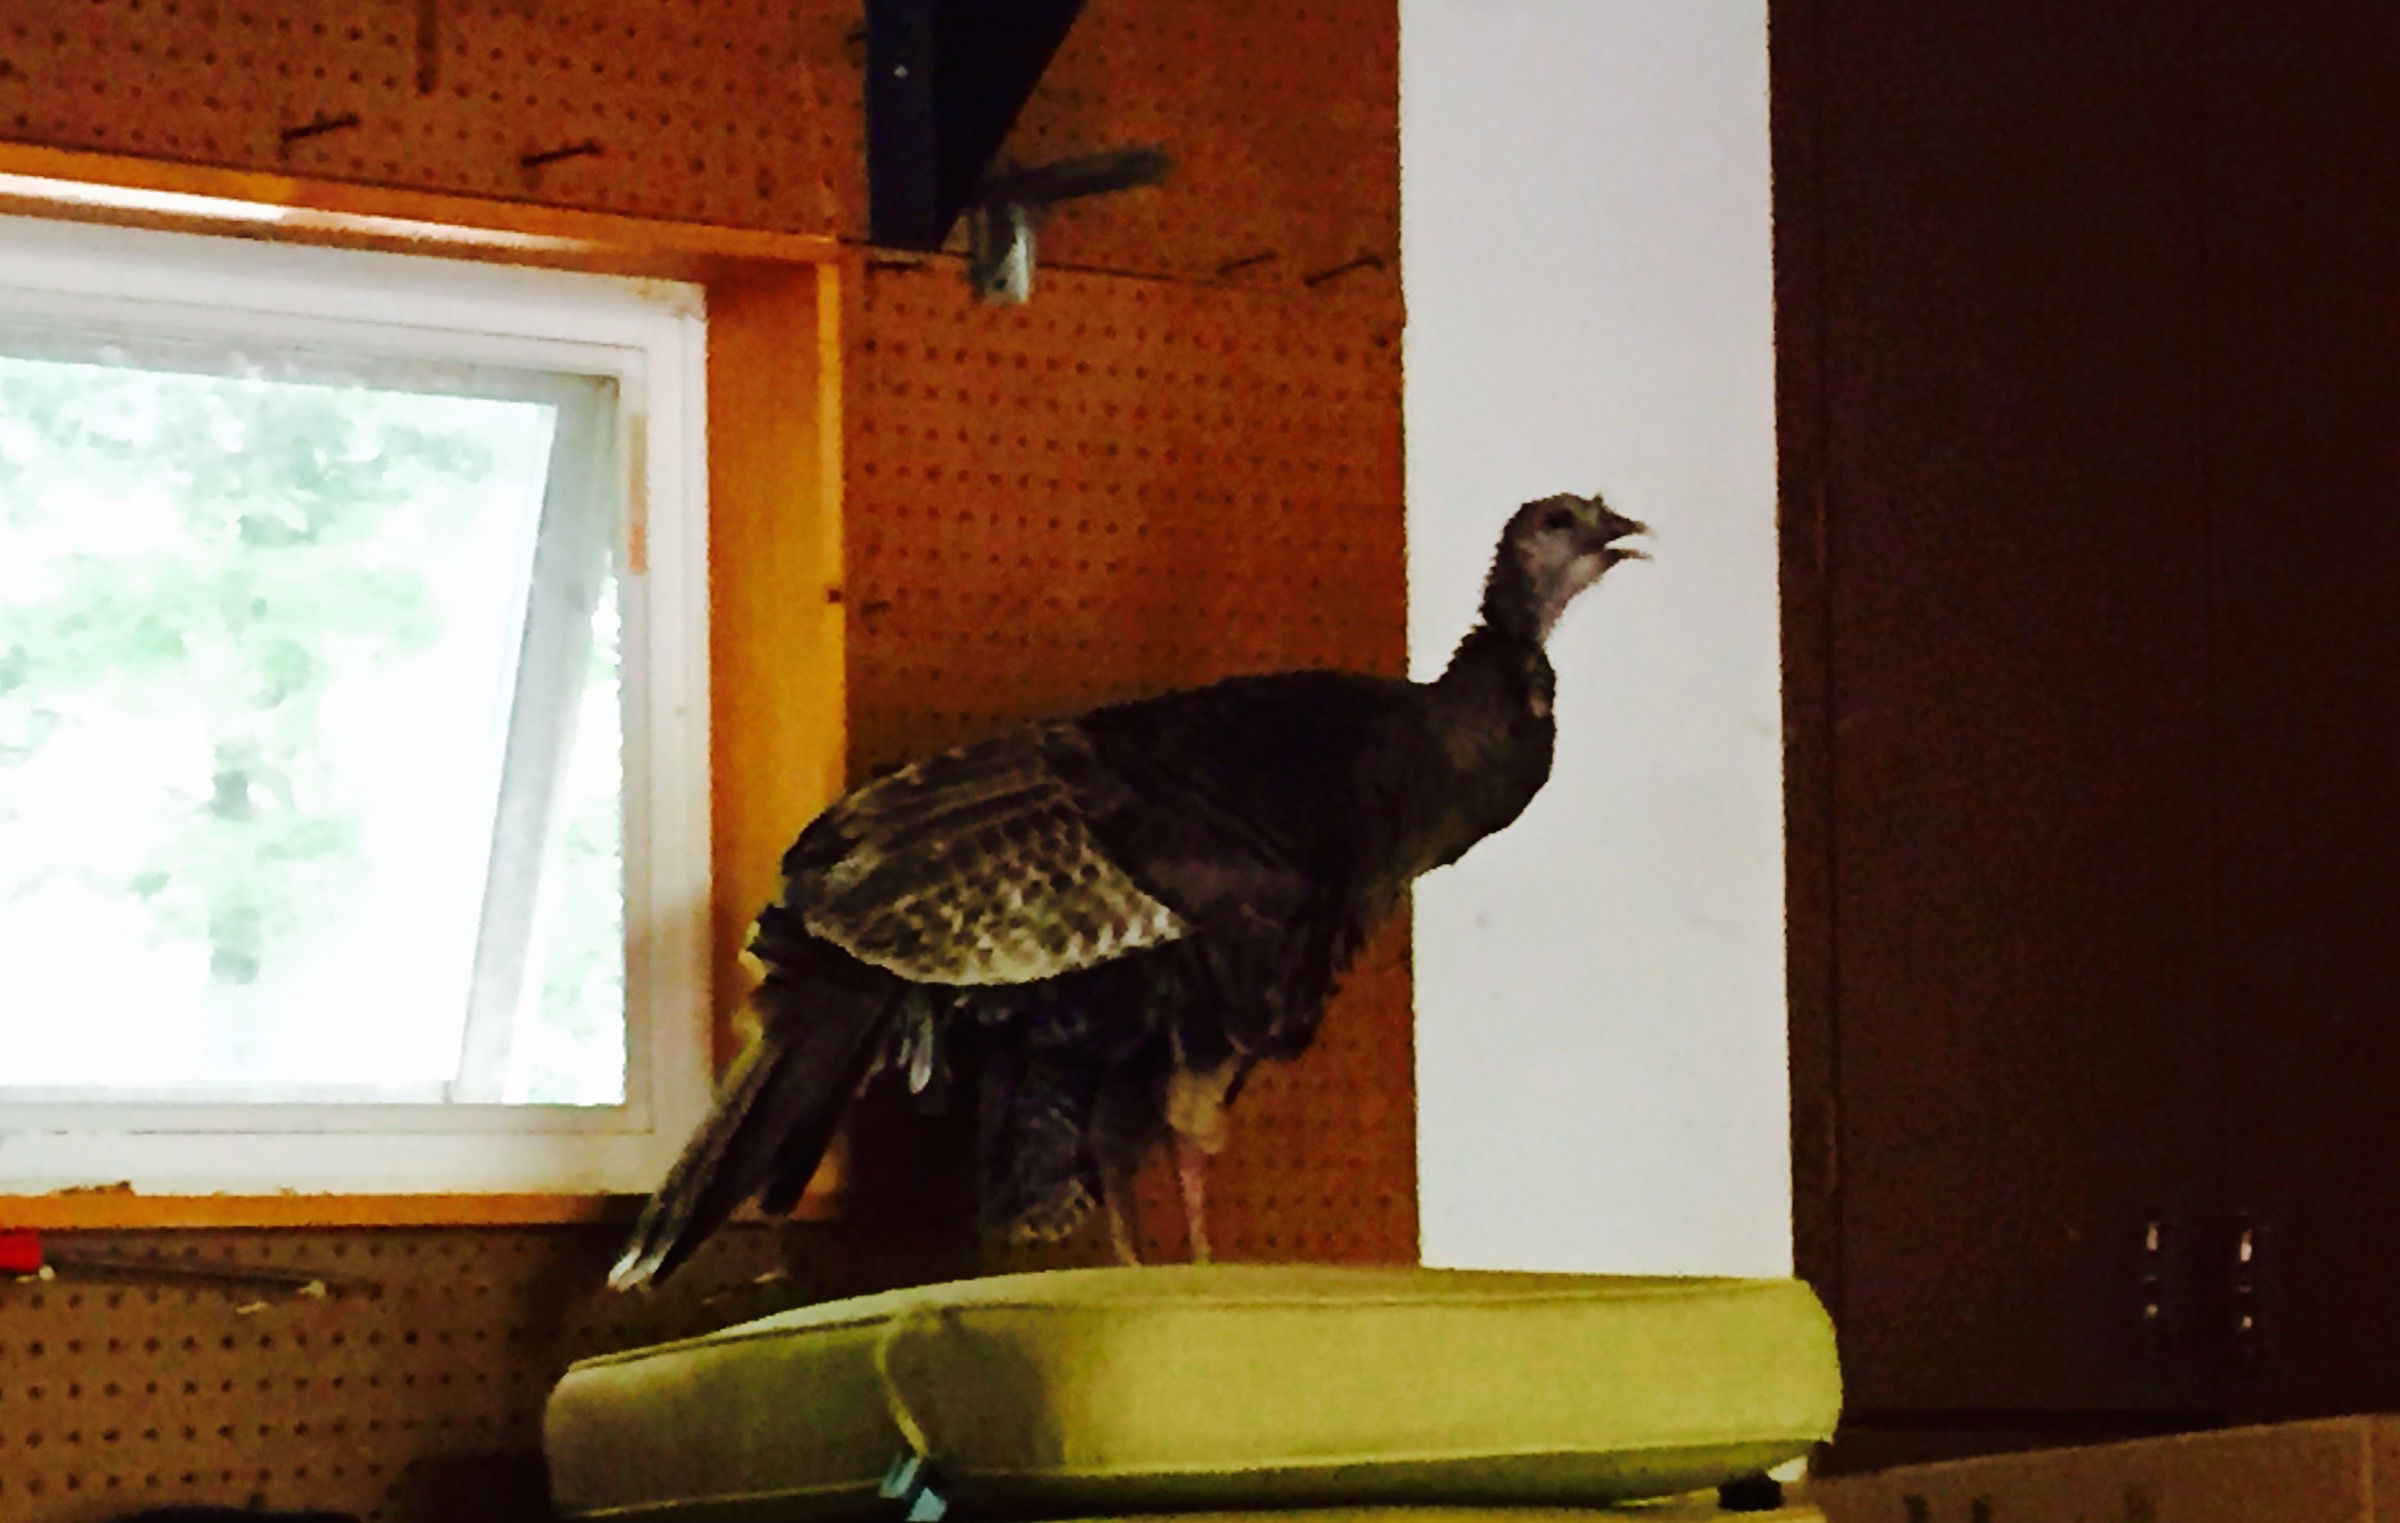
Then my eyes followed the path up a table where she was …
Sitting on top of my deck cushions was the largest meanest looking turkey who had made a “poop” path.
Turkey
Uh, okay, what do I do now? I knew that this required much deep thinking …
At first, I tried reasoning with the turkey and scolded her for being in the garage. Â Then I pointed to the garage entrance and asked her to leave. “Go on” I said in my stern (probably incomprehensible) voice. Â After a few minutes of coaching, I came to the realization that this was not going to work. (Uh, you think?)
Naturally I put my thinking cap back on and thought about this logically.
Let’s see now ~ turkeys have wings and, as I’ve observed, don’t fly much which makes them similar to chickens. Of course! Â What a bright idea I had!
In the shriek-i-est voice I could muster, I clucked. And clucked … and clucked … and, hmmm … I don’t think the clucking was working very well as I was getting very odd looks from this turkey.
Okay so I had to think a little deeper. I mean, I had to really think like a turkey. (hahaha)
I finally thought I had the solution to my problem.
In my shriek-i-est voice I clucked again but this time I flapped my arms and started walking out of the garage. I tried this several times as I thought about the story of the Pied Piper who used a magic pipe to lure rats away from a town. I did this for, oh, ten minutes or so. (Where is a camera to make a video for YouTube when you need it? Â This probably would have garnered a million views ~ yes?)
Well, do you think it worked?
Sorry to say, all the turkey did was turn its head from one side to the other trying to figure out what I was doing. Â At least I made it think, no?
I was down to my last resort ~ waiting til my husband came home from work in a half hour.
And husband was quite bold about the whole matter. He simply took the end of a broom and poked it gently and this HUGE turkey flew out of the garage. Â You should have seen the wingspan on that thing!
So ~ what’s the lesson in all of this?
Never ~Â ever ~ try to think like a turkey. Â (laughing)
We were having water “issues” for quite awhile ~ stinky smelling water, rusty water, etc. I knew in my gut something was wrong as our neighbor across the street told us his water is clear and good-tasting.
So it was that one morning my husband woke me up and said “We have no water.” Blearily I got up to check and, yes, we had no water (now, why would I have doubted him?). I’m not sure what type of help I could be but, hey, gotta support the husband. I called our home warranty company and they told me they would have a contractor call me to come take a look.
In the meantime, husband headed downstairs to where the water heater, water softener, etc. are located and turned the water softener on and off. Â Whala! Â The water came back. Â So, I sheepishly called the home warranty company back and canceled the appointment.
The water seemed to have very low pressure though and throughout the day I tried to conserve as much water as I could. The next morning we woke up to no water again. Â Bah!
A not-so-quick call to our home warranty company and within a couple hours I had an appointment for someone to come to see what the problem was.
Sure enough ~ the well water pump had to be replaced. Â And so our journey began.
Below is a picture of the well cap which goes over the casing that has the pipes that go to the well pump. The company will remove this cap and have to pull pipes from here to get to the water pump.
Well Cap
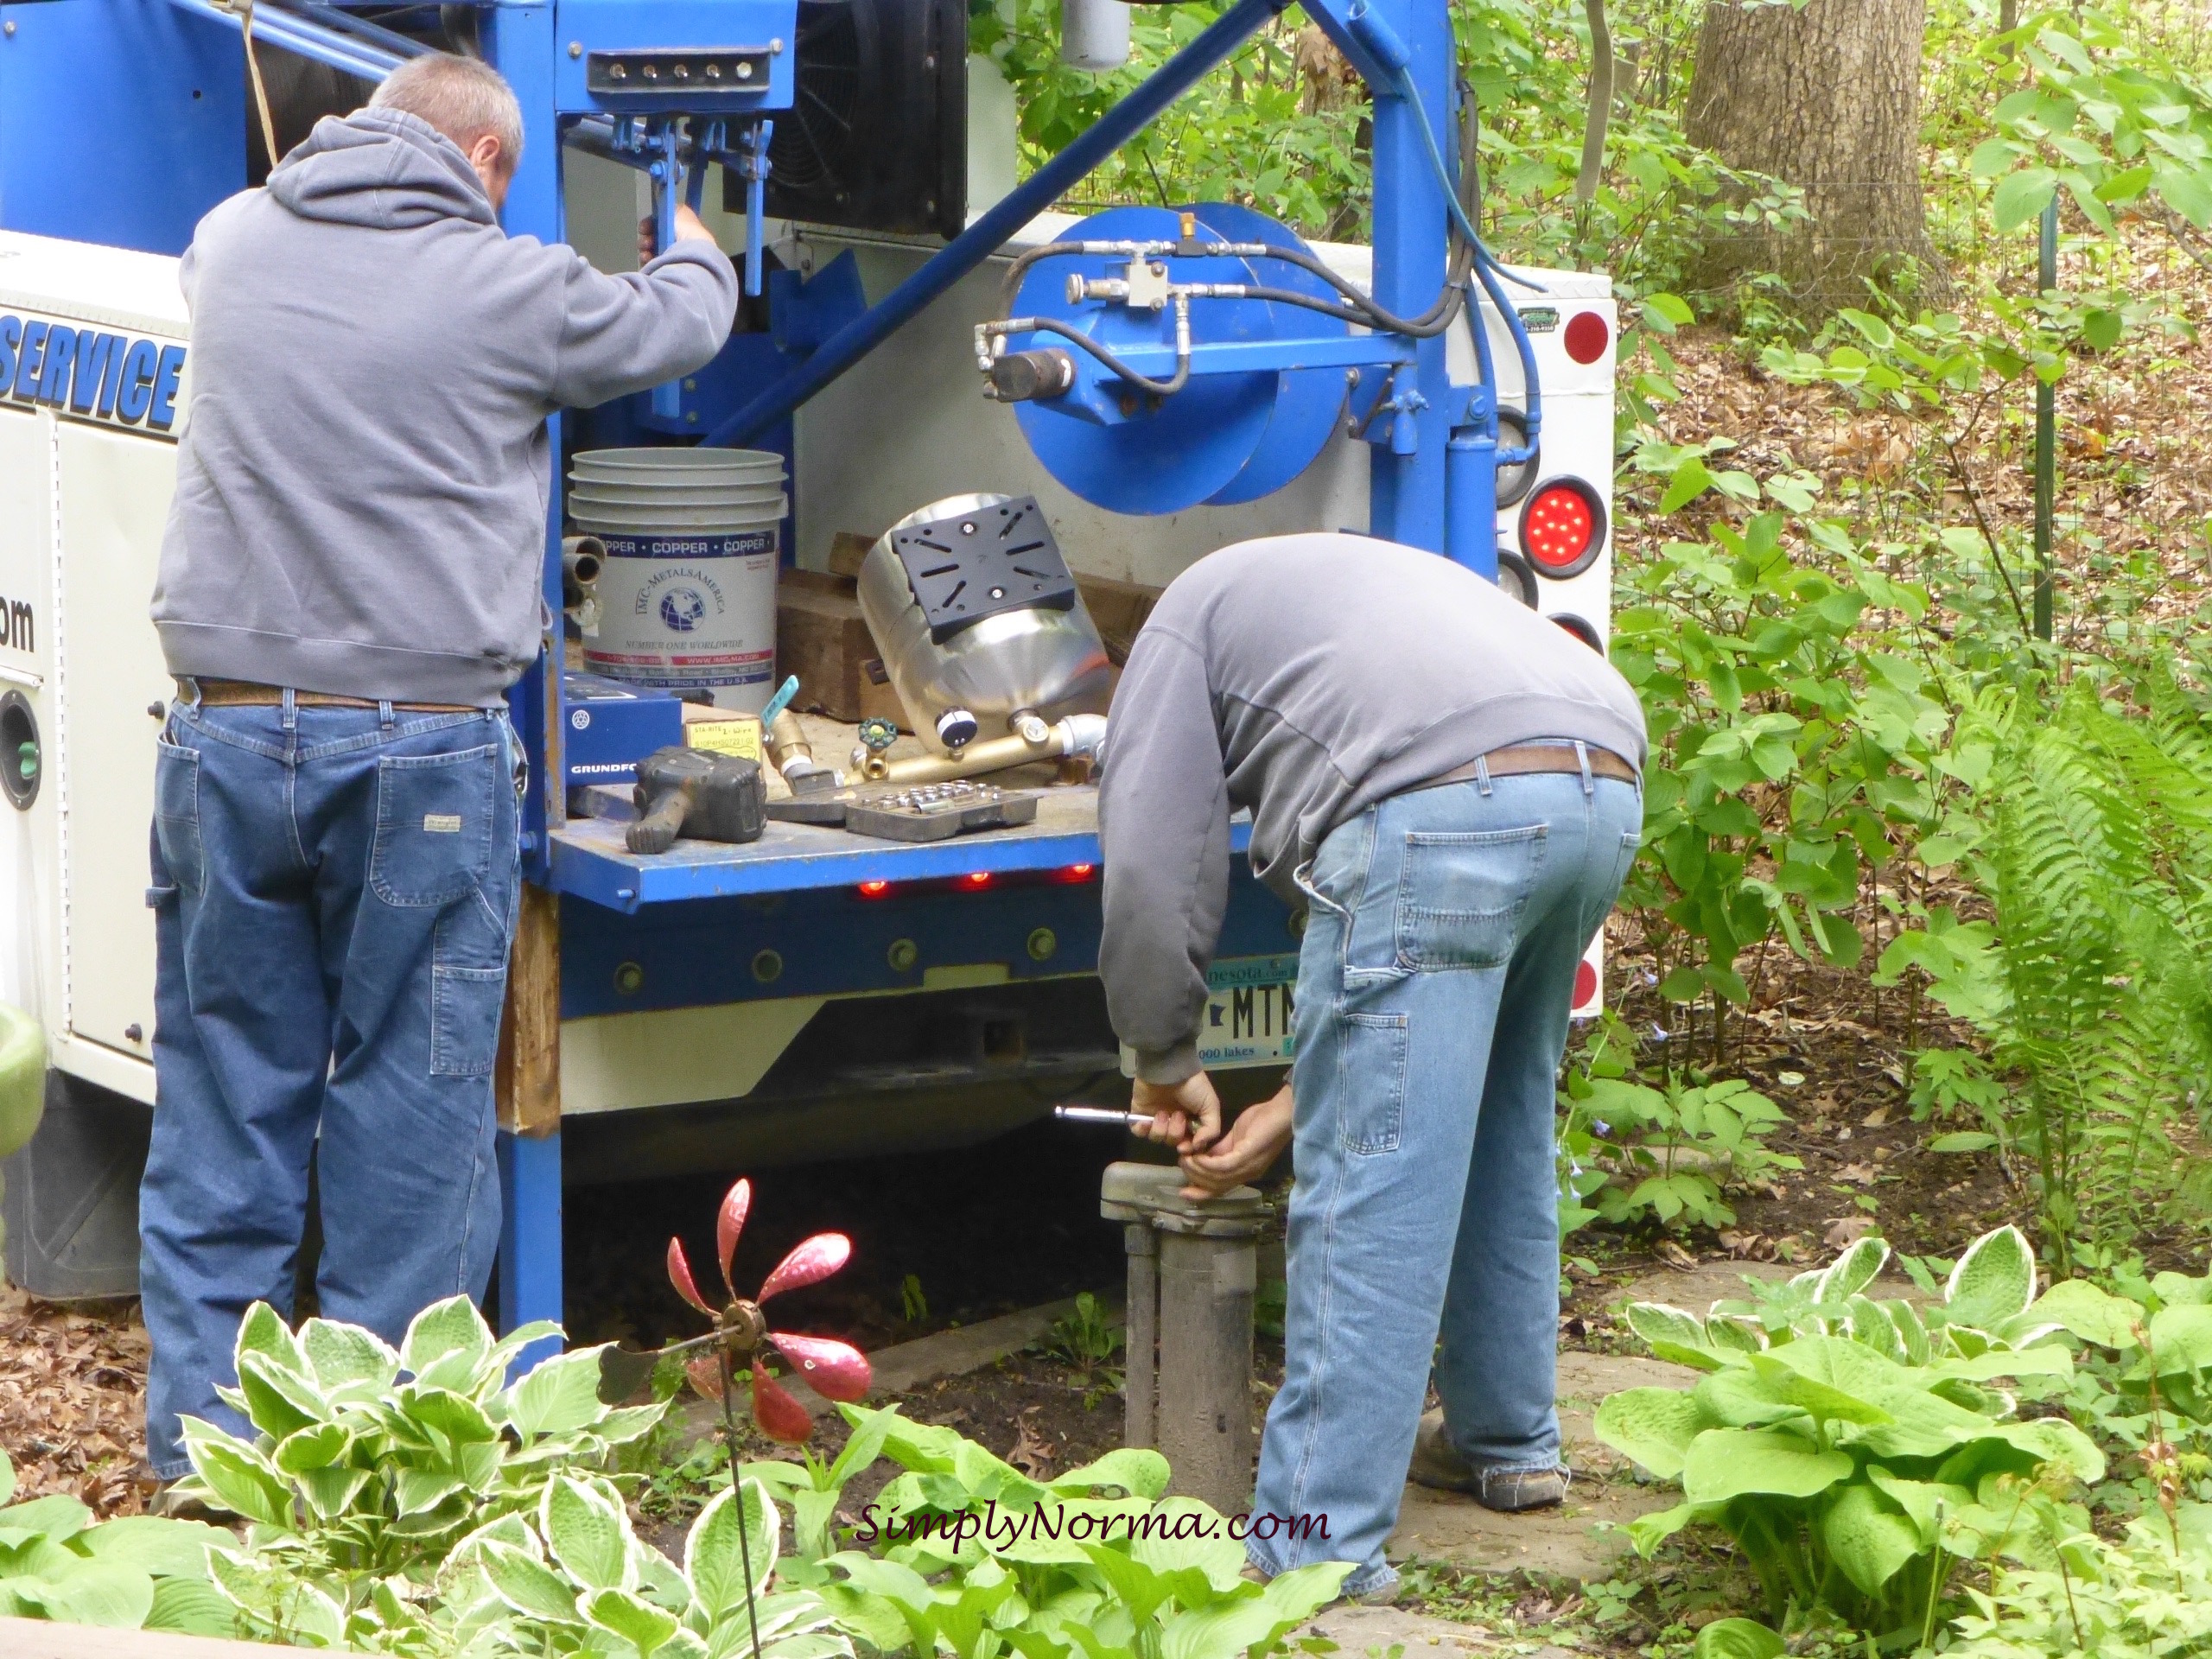
Here’s a picture of the men working to remove the well cap and getting the truck ready to remove the pipes from inside the casing.
Replacing A Well Pump
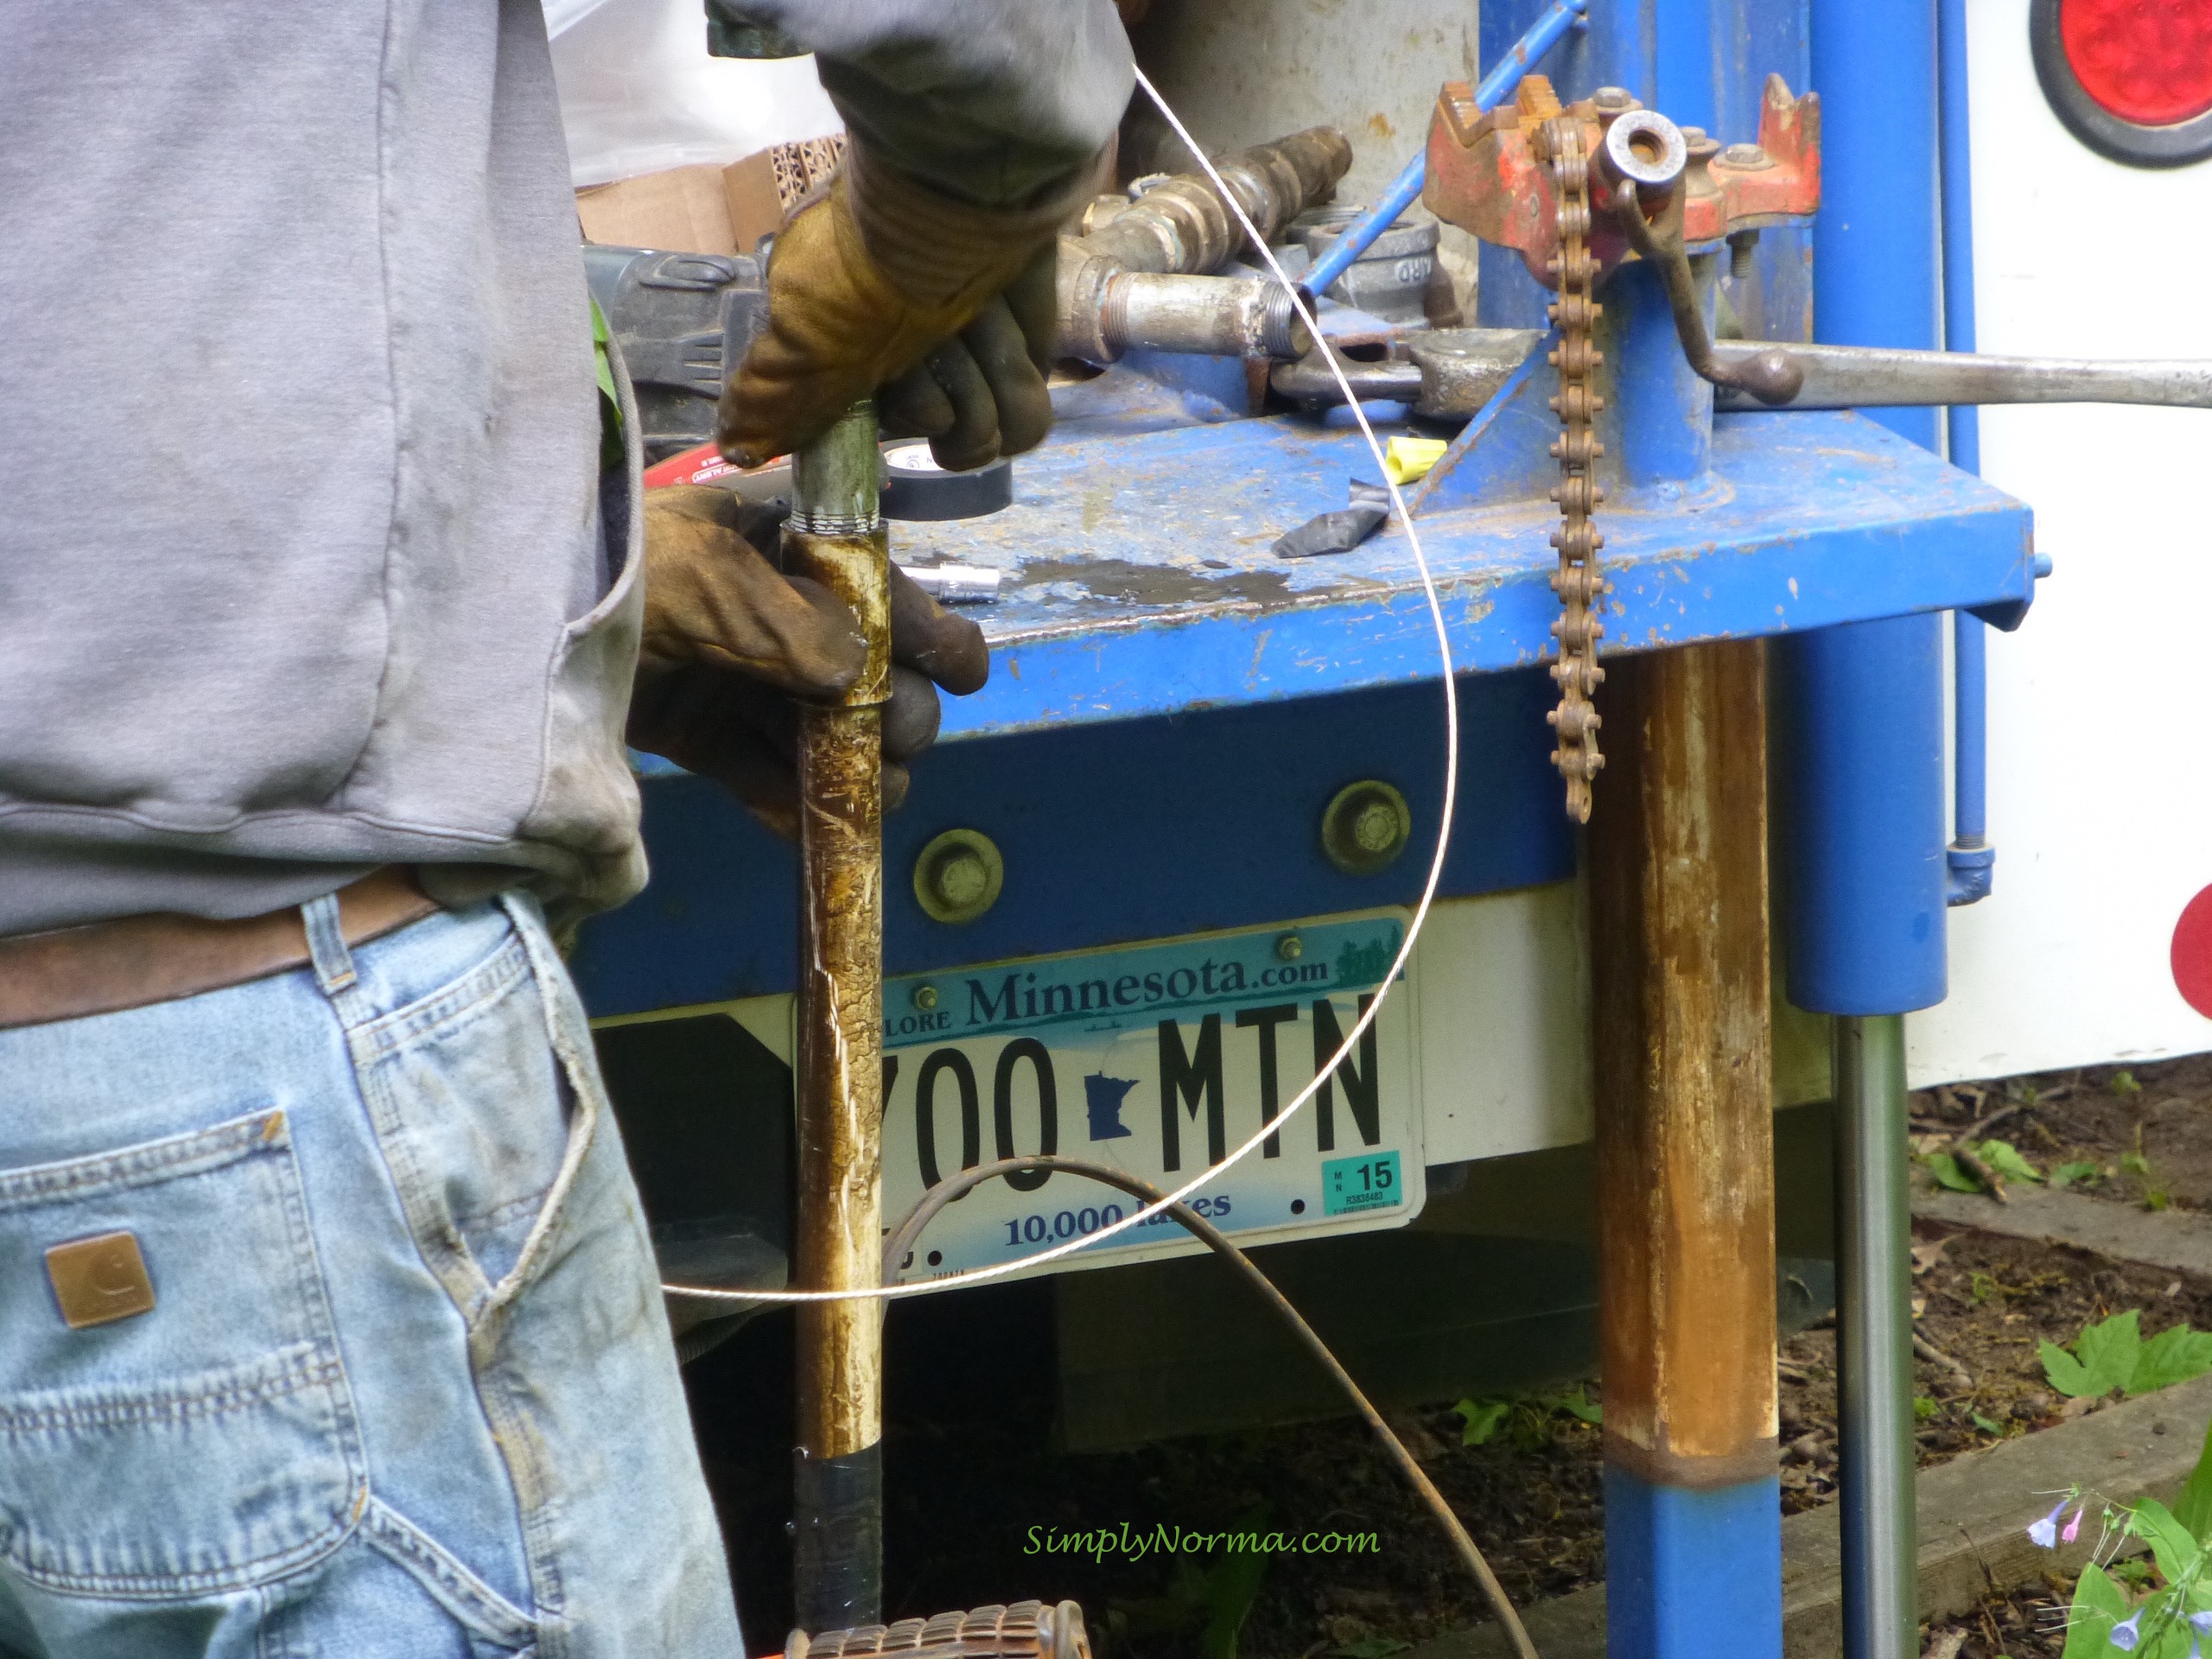
The top of the truck had this long “tower” that has a cable on it so each pipe can be pulled out since the well is approximately 179 feet deep.
Replacing A Well Pump
The first pipe came out easily, was galvanized and looked quite clean.
Replacing A Well Pump
A large wrench was used to turn the galvanized pipe to help with its removal.
Replacing A Well Pump
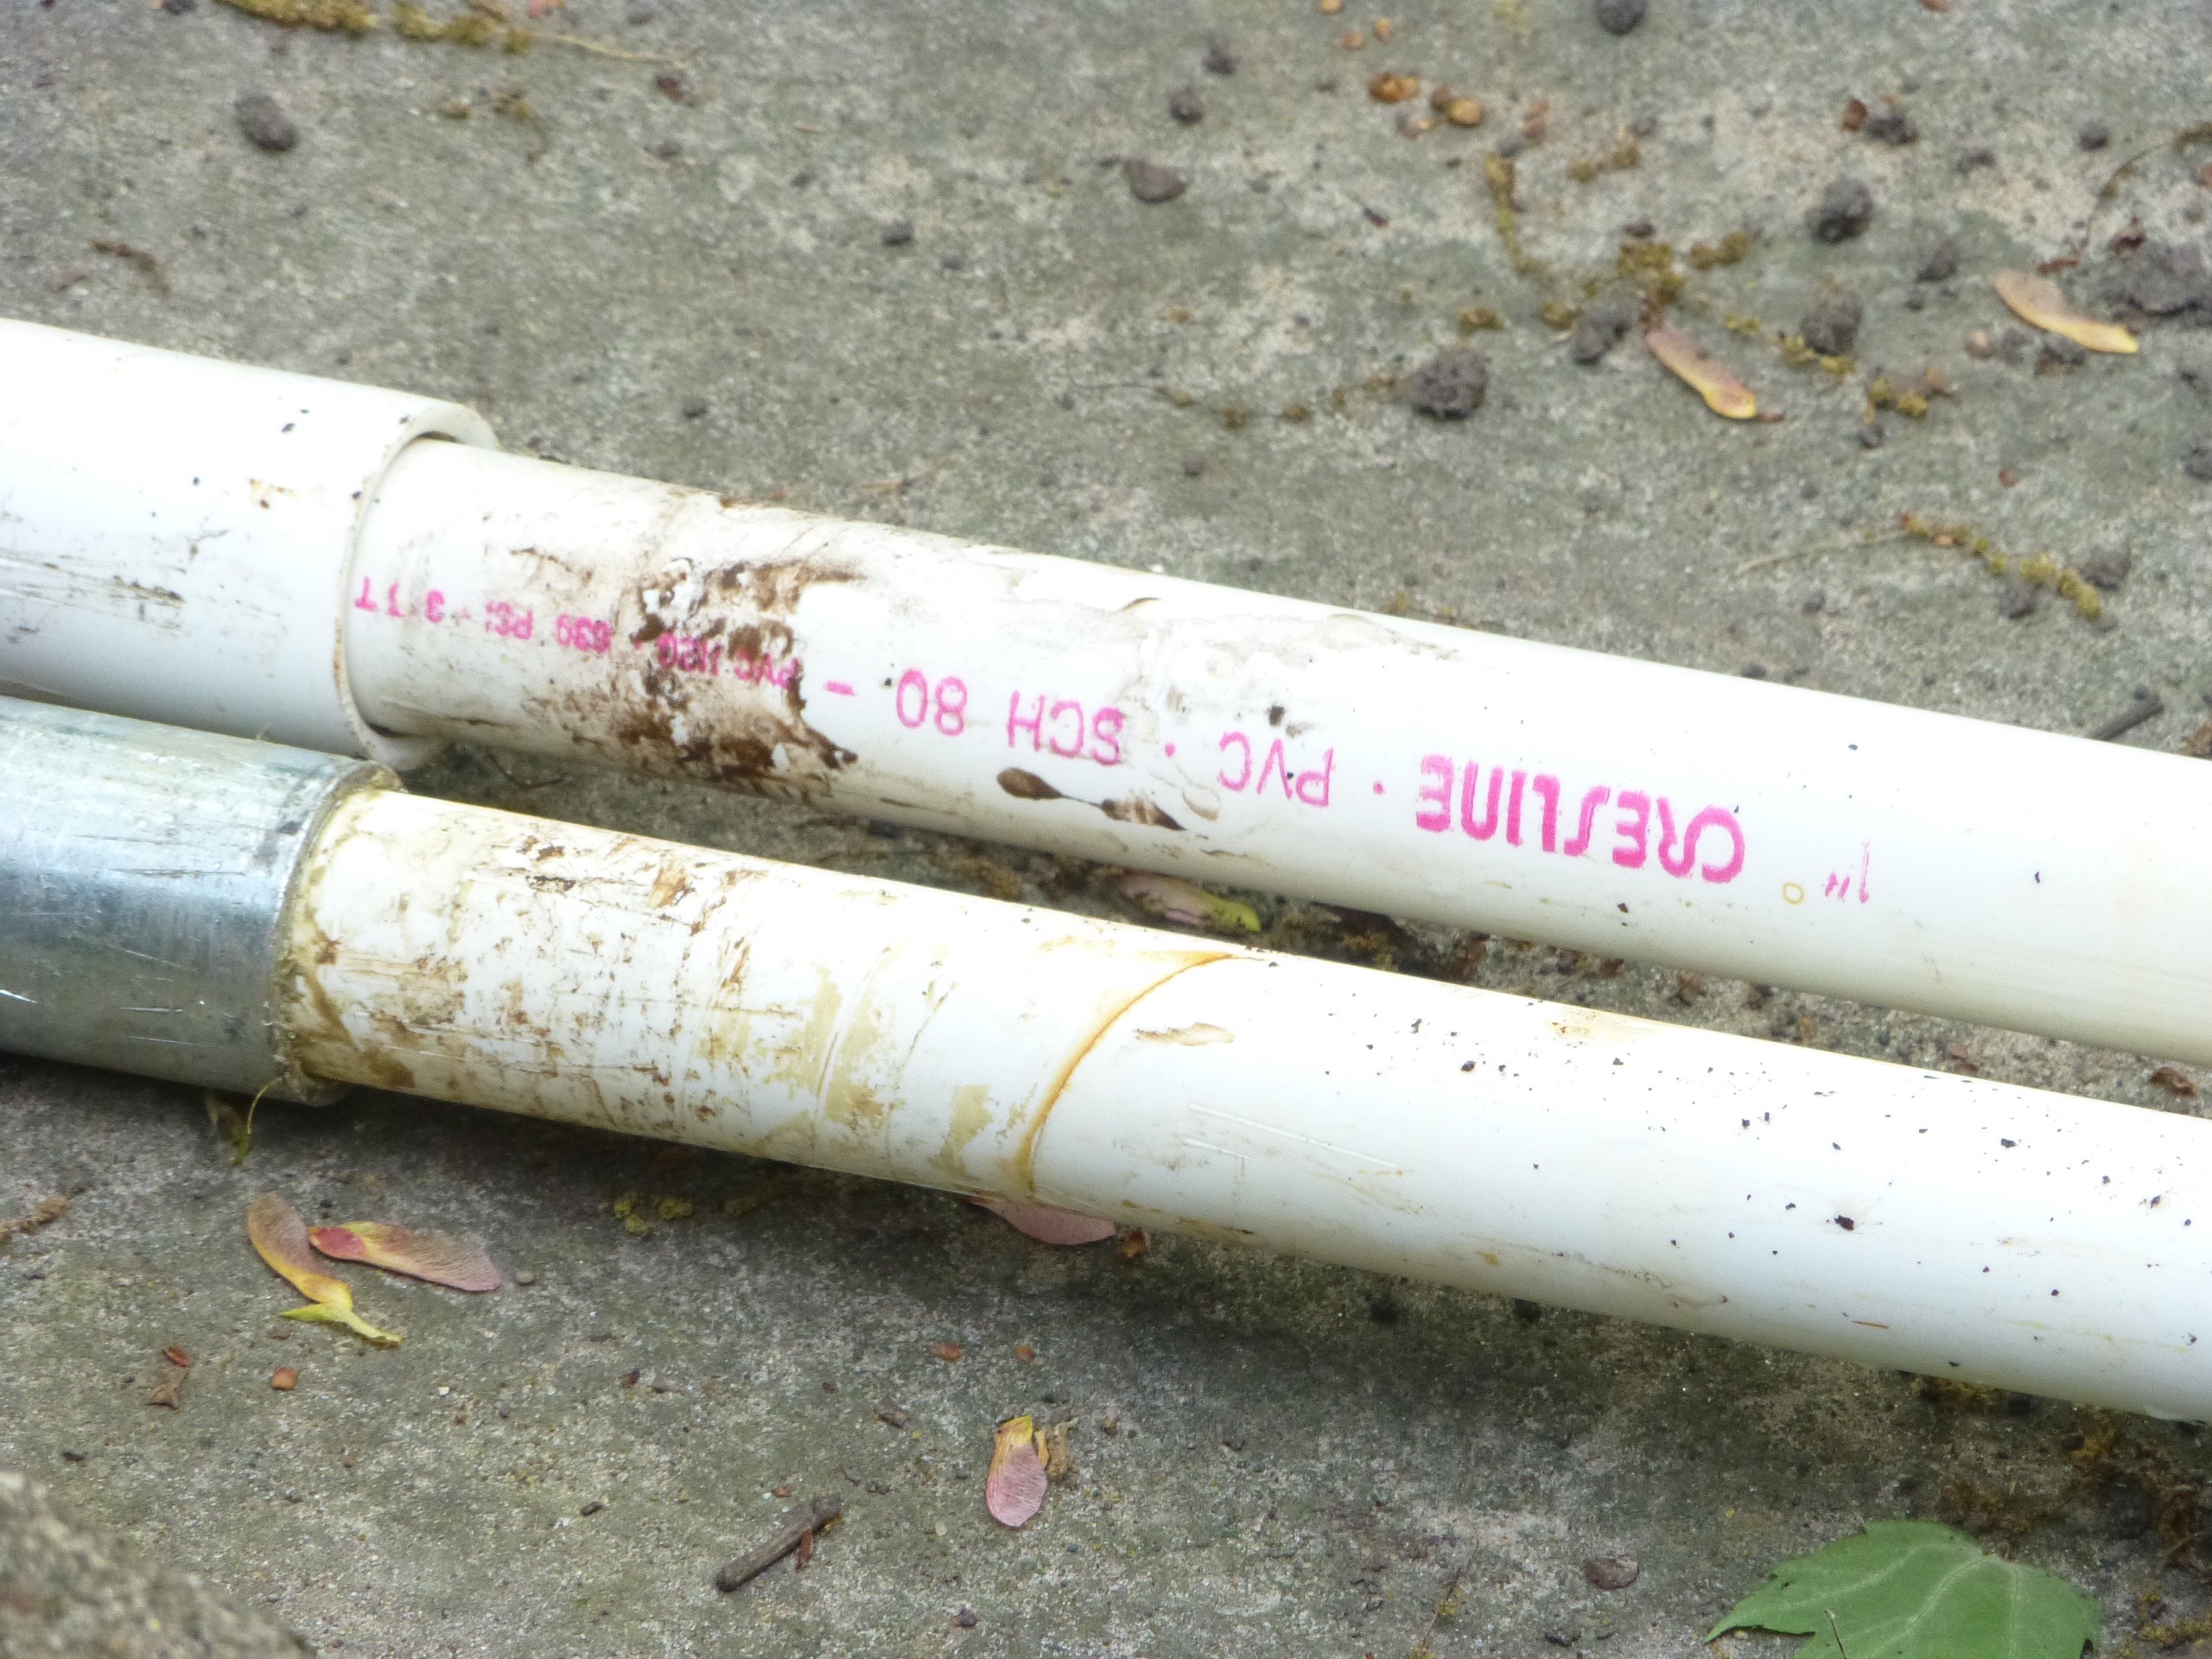
The rest of the pipes were made of PVC material.
Replacing A Well Pump
The further down the pipe was the dirtier it looked as it was removed.
Replacing A Well Pump
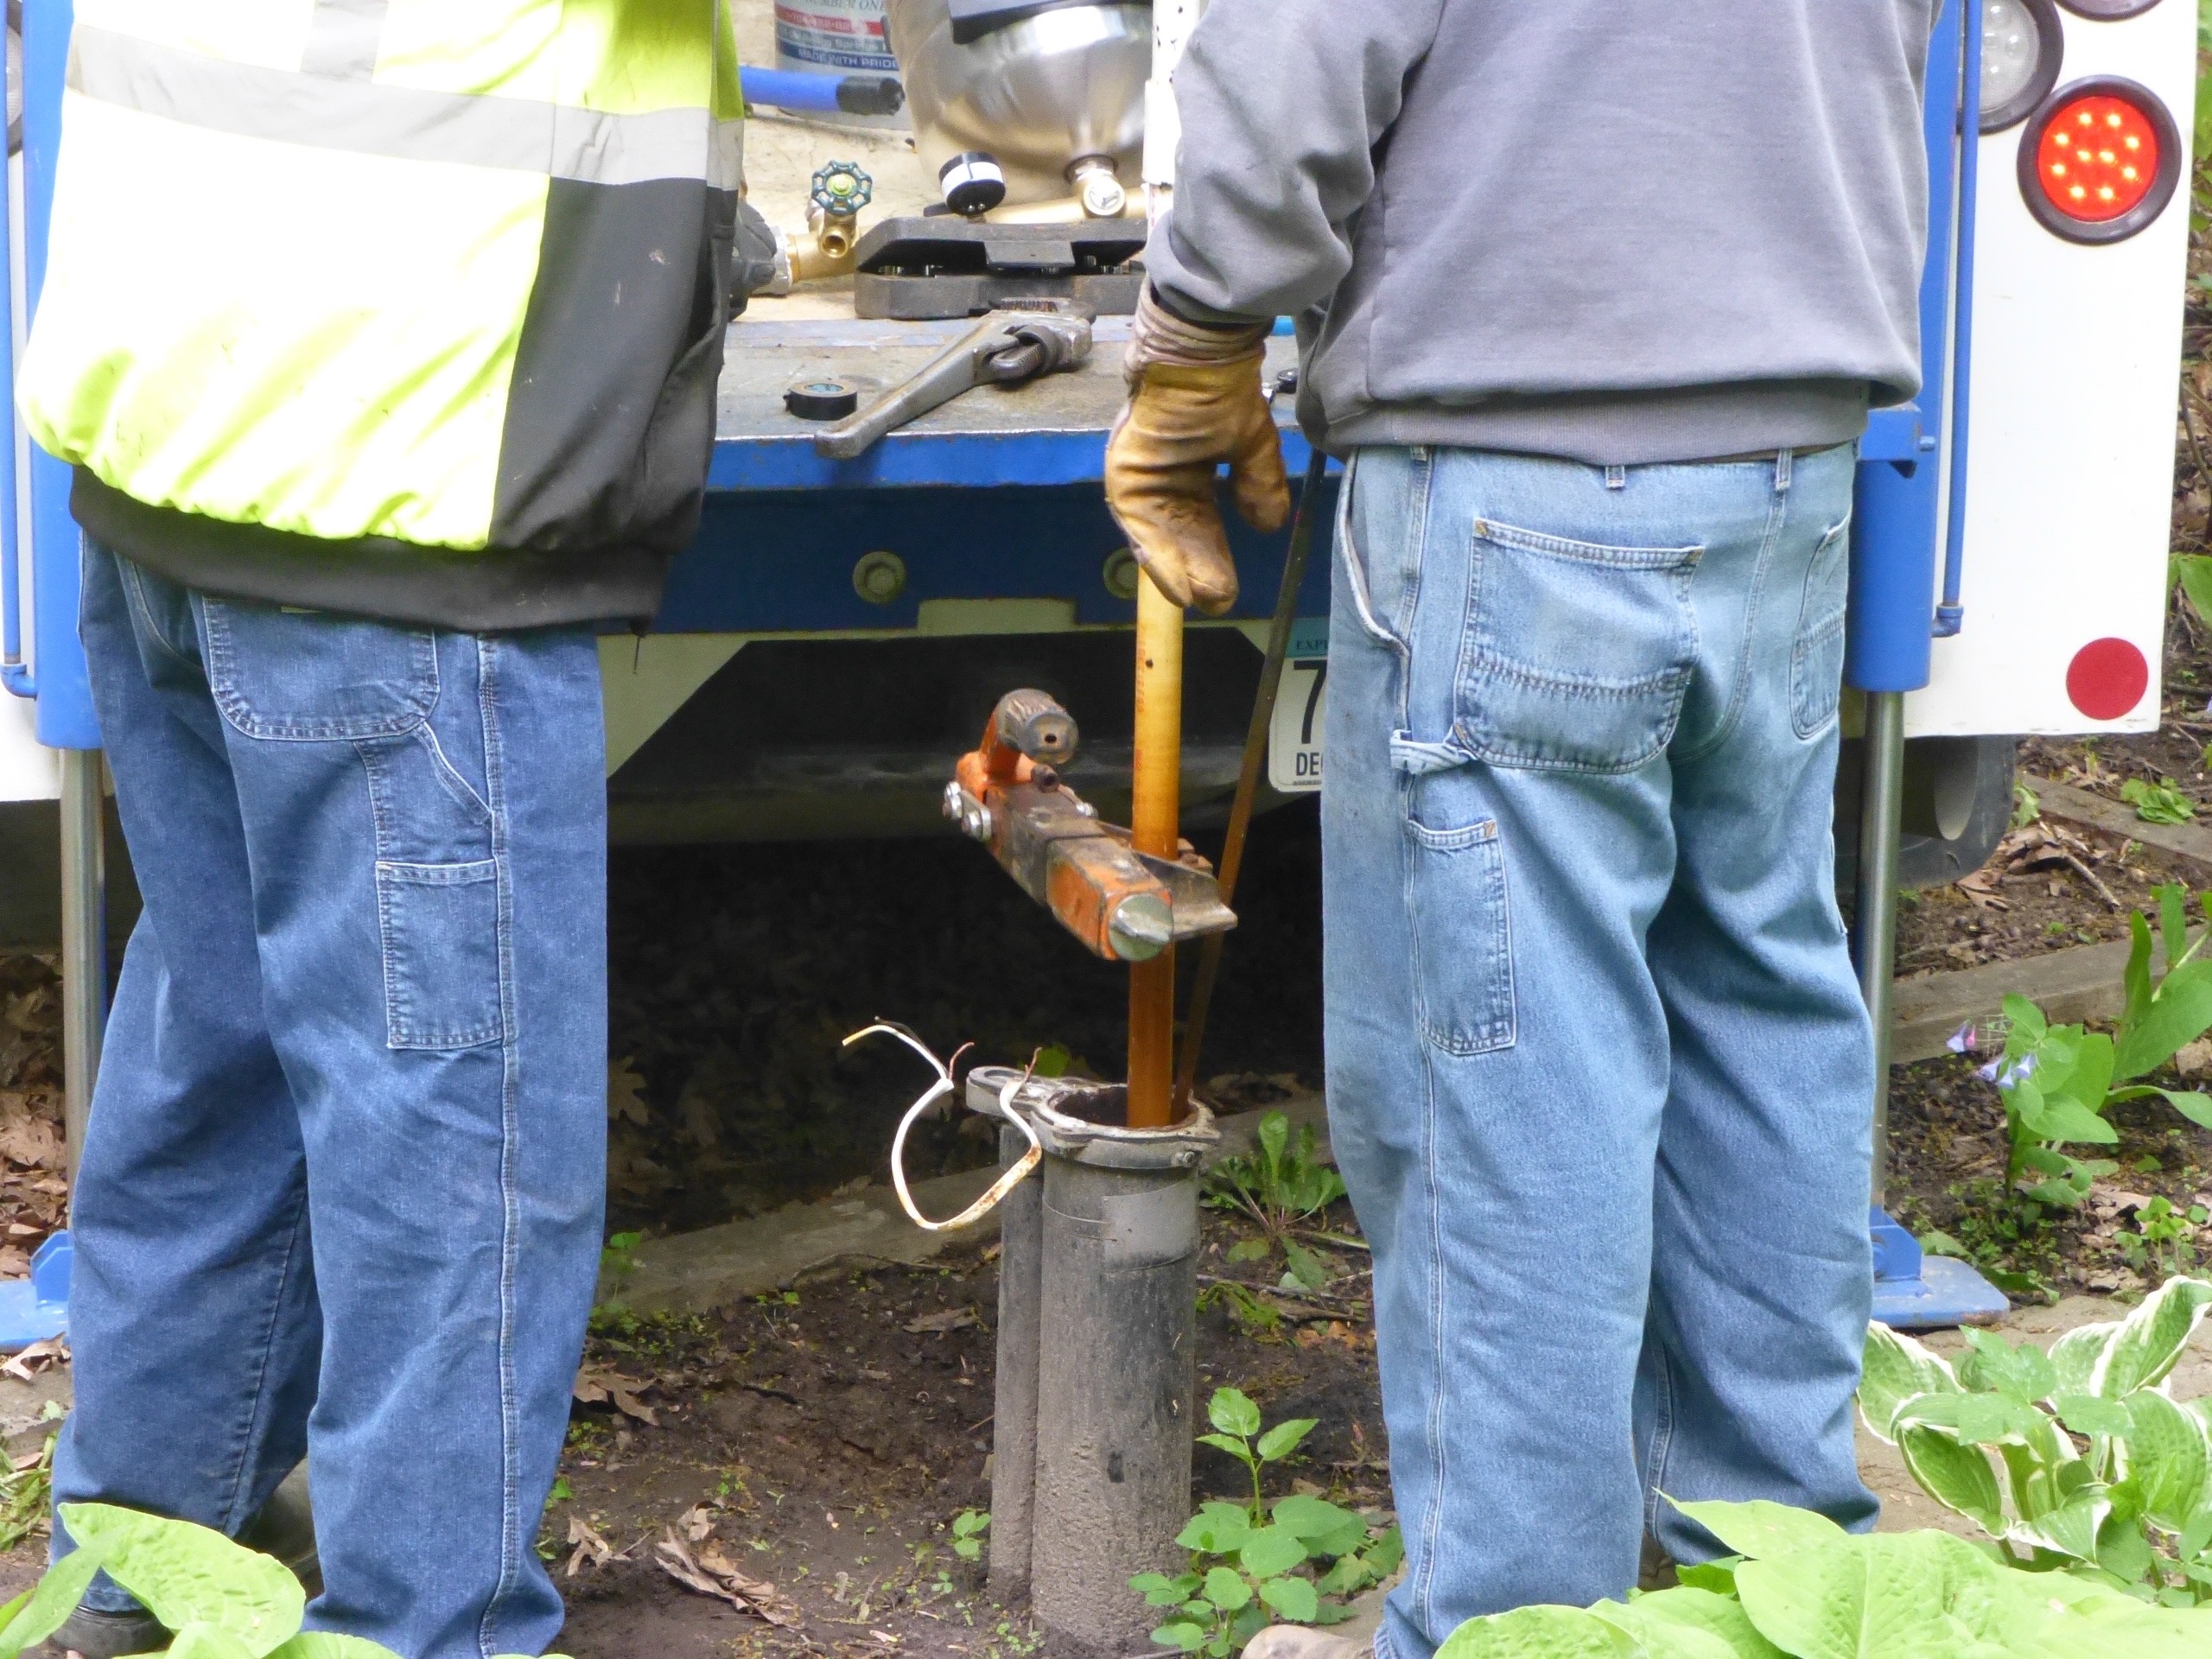
The wrench was quite helpful in removing one pipe from another.
Replacing A Well Pump
And sometimes more than one wrench had to be used.
Replacing A Well Pump
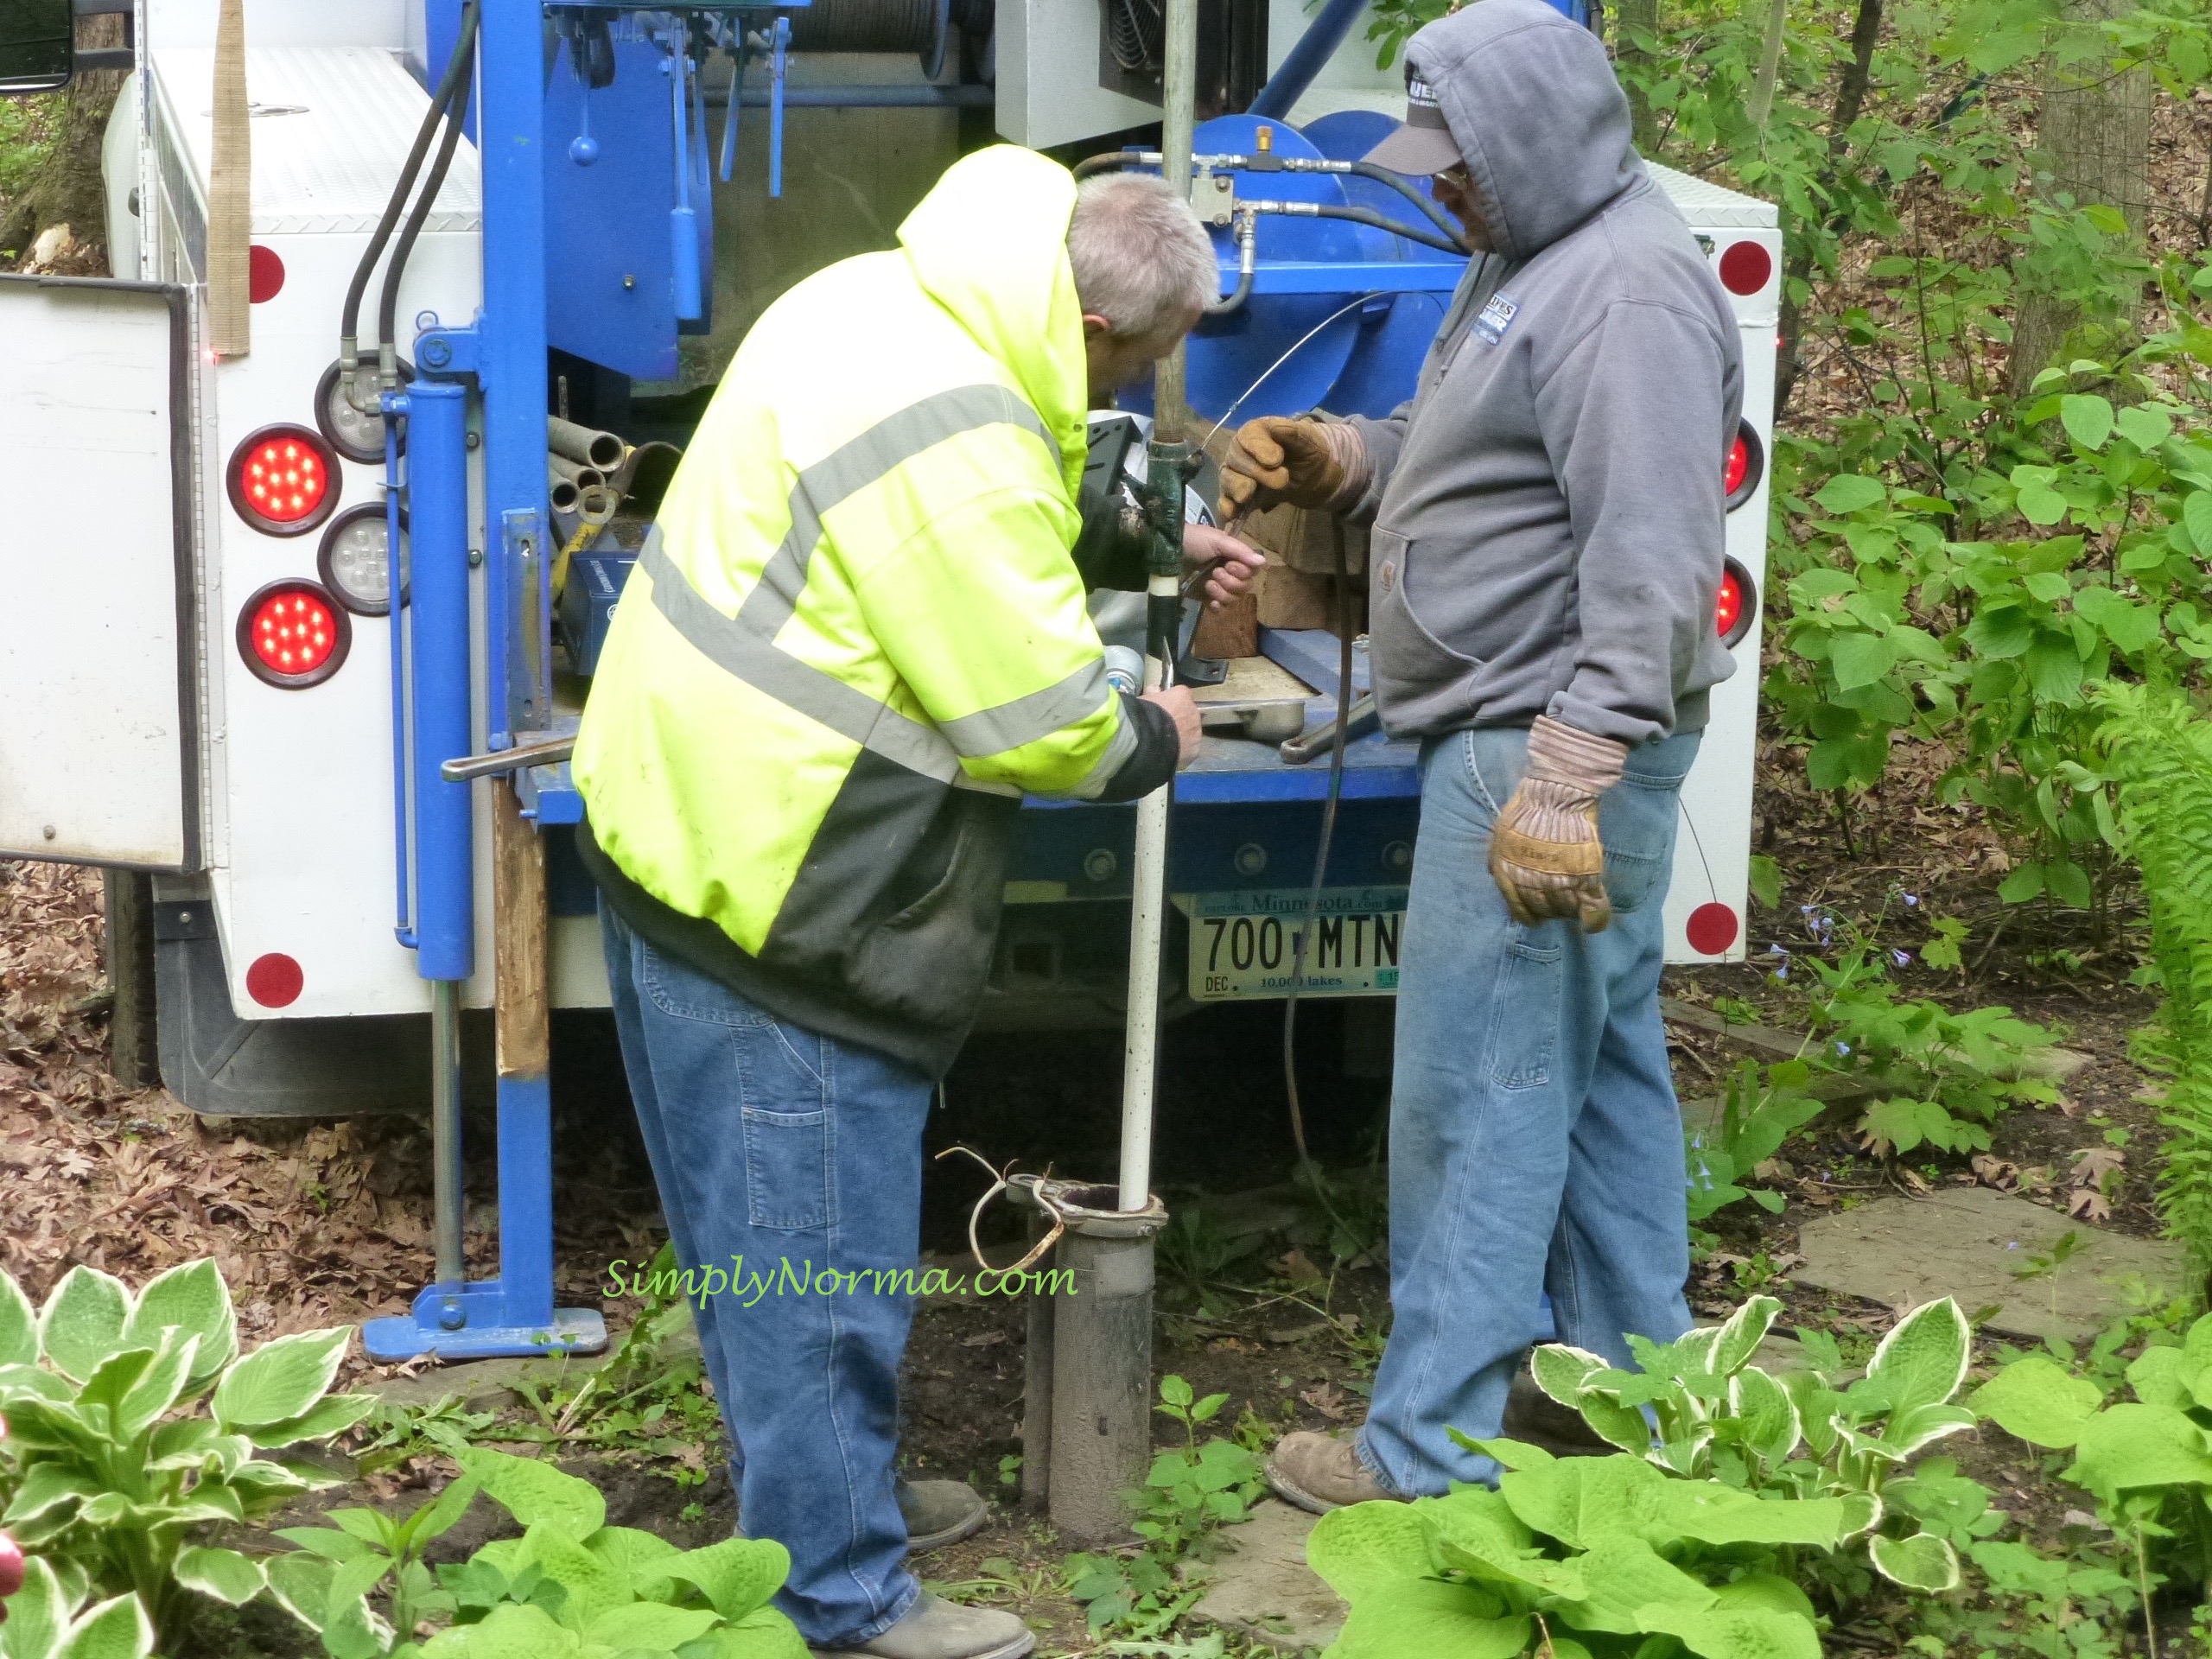
The cable was quite long and each time one pipe appeared it was removed from the cable and set to the side.
Replacing A Well Pump
Notice how the pipes are joined together.
Replacing A Well Pump
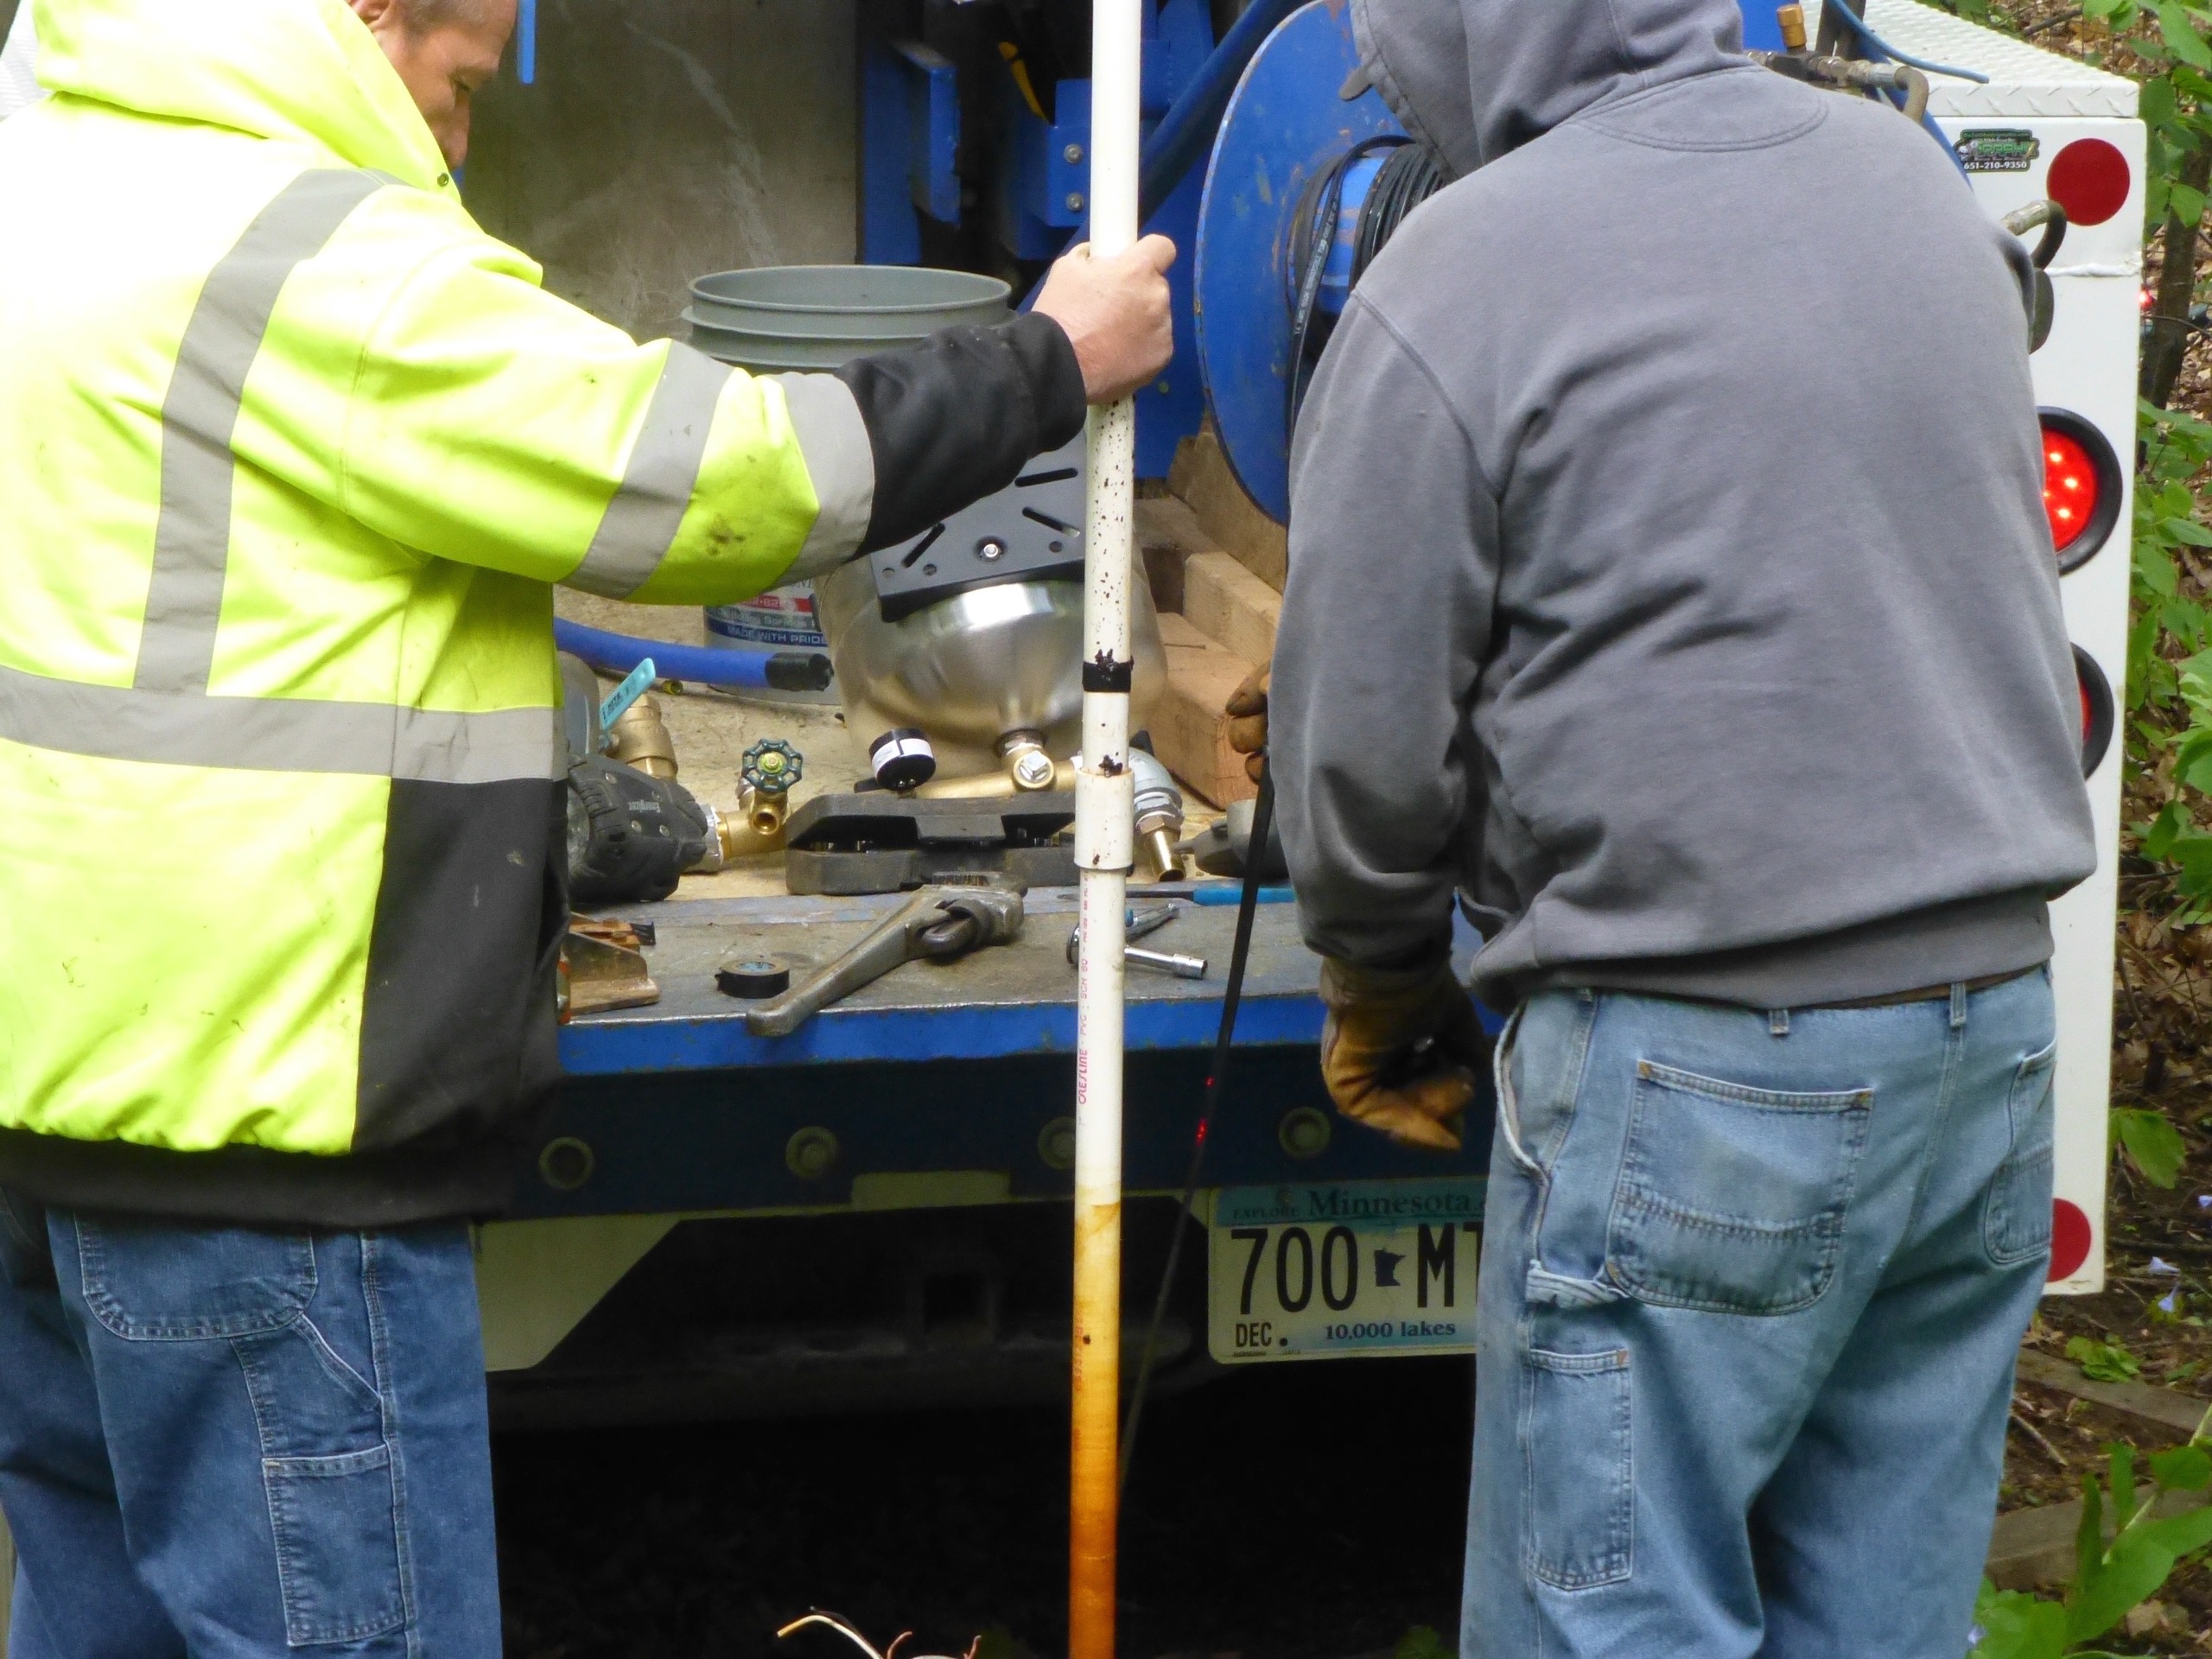
Here are a couple of the PVC pipes. Â As they were pulled up the men would use their gloved hand to remove the water & rust that came up with it.
Replacing A Well Pump
Look at how black the last pipe appears. Â It is attached to the well pump.
Replacing A Well Pump
And here is the well pump which is 4 inches.
Replacing A Well Pump
I guess after 22 years it’s bound to get dirty, no?
Replacing A Well Pump
Here’s a close up of the well pump. Â In laymen’s terms ~ yuck!
Replacing A Well Pump
Unfortunately, well pumps can’t be cleaned. Â I wonder why that is? Perhaps since it takes so long and costs so much to remove them it makes more sense just to replace them.
Replacing A Well Pump
This is just gross looking to me. Â Normally (well, okay, maybe it’s not normal) I would ask a contractor to leave the part so I can inspect it but I wasn’t sure how I would dispose of it later so I didn’t keep the old well pump.
Replacing A Well Pump
And tada! Â Here’s the new one.
Replacing A Well Pump
The pump has to go back down in the casing along with the pipes they pulled out. Â Uh, of course! Â (laughing)
Replacing A Well Pump
It looked so pretty I hated to see it go down into that deep dark pit …. (laughing)
Replacing A Well Pump
But, down it went!
Replacing A Well Pump
It had to be attached to the cable to guide it down the casing. And, wouldn’t you know it? Â It didn’t fit. Â Argghhhh!
Replacing A Well Pump
Because of all the guck in the well casing, they had to change out the 4″ well pump for a 3″ well pump.
Replacing A Well Pump
And down it went … I felt sorry for the gentleman on the phone with the home warranty company as he was on hold practically the whole time he was working which was over 45 minutes.
Replacing A Well Pump
The PVC pipe now had to be connected to the well pump one pipe at a time.
Replacing A Well Pump
They used what I believe to be electrical tape to make sure the pipes stayed together.
Replacing A Well Pump
Here’s a close up of the cable contraption.
Replacing A Well Pump
A hose was attached to a spigot so that they could make sure that all the nasty water was taken out.
Replacing A Well Pump
They started pumping the water out of the well and …
Replacing A Well Pump
Black gold! We struck oil! Â Naw, just kidding …
Replacing A Well Pump
And now ~ it’s clear! Â Success! Â They allowed the water to flow for about 15 minutes to make sure it stayed clear.
Replacing A Well Pump
The last pipe had to be placed before they put the well cap back on.
Replacing A Well PumpReplacing A Well Pump
Replacing A Well Pump
And that is how they replaced the well pump. Â Whew!!!
I told my husband this looked easy to do but who wants to pay for an expensive truck with a long cable that will sit around until you need it once every 15 or so years?
This was quite an adventure for me and I’m grateful that the contractors allowed me to take pictures. Â Quite fascinating!